It's kinda hard to find a title for a post about staring at crotch seam variations, but there we are. To sum up a rather long post: your trousers hang from your crotch, your jeans hug.
Before we fall down the rabbit hole, sewing has a lot of conventional wisdom. Your coat fastens this way or that, your pants fly opens this way or that. There are a lot of do's and don'ts and everyone has an opinion but mostly we go by convention.
And most of these conventions are apparent, obvious, and overdiscussed. So to find one that hasn't been is weird.
This post is for the overdiscussers. Which I guess includes me.
~~~~~~~~~~~~~~~~~~~~~~~~~~~~~~~
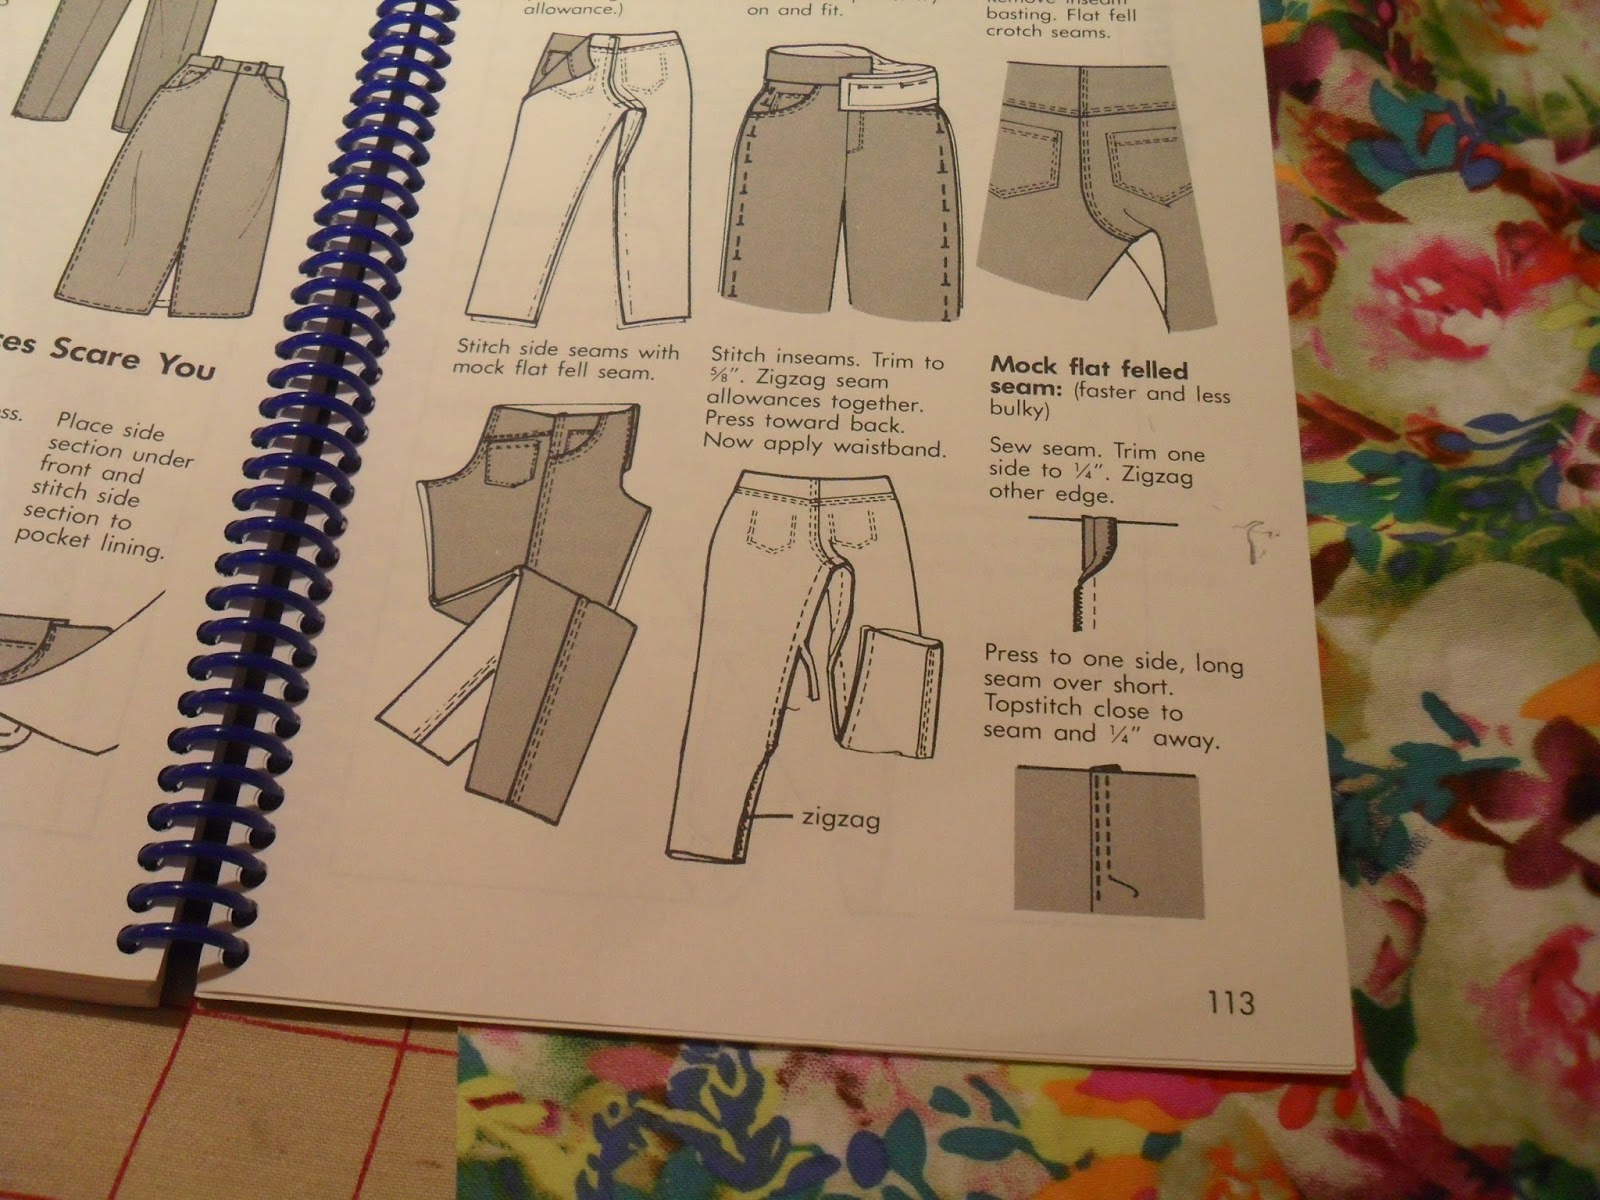
Over on Closet Case Files, HLou is running though the Ginger sewalong. And her dominant seam for the intersection of the front and back pieces runs from side to side. Which looked really weird to me, as the instructions I always think of are these:
 |
| from Pati Palmer and Susan Pletsch's "Pants for any body" , 2000, my copy * |
Youre leaving that bit at the crotch point open so you can sew the legs together like below

Except when you're making jeans
 |
| Sewing order: front for fly and pockets, back for yoke and pockets, sew up outside seams. Final seam is side to side. |

This is a pair of men's jeans, with the fly open at the front. The final, dominant seam runs from side to side

A pair of men's trousers, where the seam runs from front to back
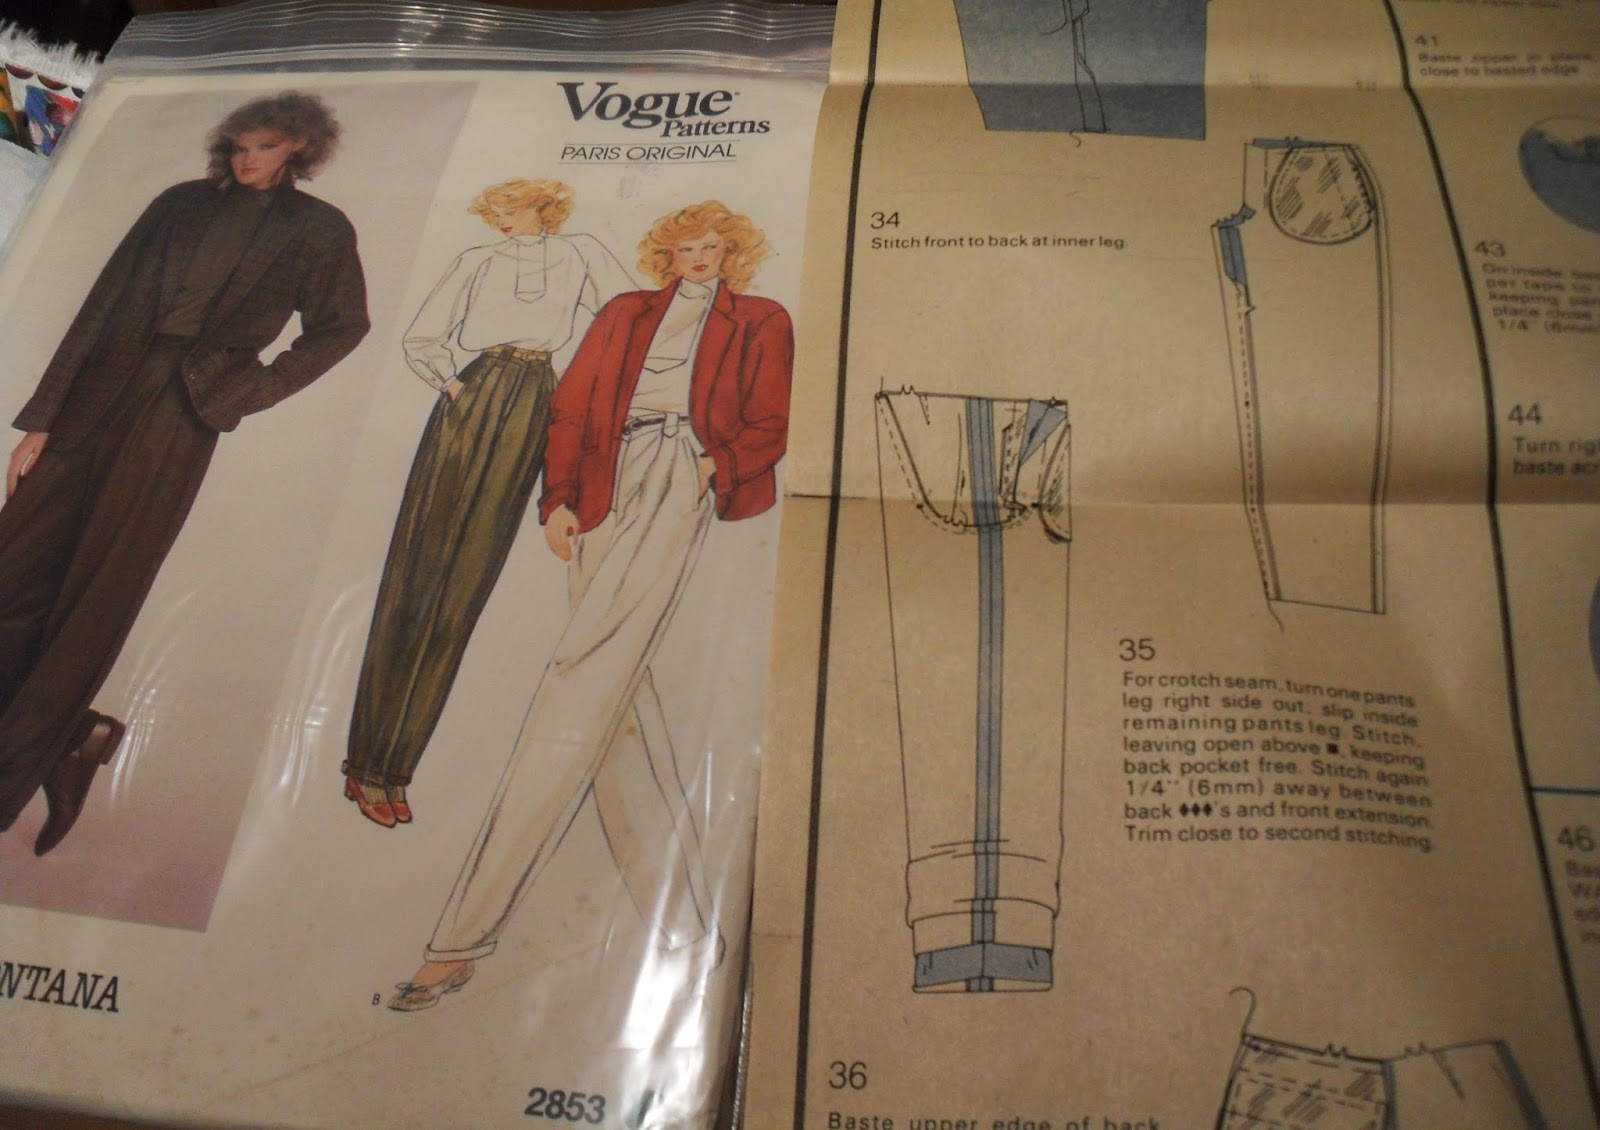 |
| typical Vogue pants construction information (where you stuff the one leg inside the other and sew the final seam) BTW: reading these instructions, don't trim that seam to the second stitching. You'll weaken the seam more than you will adjust the fit. |
After inspecting every pair of pants in this house that were purchased, I've pondered the whys of this. I have gone to a lot of effort over the years, and for what?
Taking that step to leave open the seam after you make up the fly is a pain; the only real reason why you'd go to that trouble is so that the fabrics for trousers can hang better. They are designed to drape your legs, and you'd want that seam to act as a hanging line.
Jeans hold themselves to you, even if you're using a lighter weight fabric.
And camel toe is so unpleasant. Which is why there are no model shots of these jeans in progress.
I keep changing weight and moving seams around, so this is version 5 of the Jeanius jeans. And once again, the sides are too high and the back and front are too low (yes, bigger in the back AND the front. Damn you cookies!)
I can't do much about the front: the fly is finished, the zipper trimmed, and such.
I can shove a wedge in the back at the center to bring up the waistband as I bring it in
 |
| Yes, my backside is that round. |
Or I can do what I did, which was add a side to side gusset at the crotch.
 |
| Faint pencil line at center to help match up front and back seams......taking the dominant seam to a side to side and then some |
Don't add a side to side gusset at the crotch.
This does bring up the front and the back. It also gives me too much fabric in the inside legs, which creates a cavernous camel toe effect. Which is interesting, but not quite what I was going for. And I am just not interested in that photo for sharing.
So another pair of 'eh' trousers; not sure if I leave in the gusset OR just drop the side seams at the top for a lowriderish effect.

Given the way I remodel my clothes, I will probably live with it and THEN remodel it.
And that's why we save the leftover bits.
I am finishing this up and going to alter the pattern again, which will bring us to version 6.
~~~~~~~~~~~~~~~~~~~~~~~~~~~~~~~~~~~~~~~~~~~~~~~~
*Hey, I don't make $$ from links. I make money from sewing and selling patterns on Craftsy. The Spoonflower thing makes me money I spend on Spoonflower making more samples for more prints. Etsy has never made me any money. I don't recommend buying on Amazon, for a long set of reasons we don't need to bore ourselves with here. They do control the used book market; go look on Abebooks site for more. But they did pay me a lot of money for toy reviews in the 00's. Ah, those were the days!