Showing posts with label plaid. Show all posts

Sunday, August 19, 2018

8813 My Sad French Tilton Tablecloth Maid Dress. I read the directions. All but one.

In plaid. 

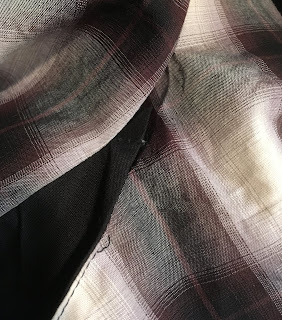
Because I have seven yards of beautiful cotton woven plaid shirting fabric from District Fabric's brick and mortar store, at their closing. THE ONLINE STORE IS OPEN.
 Ashley moved, she didn't go out of business.
http://districtfabric.com/espresso-plaid-shirting/

This pattern has been on the top of the pile for a long time. And Pao's creations have made me hungry to try it out.
She has links to them all in this post
http://projectminima.blogspot.com/2018/05/wearing-that-french-housedress.html

But I have issues. So many issues.

Yes, I understand that gathering the central panel before you sew it to its adjoining pieces is the way to go. But the finished neckline looks so wonky in so many versions of this dress, even assembled on it's own. The neckline seam is on a faint curve, folded on itself as it's own binding, and then folded over at the back neckline, as it's own facing.
One of these actions is successful, but not both. The back neck seam is a lot of folded fabric and thread mounted on a single layer of fabric,and SPOILERS: it cuts into the back of my neck. The front V neck is often warped and wobbly.

I raised the opening an inch and change, per reviews that it was too low. I did measure the entire neck opening, because Big Head.

Yes, I unpicked that horizontal gathering seam; it's off grain. 
It looked worse when I gathered it. 

Redone, regathered, and reinforced with fusible bias tape on the wrong side. Thank you Professional Sewing Services, for selling this at SewExpo.


And I sewed bias tape over the front side, because it was still an ugly seam on the right side.

Hrmmm.
This is one place where rick rack would be a good choice. It needs a distraction, because it's at this point where this project becomes a race to scrape it from the recycle bin.

However, I cut it out and did a great job matching plaids across and around the piece. So in for a penny.....

I started assembling the pieces and realized I had mis-altered the pattern and plaids weren't going to line up the way I had thought.
It was going to be perfect. 

The pocket goes in very nicely. Just make sure you notch the seam notches and use them.


The seam to match the sides to the pocket panel got folded in. I'm unclear how this happened, but I resized and made mistakes with seam allowances.

Nevertheless, she unpicked

And I just topstitched them in place. At this point, I just want to finish this.

Those front pockets are lethally large.
Without the center panel, you can see the depth of the droop of the pocket on the right. The pocket lining is almost level with the floor. Gravity will suck things out. 
Bad Pocket.

This is WITH the pockets taken in 7" at their top edge. EACH.


My results:
I made a schmatta here.

There are things I like about this dress. the cut on sleeves and the vertical style lines the front panel creates. Even as a hot mess, it does look like the pattern illustration. It's got some serious decorative handwork possibilities on that inset/gathered section.
I have taken all my alteration issues and gathered them into a second post, because this one is really long and doesn't end with a happy ending of me frolicking in the dress. 
Eventually, I will either pull the central panel out and replace it with NOT PLAID, or I will just scrap this entirely. There are too many points where I didn't get the effect I wanted and what I got is distracting. 
The best way to get the illustration is to make this in a thin and droopy knit. That's the direction I did not follow. You need the knit for the drape, not for the stretch. You'll use a straight stitch and it will be great.

I honestly thought I had a photo of me in the dress, but I don't and the idea of going to get dressed in it and taking a photo makes me sad and I want to get this done. I want to stop writing about it and move on. 
I will put a photo up, just not right now.
Consider this a place holder.
That's me and baby seam ripper. Art on right by Ken Taya @enfu


Sunday, July 23, 2017

McCalls 8062 Vintage 50s Blouse

It's that time of year!

I put up a string of photos on Instagram of different vintage patterns that are pretty much the same pattern. Partly because I had bought all of them with the same intent of a low yardage blouse, and partly because I really would like to come up with a new blouse, and early 50s vintage is where my mind travels.

click on the photos to make them bigger.

It says novelty cotton right in that list! (it also says corduroy)
Have you ever had a corduroy blouse? 
I'm not saying it doesn't work, but it has to be a really nice corduroy.


for those who like a side zipper, this will squeak out under a yard with facings.

mail order blouse, no number. These instructions and the Japanese pattern books are going to get a post of their own soon


I don't have a waist anymore though. That will be apparent shortly.
April 2016

I traced the vintage McCalls features onto the newer McCall's to speed up the resizing process. I decided to go with the sleeveless version because I really liked the squared off armsceye shape.
It has no bust darts. Since I have no bust, this usually works for me. It seems to be that it should be cut on the bias to get away with that dart free effect, but it's not.

Square!

And of course, I decided to go plaid.


I did not write on the original: this is a copy of the cover.

One way to guarantee the plaid matches all the way around it to cut out the pattern as one piece from front edge to front edge, make long darts resembling the side seams and wherever you take darts. 
I went downstairs before work to take this photo, and while it lacks much information as a photo, I can assure you that the pattern piece lacks just as much. I cannot photograph pencil lines that are not there: I winged it. That it would be wrong to leave out this information as a full report of this make, that is certain. And that the visible back dart (right corner) is in a better place than the one I put in.

This technique allows me to use the selvage and these markings and tags from this Javanese sarong yardage (from Value Village - someone had dumped piles of these great plaids). This 'unbroken' section of plaid weave is a feature of many of these sarong; it's woven that way, not tucked or stitched. It just fits with open sections to spare before the shoulders. 
In my next life, I will get the plaid to match on the shoulder seams as well!


Getting to this took about a week.

And I did the 'fat thread in the bobbin' bottom up topstitching


and the facing folds over so it all matches all the way around


And this is where it stopped. I did the buttonholes and sewed the first button, and then, before I could get to the body fisheye darts, I stopped.

And this is how it hung on the rack since June 2016.
Sewed the first button and then hung the rest on a safety pin.
I had made the damn buttonholes!
I think I ran out of Vintage Pattern month and Summer.

So, in honor of July as Vintage Pattern Pledge Month, I put the darts in and here we are.
Uh oh. Clipped the dart before I tried it on.


Took all of two minutes.
Should have taken longer.

You know, I've posted less flattering photos of myself on this site. So the part where I'm pointing out how those darts in the back are too low and too deep and I cut INTO THEM so I'm stuck with the shirt pooching up on my backside?
Yeah, that.
We really do not have many neutral backgrounds in this house.

But still. I like it. The fabric is crisp and lightweight, but not transparent.
I like it as a plaid as well. I'll open up the darts and mend the slashes.  


Wonky topstitching a speciality!
I am getting bagging in the high chest/armpit. This may be a feature more than a bug, as the rest of it fits as well as a box shaped woman can expect. The armscye fit the chubsters just fine, and I don't want to open them up any deeper as exposure is not something I'm hoping for.

But check this out

I bought this solely for the instructions
Shoulder pleats! This might help deal with the bagging.

And I have a lot more plaid!
And one more week of the month!
And a night free without family obligations!
Words to live by

Thursday, January 21, 2016

Plaidly Insane

photo by Tanit-Isis


Why is this skirt piece shown on this yardage at this angle? Not cut on a fold, which would surely save fabric and brain power.

Plaid potential.

If you cut it at this angle on a regular plaid, centered on the center of the inner circle, it will line up.

Why?

Geometry!

One angle is the reflection/reverse of the other

My proof:


The plaid is pink and brown so I would stop making a pretty, but irregular plaid in Paint.

Yes, Paint. Old and effective tool.

 Paint will not let me make that last little fake rule line up exactly to the cut 'edge' of our semicircle, but it is an accurately flipped ruler of the other edge.

The plaid lines up.

All proving that I do have a plaid problem.

Monday, January 20, 2014

Self facing welt pocket diagrammed (in color)


After a conversation or two online,  I felt I needed to clarify my pocket procedural.

I used a version of this in Plaidness, but it doesn't illustrate what I'm trying to say. I like my real fabrics to coordinate, if not to match exactly. If you are using a matching plaid for a welt, all that flipping and pinning I did in Plaidness is the way to go. I am sure I will figure out a better way to do that, but not today.

 The drawings are not fancy, but this way, the right and wrong sides of the fabrics are clearer. 

Garish, but clearer.


First, you need to cut a bigger piece of pocket material than you think you're going to need. My drawings here result in a too tiny pocket (as you will see by drawing F).

With the right sides of the pocket material and the object of pocketing facing each other. You want to sew two lines of stitching where you want the pocket opening to be. They are the top and the bottom. 

The green line is the cut line to open the hole. You want to make the triangly part as long as you can stand it.


Turn the fabric through the hole you just made. The green triangles in B show where you're pulling those bits through to the sides between the layers (xray vision time!). Iron now. Drawing C shows folding up the bottom part to just cover the hole. Iron it in place. 


You want to sew  (the red line) in the ditch on the right side across the opening and ONLY across the opening in the ditch. This involves pinning on this inside and turning it to the right side and probably repinning (and then removing the pins from the wrong side). Lots of pinning.

This is where I mention that you want to keep all of this as flat as possibly.

Back on the wrong side, drawing E, iron again. Then bring up the bottom edge of the pocket to meet the top edge and sew them to each other (making a tube). If the pocket is square enough, this should work. If it's way off, you'll need to trim it. 

I like the pocket seam to be up and towards me, not at the bottom. The pockets seem to wear better this way. That's why that seam is in the middle (perhaps too high but this shows why you want to use a BIG piece of pocket stuff for this. You will use it all).

I slide a piece of plastic in between the layers I want to pin and the ones I don't. Which comes in handy in drawing F. I iron again, slide the plastic under the end, pin it, pin the other end, and sew as indicated by the up and down red lines. I only sew the pocket material, not the facing or the front. No, I'm not sewing right next to the welt. It's going to pull and distort the back of the pocket with too much handling.

Flipping back to the front with drawing G, I finish it up by sewing in the ditch on the ends of the welt (the red lines) through all layers to secure. Kinda covers the part where I did not sew the pocket sides that close to the welt.

Nice things about this application; if I use a big enough piece for the pocket, I'm not stuck if I miss-cut. I like to use the lining for the welt, but if I don't, I can stick a front fabric patch to cover where the flap covers the hole on the pocket fabric piece. I can pull something through the welt flap to make it stiffer/puffier/I can keep the construction as flat as possible for as long as possible. I can reinforce the pocket bottom if I decide halfway through that I should have done that.

I like a process that lets me mess up, fix it, change my mind and use all those pins I bought.

Hope this works for you, too.