Showing posts with label fitting. Show all posts

Thursday, August 25, 2022

Somebody's else's pants fitting Bridal Edition

McCall's 7910 on the left is the pattern we went with for the bridal jumpsuit, and the right photos are the inspiration pics that drove the fabric decisions.

There was pattern alteration and tissue tracing fun

 Remember the phrase "the wrinkles point the way"? We're going to come back to that.
I am made the toile in a pink ponte that I didn't want anyone to fall in love with. I wanted to make mistakes and take chances with this.

Trying it on with the seams on the outside really helps.
Wedding jumpsuit

First try on was way too long in the waist and neckline needed rethink. She is alllll legs.

I sewed other things to break things up: I made another Closet Core Kalle because I can make that placket in my sleep, I need to be reminded I know something about sewing here and here's a burrito yoke photo

Spoonyflower coffee cup fabric in cotton sateen. Mmmmmm

Back to the knit

Second fitting for this jumpsuit. The first one was a 'so do ya think this is going to work' (also had to see if we needed a side zip and yes we do) and 'is this what you wanted and what else do you want?'

She wants it fitted through the thighs, swooshy at the legs. She's the boss.

There are terrible photos but they let me see what I could not see when my beloved goddaughter was standing in front of me. Looking at the photos here, it's obvious where we need to go. Space and time to think.
hoiked way up in the front

hoiked up back view

Now, I know the back is fine without being adjusted, pulling them up looks terrible; it's the front that has the trouble. there's too much in the crotch point, even after shaving some off. The next set of changes include adding a stable lining for the bodice to support the pants at a stable waistline. 

When I get stuck, I have a couple places I go to on the internet: this one is for pants

https://5outof4.com/pants-fitting-guide/


This is a pretty comprehensive 'photo shows problem, diagram solves problem' run down of what can go wrong and how to fix it. 
This not related photo that illustrates the point that the wrinkles point to the problem: there's not enough fabric in the armscye for the fella to raise his arm. this is an exaggeration of the problem, but it illustrated the problem to the tailors that it's bad enough and he needs a remake of the sport jacket, because this is just too tight. He's not lifting boxes, but this jacket will not fit over a thin sweater, not even a shirt with sleeves.

For videos, Style Sew Me does a nice job
https://youtu.be/1gsHHK5TlEw
has a nice set of action shots (you have to smooth and reshape that seam as you sew) and some nice advice. 
I would undo the seam , baste it, check it and then stitch it, because my problem is not equally distributed front and back (and probably no one's is)
Baste and check before you cut.
And don't be afraid to put fabric back on if you're making a toile.

Spent a lot of time second guessing
Recut, resewn, recut in final fabric.
Better (also has elastic in waist)
It took me an entire afternoon to get this result, and a lot of mis-makes. Making the loops on the ribbon gave me my best results, but a whole lotta other folks would say differently.


This was a mistake. Pressing and putting the steam board over it was smart. leaving it on the ironing board overnight was a big error. The side seam pooched out to a bigger curve than it needed to be, so the side hip has a little bag to it. Bride is going to steam it back flatter, which should work. Still, a rookie mistake!

Clipped out excess in hem seam, used random pressing aide to hold steam in to set the crease.


So much to sew through at the side and so hard to get it all to line up. Ponte knit is heavy and wants to fall on the floor and pull out of my hands. 

I was very concerned with making sure the side seam for the zipper lined up at the waist seam and the top edge, and there was a lot of basting and swearing and the usual poor vocabulary exercising. It's like a white on white on white sandwich.

 Basted the zip seam closed to add the zipper,
I did this about fortybillion times.

Made a sash of the lace and poly organza. 


Sewed all ten feet of it, turned it, pressed it


Handstitched motifs to secure to the back at about one in the morning because I forgot I hadn't finished it. 
Bodice to pants, and this time I pull out the pins before I sew over them.
that's fancy sewing here.

this is as long as I can get the stitches to go.

Plushy elastic on waist gets little ribbon ends

Missing: photo of entirely hand inserted zipper. Gaaaaaah.
SUPER fancy sewing


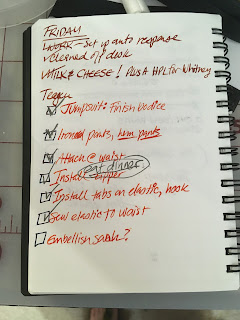
I make checklists for any day or process that has more than two steps, so I won't forget something. 
I did not embellish the sash: I was too damn tired.
And Whitney doesn't read this blog so she won't know I snagged a lil Lovecraft for her.
Finished photo of jumpsuit? No. Too tired to think of it.


Sunday, February 2, 2020

Habit Patterns from 1954

As you have noticed, the internet is full of things.

https://archive.org/details/HabitPat1954

Helen is a trained monkey. Barbara doesn't need your pity, she needs a friend.
The narrator is a scold.
Discuss
That's what I found before I found what I was looking for.
Ithaca Maven on IG posted this
And having found a few similar pamphlets, found this one.

Same author, same work, previous publication year in 1945
If you're looking for these booklets, a source like the Internet Archive will probably have them. I could not locate this one just by searching on the author or the title, I gave in and went to archive.org and found two copies, scanned and ready to read.

The internet is full of things, but you have to be prepared to look in a couple different places. I also search on eBay and Abebooks and Amazon, on a couple of different variations on the author or the title. Ephemera has golden contents. Particularily pages 18 - 21, if your sleeves are misbehaving.

She said gusset. Hee hee hee

Sunday, February 17, 2019

Butt like a b, tummy like a d: Pants Fitting Evolves By The Year

This is for the Green Violet, and for me.
I did slap this together to get it done, and I will probably edit it later.

Shall I compare me to a basketball?

So, me and the Violet were discussing the 'sway back' alteration.
https://thegreenviolet.com/2019/02/14/decades-of-style-ophelia-overalls/

I realized that I had been changing up how I fit my pants without notating what the changes were and how I got there.
I do keep this blog for my own reference, you know.

This is my one piece pants pattern 'sloper'. It fits well enough for tights, and it's where I am editing any pants from. I can divide it into a front and a back on the side line if I need to. I can make it bigger, but I cannot make it smaller cause that's how big I am.

Like so. Well, it needs some darts.

This is the business part of the one piece jeans pattern (minus the fly). It has four 'darts' in the waistband. 

1) is a tiny 1/2 tuck in the front in the gap between the pocket piece and the front piece. Doesn't show, helps with my growing front porch belly.
2) is a slash/curved dart on the side seam. It has much function that it performs with the pocket assembly, and a long slow, mostly narrow dart that works well until we get to the top and we curve in. 
Not super sharply.
3) is the secret sauce for me. To be discussed in a minute.

4) the back center seam is a dart. The center front is straight up and down, because that's what the fly zipper wants to do. If these were pull on elastic waist pants, I'd curve that front seam cause 60 yr old Front Porch!

So, dart number 3. It used to be a three inch long narrow dart (in green), like you see in most pencil skirts. It's apex is at the butt apex. The newer version (in blue) is shorter and wider. My butt apex is noted by a heart! 

I'm unclear exactly who I figured this out from: Sandra Betzina, a Lois Hinse pull on pants pattern, the ether itself, but I learned that dart does two things. 

A dart reduces bulk where there's too much, and allows for more volume at the apex. It creates a line rather than a fold. You are trying to get the fabric to lie smoothly over your cheek. 
And if your cheek has a different shape, you choose a different dart.

I believe the proper ladylike term for me is that I have a "high hip".
I have a big butt, yes, but I have a porch. I don't have a slope to the fullness part.
I have a ledge. 

I sew for a friend who has about fifteen inches difference between her waist and her hip. And that has a 5 inch height drop.
I have about a 10 inch one (35 - 45) and it happens in about 3".
Fabric will pool above my butt apex because it can't deal with the sudden transition.
I can't put a back yoke on jeans without the curve being super extreme (or I have to put a dart in the yoke, which seemed like too much work).
We used to call this a swayback alteration, but that's inaccurate. My waist is not going in and coming out at an extreme angle, my butt is just going out at one.
My back drops right into my waist.


The heart is where the real bulge is on my butt. Not on the side or the gluteal center, but on the iliac crest. Also, my tummy is catching up with my butt.
I'm just here to report, not to analyse. 

side red lines to show difference. The left side is where I had the hip replacement, btw.
These two photos are from the Ruby Joggers pattern test, for Paprika Patterns. What struck me in this photo is the back yoke line.  The plane it illustrates is sloped but relatively flat at the center and on the left side, and rises up on the right. The side curve really shows it. I have that curve on the left, but it's farther from the side.

A longer dart won't give me the fabric I need at that point. And just like the seams on a basketball, you need more than two to properly wrap a sphere.
(rotated to give you a better idea what I mean.) Those seam lines aren't all the same shape, are they?

Saturday, March 18, 2017

Armsceye OR A Search for Sleeves That Fit

My enormous arms disturb me.
They probably aren't enormous, but this is how I see them


I do know that different armholes make my view happier or sadder.
And I have spent a lot of time over the last year or so trying to find a better fitting woven top. Most armsceye are too low, which makes everything feel grabby and pinched unless you're working in knits.
And for a gal who adores novelty prints and wants a sleeved shirt, I need to solve this issue.

This post is going to be a little all over the place, but I wanted to give you an idea of the process I've followed.  And it did wander all over the place.


It's a complicated article about sizing and measurement. Most folks get stuck on bad bodice fit and never get past that. There's a lot to ponder in that article, but perhaps it's better taken in small doses and worked on in pieces.

In pacing the contents of my computer, waiting for College Boy to return with my station wagon this evening, I stumbled across the page on Overflowing Stash's blog about this very topic, with a guest appearance by Kenneth King. I love Pia's deep affection for process, and working things out as methodically as possible. I will never, ever get there, because I am too easily distracted by shiny objects or exhausted and just want something done, but in my dreams I am that good.

But hands down, the piece I go to is  on sleeve types on New Vintage Lady. Rather than add width across the bicep and call it done, I want something to offset the rounded effect that provides. She's done the drawings that give you some different ideas to solve for this.  So much goodness in one blog, I tell ya.


It's a glacial editing process. I got the block down for me (the bodice, the derriere, the legs) and then I edited further for taste and framing, and then I injured my shoulder, had to stop working out and gained another ten pounds. 18 months later, I've had to start All Over Again.

I've had some humiliating fails along the way.


I was essentially gifted a scant wide yard of this palm print and I've had to put the resulting jacket aside because it's really tight in the arms and it just makes me cry. 
It's too nice to toss, but at this point I can't quite figure out how to save it.

And I know if I tossed it, I'd figure it out the moment it was gone for good.


The print placement was aces, for once


This is what is left of the very lovely Tokyo Train Ride; the shirt was dubbed Train Wreck and turned into a lining for a purse for someone I rarely see. That helps a little.


This, on the other hand, turned into a couple of decent shirts. Or what was left of the pattern when I was done fiddling with it. The key is not the design of the shirt, it's the relationship between the neck opening, the sleeve height and the armsceye.

Next week I'll show you what I came up with. I used some ideas from here, tossed others, and had to test wear 


College Boy is home for spring break (it's not even Spring, is that right?) so there will be a lot of thrifting and a little Manly Alteration Sewing.


And I need one of these for the wagon

Tuesday, January 13, 2015

Pants Pattern ComParison

I wander around Pinterest now and then, and stumble onto much goodness. I seem to be a visual search person. 

This is much much goodness about pants patterns, written by Dixie DIY in 2012 on her blog. I could repeat it, but she wrote it and researched it. I'm here all week, working on pattern testing; see ya later.


Dixie DIY wrote a great post about this:
http://dixiediy.com/2012/02/decoding-the-derriere-or-have-you-read-the-word-crotch-enough-today.html


Thursday, December 4, 2014

Booty Power to the People

photo Sew2Pro,


If you have any curiosity about how to move a dart on a pattern piece, this is a fine demonstration of that.

I am working on pants and their darts related matters this month, and hopefully will have some stuff to share on that front (or back, see what I did there) soon.

photo ErnieK


photo Rosie Wednesday

And go read this, too: Rosie Wednesday's red-wool-pants