Friday, November 27, 2020

Headphone Covers: Smaller Things Are Harder


While I was writing the earbud post, I realized I never wrote about the headphone covers. I think I put them up on IG, it was a super quick thing that held up a lot better than I expected it would. And they are still rocking, 8 months later. I never knew I needed leopard headphone covers; they always make me smile when I see them. They make other people smile, too. 

But how much stress do you put on the covers of your earphones? The original foam covers were getting shredded around the edges but not falling off. I did use the originals for a pattern, but they were so stretched out, they were little use.

The key is to cut that center hole a little smaller than the thing it's going around. The second is to test your zig zag stitch on a sample before you commit to the actual piece. You will blow a couple of these testing this out. It is just part of the process, forgive yourself now. If your fleece is precious, test it out with some that is not as important to you. 

You will cut out a lot of little circles. This part gets old fast.


The trick is to only pull them on your headphones once. If they aren't quite right, you have to cut another one to try again. There's not enough elastic in fleece to do this twice, unless you want to sew a tiny line of stitches to snug them up onto the headphones.

I mean, you could.  I'm just not that ..... handsewing-y.

I'm really not a fine finishes person. I can knuckle down and do it for friends or customers, but for my own use, not so much. While working on the Haptic Map Quilt is improving my needle threading skills, my stitches are still inconsistent. I keep buying new hand sewing needles thinking that will do the trick.

Uh no. Practice will. Boring dull practice. Which I make me do while watching movies Saturday nights. Yes, Svengoolie monster movie time is handsewing practice. 


Friday, November 20, 2020

TnTee #sewcialists mini challenge

All cut out and ready to get sewn a month ago. I just finished the last one yesterday.
Things got busy!

 I make a lot of tshirts off the same pattern. I traced it off a t shirt that fit me, and have refined it from there.
And I cut out a batch of them on one evening.
Trying to grain up the fabric and get the biggest leftover piece for the collar (upper left corner of fabric here), meant I cut the sleeves on the fold (bottoms folded up equally) and let the leftover space between them determine their length (at bottom of photo). I had to piece the collar, which didn't really show.

Cutting down an XXL shirt for myself, here estimating where the logo will go. 
I am short, and I love logo shirts, so I do a lot of this.

Another tshirt, this one in black bamboo, same layout as first shirt.

This shirt was not touched. Yes, we date back to when Excel was Microplan. That's Mr I Worked On The Manual. He does have magic Excel powers.

I picked the sleeves off to make sure I could get all of their width. Yes, that was boring, but it was worth it. That's what I do on Saturday nights while watching Svengoolie horror classics; unpick seams. Think this one was The Wolfman.

Not that long, but I did add a little at the cuff for width later. It fits just fine.

Another t, adding stay tape to the back neck and shoulders to all of them one by one.


Those old serger spools come in handy for tape. I had to cut it in half lengthwise. It wouldn't iron to this poly, I don't know what it's issue was.

Use a thousand pins to add the collar

Sewing the tag on wrong

Tag sewn on right (used white stay tape for this shirt)

All I sew with is a sewing machine, reduced the pressure on the presser foot, use a zig zag stitch, and I test the stitches before I start every time. Sometimes I use a ballpoint needle, sometimes a stretch needle, sometimes I forget and use whatever is in the machine.
But I always test.
And I always prewash.
And I try very very hard to get the fabric ongrain first.

Enjoy!


Friday, November 13, 2020

Felix Grainline Revisited: The Fin

I'm shocked I didn't write about this dress when I made it in 2019. 
I think I just didn't want to dwell on another epic fail.

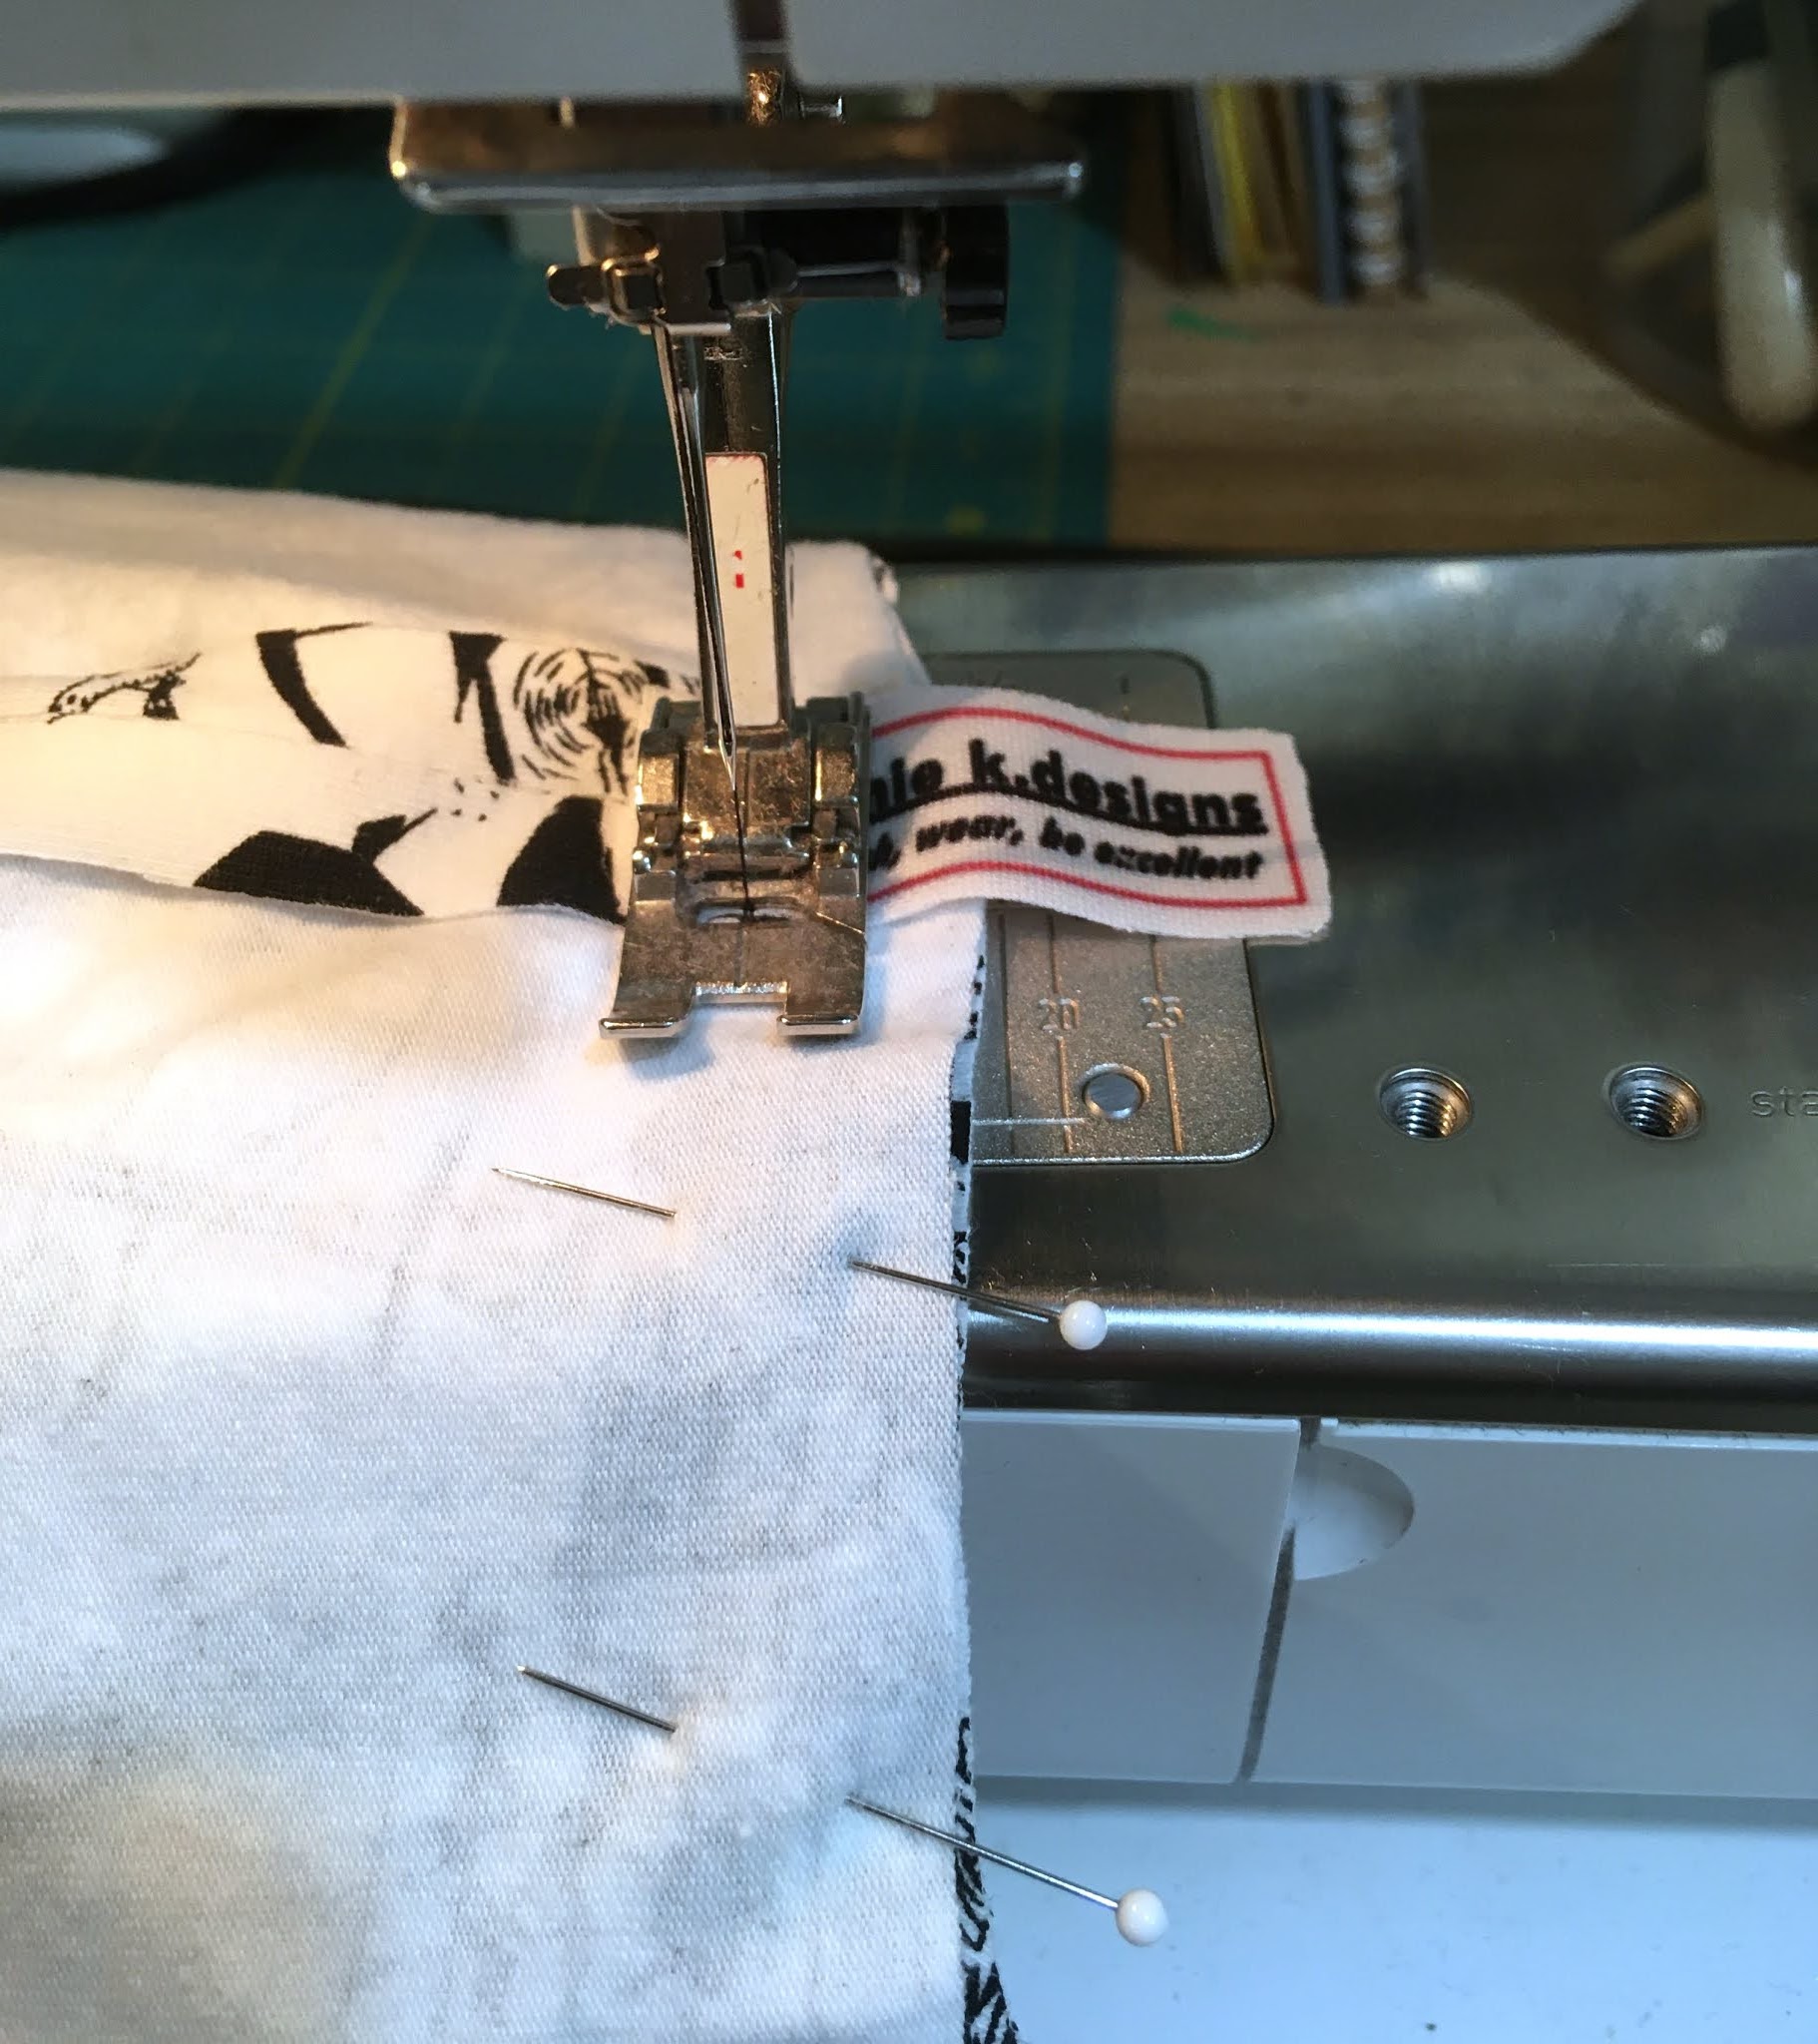
 I had enough fabric leftover to make a couple of masks to go with it this year, so it got a little more love around the house.

Matching mask and dress. There are many matches when your stash is 95% novelty cotton


I did wear it pretty frequently this summer. I do not like the pattern.
 I really hated it at the time when I finished it.
Useful clues:
I had never made a Grainline pattern before this, I was not familiar with the fit profile.
Not useful clues:
I did not line it, because it doesn't need it. The collar/facing finishes itself and the inseam pockets are close to the outside seam and not big enough to need the internal support.
The measurements had enough slack in them to just make out without a toile. 
It's a pullover dress for light woven fabrics.
HOW HARD CAN THIS BE?

Ernie Kovacs, from Giphy


I love this Alexander Henry print, I love how the black collar really pops (which is why it lived in heavy rotation) and sets this fabric off. I love what the dress should look like.

And looking at the photos again, I can see where it went wrong and why it irritates me.
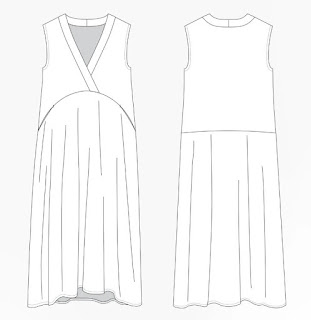
Grainline illustration from website
Several makes of this dress, including the designer, has the same problem:
it's got a fin in the front.

http://www.stonelakeroad.com/home/2019/5/13/two-felix-dresses
https://grainlinestudio.com/collections/dresses/products/felix-dress?variant=22533591040082
When more than one person has the same issue, it's not operator error.

To figure out where this went wrong, I had to reverse engineer it. To see the pattern, I had to figure out when I had purchased it, and where I had put the PDF on my computer (or had I deleted it entirely in disgust? No, but I did toss the printed pattern.)??

Grainline Patterns photo from website

I did find the photos, still unedited, in that month's folder.
I was really steamed about it, as the skirt stuck out in front like the photo below
(and this is the cut down version of this effect).
Hanging up in the website photo, the center is nice and flat, but there's a lot of skirt there. And the back of the skirt is coming forward to the front, just on the hanger. It's all pulling to the front.
My dress enters the room before I do

Selfies from work last summer. Not my pinball machine.
This is the problem
see that? I have a front fin and it hikes up in front. A lot. 

I could not figure out why I have so much fabric in the front in relation to the bodice: I had cut the same size for the skirt as the bodice, and if I slipped up by a size, I wouldn't have that much (and it's a LOT) fabric in the front.

Now I have cut that down (and cut it down again),  and it's manageable (mostly because I love the print/black contrast neckline). I tolerate it.
I have a lot of process photos, but this one of adding the neck facing is going here because I like it.

I wore it a lot; that long v neck with the facing collar is very flattering, it feels good to wear (not every dress wears well in quilting cotton) and it's different from the usual subjects in my closet. The pockets are a bit short (almost 7" deep, not quite enough for a phone and all the potential volume). 
I was going to trim down the front skirt, and continue that skirt gather to the back in a swoop

red line is new style line
Like this

But this is not going to solve it. 
Aubrey Plaza for drama


So what do I think is the problem with this pattern?
The neckline/shoulder seams pull the dress up in front: also, the front v neck should be longer, the skirt/bodice seam is unequally curved. Mainly, it's out of balance from front to back.

I got the idea from Dressmaking Debacles.

http://dressmakingdebacles.blogspot.com/2018/08/grainline-felix.html

"I'm thinking the neck/shoulder fit on Grainline just doesn't work for me. I believe it's meant for a more erect back; the shoulder seam is WAY back on me and I do not have forward shoulders."

And she has the same issue with the skirt in the front.
The neckline is pulling the dress up and to the back.
Look at the selfie profile photo again (it hurts me to look, you go ahead)
The quantity of fabric in front isn't helping.
Oh dear.
I do like the style lines.
So, my solution is simple.


I will be adding these style/seam lines to an existing TNT a-line sheath pattern.

The more I look at the seam line between the bodice and the front skirt on this page, the more I see how it adds to the problem in the front.  The top of the front skirt panel is too flat, relative to the width and curve of the bodice. It's not a lot, but just enough to create that front fin and skirt ride-up. 

I could correct the pieces to make this adjustment, but then there's the angle of the bodice vs my torso.  There's just too many moving parts to get them to fit. I'm really better off just tracing off a new TNT 'a line' dress pattern, drawing  the style lines on it to add the deep v collar (faking the overlap which has no practical purpose) and adding seam allowances as necessitated by adding separate pieces. 

I did add a tiny modesty panel at the base of the v neck, It's deep for me,  as I am actually a pretty modest dresser. My skirts have crept up from shrinkage over the years; I do have some deep seated issues about my knees it seems.

In reconsidering this pattern, it does offer an opportunity to salvage another dress that's been lurking in the WIP pile.
Maybe that long flat facing 'collar' is a solution to this

I love novelty prints, but they can be overwhelming, and it's nice to break them up with a solid trim, or just embrace the insanity and add another print to the mix.

Percy will approve


Sunday, November 8, 2020

The Pekka Jacket, versions 1 through 4

 I didn't like this jacket at first

And I'm kinda shocked I haven't written about it yet.

I started the first one in July. I was sewing this summer, I really was.


I worked on the first version, using a heavy rayon twill that frays when you think about it. I assumed it was going to be a problematic toile. I adjusted the length and cut down the pockets, but left the original seaming. Which took forEVER to finish. About ten hours of misery.

I finished the seams before I assembled parts because the edges were disintegrating as I handled them. I worked as flat on the table as I could manage.
this was a video that blogger isn't interested in loading today

And I hated it. And my sister didn't want it, so I hung it up in my dining room to stare at. 

And a few weeks later, I wore it to go back to work.

And it works; it's the perfect office jacket. And now it's a TNT.
version two

version three

version four, in wool

Endless seam finishing; hand sewing is not my strong game
Plus adding a neck saving piece (Fun fact: I'm allergic to most wools. Except for mohair)


Most of the construction of this jacket involves interior seam finishes. If you use a fabric that doesn't need much finishing (besides hemming the body, the sleeves and the interior of the pocket) (or let's say you bag a lining for it, which might be quicker), you could be done in an afternoon.
This took all of Frankenstein Meets The Wolfman, Star Trek and two podcasts on Dune.

It's a oversized jacket with cut-on sleeves and a lot of seams, and it's a jacket that I made in fabrics that either ravel or are stiff enough that those seams need hand finishing. Either tacking seams open or wrapping them with bias tape.

https://blanchexblanche.com/en/shop/woman-patterns/jackets-coats-en-2/ready-to-sew-veste-pekka/


Obligatory hair touching pose

So much seam finishing


Version two, made of a quilted grey knit from District Fabric (back when they were still in Seattle) left off the vertical seam that encloses the pocket seam, and gained a armscye and an added sleeve so I can wear a winter coat over it.

The pocket is still deep, and will hold an army of cats and a to-go coffee 'mug'. 

The third version is from similar knit/quilted material that started pilling the moment I pulled the fabric out of the bag. By this point, I'm cavalier about seam finishing. And photos.

Version Four was planned to be the warm work layer, a stylish slanket. I bought double layer wool/rayon sweater fabric from Emma One Sock, and planned ahead to finish seams by trimming them out and basting them over.

It's easier to see the construction details in the wool.

 I had to trim the layers apart in the seam allowances to make the seams flatten out better.
And I bound all the seams with homemade rayon scrap pieced bias tape

This spool is perfect for this job.

I attached the pocket on the outside seam, folded it over, tacked it down, and then you add the back and sew on the collar

Photos that are overexposed are to show details. But you knew that.


The rayon edges shed little blue curls EVERYWHERE. Still cleaning them up.

The seam finishes were pretty much all done on the dining room table, to keep the weight out of my lap and off my wrists, and on Saturday nights watching Svengoolie monster movies on the big television.

Hand sewing is not my forte, and I am trying to improve my skills by stitching as often as I can.

Next time, I want David Sedaris' jacket


What a great riff on blue line kitchen embroidery!