Showing posts with label seamwork. Show all posts

Thursday, September 23, 2021

A few zipper suggestions

I feel like such a crank when I watch Seamwork tutorials, I honestly do pass some of them up because I just feel like that guy yelling at kids to get off the lawn. And I do have the same arguement most of the time: use fabric with a contrast between wrong side and right side, so we can easily see the inside/outside tasks and see how things line up.

but this!

NO

https://youtu.be/oGPfxaYYeR0

Of course, now you have to watch this video to follow along here.
It's not my content and it does not hurt to add to their views. They are trying to do a lot and I wish them all the best. I get trying to do too much.


Once again, I'd like to say that I have made all these mistakes, and I don't want you to.

I'm good with the first five minutes of this video, except putting a coil zipper in a pair of jeans is a temporary move, as the pull will pull the coil apart if you put the least amount of stress on it when you take your pants off or pull them on. Coils are good, but they don't take repeated lateral stress well, especially at the same stress point. This is going to happen when you put on and take off your pants. You will unconsciously unzip them to the same point, which is not at the bottom of the zipper.
I replace a lot of jeans zippers.
Trust me on this.
Metal toothed zips will last longer, but will eventually fail for the same reason.
So unzip your pants the entire way every time. You will thank you.

Moving along.

Sewing the zipper/fly guard is where the wavy thing happens - that seam is off grain, or got mishandled when it was pinned in.  I'd stop there and unpick and redo it. This wavy fabric isn't going away until you do that.

Where I started pointing at the screen and sputtering was when we unzip the zipper partway through the application.
I don't care if you measure the teeth from the top of the fabric, you should not unzip the zipper when you sew it down permanently. It's going to be uneven.
At the base of the zipper, the side pulled out is curved, and the tape is distorting already farther up the zip. This zipper tape isn't heavy enough to not twist and you're sewing that twist into the tape.

Why is the other zipper end pinned up?  We are not told to do this, or have it explained to us. There might be a really good reason, but I don't know what it might be.

And the finale
The zipper is twisting in the left seam.

This is with the zipper zipped all the way up.
The puckering at the bottom in the blue circle will probably iron out. The wavy part with the red line will not. That extra fabric isn't going away.

You can really save a lot of time by basting in a zipper by hand. It seems wrongheaded, but the zipper will lie flat, it won't bubble and buckle (see my raincoat makes if you want to see some wack zipper installations) and even if it's a 32 inch raincoat zipper, the less you handle that zipper, the better it's going to look.
Example one:
First pass I put pins in the zipper tape and it's all wiggly and awful. I took them out, pressed the zipper and let it rest under a block overnight.

Next day I used Wonder clips and hand basting. 


It's not perfect, but it's a whole lot better

Second coat was nothing but hand basting and laundry clips. I used a water resistant plastic coil zipper, as that was what I replaced, but in a jacket like this, the failure point is going to be where you join the zipper in the base unit as you prepare to zip it up: the tape is going to fail at the edge of that plastic point on the bottom. The zipper may fail along the path if it catches something in it at the same point over time, but generally this is a good use for this zipper type.

Zippers are not as good as they used to be. It is what is is. 

I'm pretty pleased. I might get better at this yet. There was some pucker on the underside facing at one point; it got over handled in removing the original zipper.

At no point did I separate the zippers to sew them. Yes, it's a pain, but unpicking a 32 inch zipper is a bigger pain.

Feel free to argue in the comments.


Wednesday, June 2, 2021

Are we really out of ideas now? Summer Jumpsuit Romper Playsuit, 2nd Edition

I think my mom made me one of these.
Hello sailor boy!

These overalls are a thing, all over the interweb, you will have to go look for it, I don't want the link-backs:
mrswongyeo.com/home/beaton-linen-overalls-review

Or perhaps:
https://ralphpink-patterns.com/products/florence-play-suit

This is a classic, and a first sew for a lot of folks:
https://www.peekaboopages.com/2012/07/vintage-pillowcase-romper.html

 Kari Jumpsuit, Seamwork photo
 https://www.seamwork.com/catalog/kari

from the webpage: "If you’re craving a garment that’s the ultimate for summer comfort, sew the Kari romper. This romper has a trapeze silhouette that disguises as a dress in drapey fabrics. Shoulder ties add a playful detail and make for easy fitting—and yes, it has pockets!"

One style to rule them all?

McCalls 8165, website photo

"Very loose-fitting pullover dresses & step in jumpsuit have sleeve & length variations." Does not come with pockets as a part of the pattern.

Amy Jumpsuit, Closet Core Patterns photo

https://store.closetcorepatterns.com/collections/sewing-patterns-all/products/amy-jumpsuit-pattern

"The Amy Jumpsuit is comfort and breezy elegance all in one tidy, minimalist package. With a figure-skimming silhouette and ultra-wide, cropped legs, it's got the soul of a floaty slip dress in the body of a jumpsuit you'll never want to take off." Pockets optional, included with pattern.

I know I had one of these that my mom made as a kid in the late 60s. Searching patterns I came up with 

https://www.ellieandmac.com/collections/adult-romper-patterns

https://www.etsy.com/listing/841476661/the-paschima-harem-jumpsuit-digital?

Oh, just go search on the term 'baggy linen overalls sewing pattern' and you'll get the idea. Also so many freebies for the self-drafters!

Meanwhile, in real sewing news,  a  link to  Spitalsfield Life: church embroideries and the broderers. You know, skip all the jumpsuits and read this great profile of the ladies who keep the faith shiny.

https://spitalfieldslife.com/2021/06/02/the-broderers-at-st-pauls/

Friday, January 15, 2021

Or you could stay stitch the seamline first


Stay stitch those seams!

I'll be honest: this solution is going to result in pants that don't fit

I've been having this stretched out waist problem with denim and twill fabrics (last pair of pants gained three inches stretch).

The best way to avoid this is to stay stitch the waist and crotch seams first thing, before you start handling them. Twill weaves will stretch its why we like them for work clothes, but you want them to stretch the way you want them to. 

When it's too late, you are going to want to get out your pattern pieces and recut that waistband (and probably the back crotch seam). And it may not work very well. Another option is pleating the fabric to take up that slack.

Since I eat my feelings, I need new pants. Nudity is frowned upon, and it's winter here. I am working on a set of pants about posts. No, wait, reverse that.

My brain is a little overtaxed.

I'm at that point in the accounting class where I have to make my brain retain knowledge that is antithetical to what I thought I knew.
DEEP BRAIN HURTING.


Sunday, September 20, 2020

Scale Model Fun / Single Layer Layout / In Praise of Tracing

This is an adorable video by Seamwork, and it beautifully illustrates working with scale model pattern pieces. 
image from Seamwork video
https://youtu.be/Tb_AyBwGTKs

On the instruction sheets of most patterns, there's an image of pattern pieces laid out on the fabric, to show you potential pattern pieces laid out for cutting.
Why, there's an example in the video at the beginning.
image from seamwork video
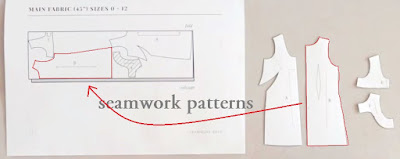
I outlined in this image; you can scan and enlarge and print similar from any pattern instructions sheet. You can make them as big as you need to. They will not be exact, but they will be in proportion to each other, and that's what you need.

You can use those scale model pieces in other ways.

BWAHAHAHAHAHA
hemlock vintage clothing


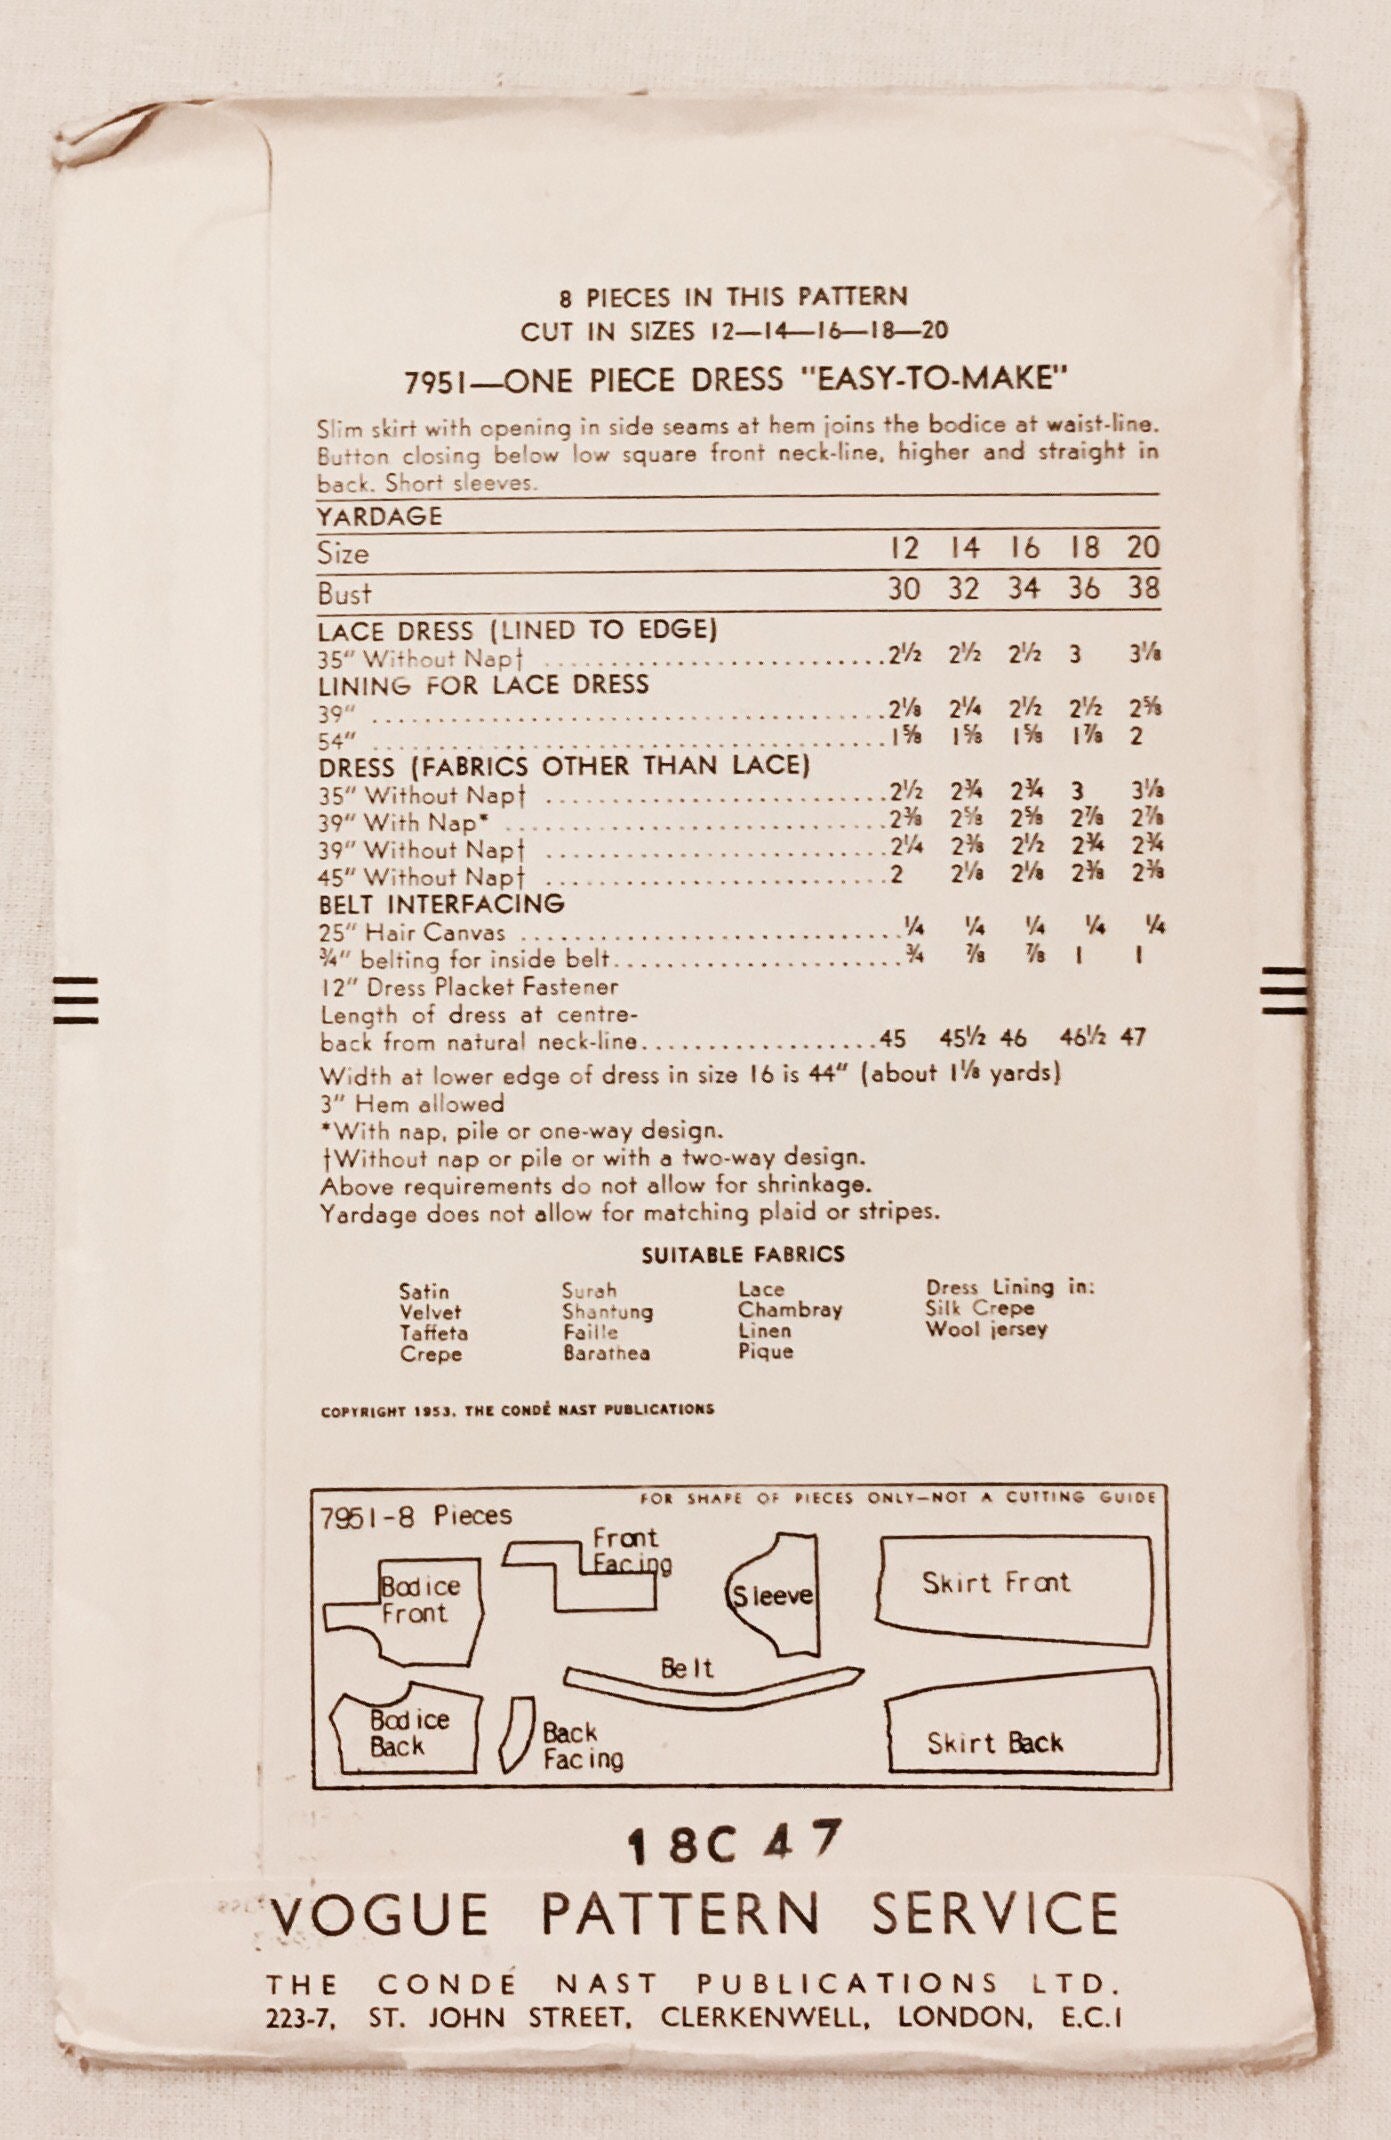
I love the back covers of vintage patterns for the preview drawing of the pattern pieces, for the very same reasons.

I can use the scale model pieces (sized up on the scanner/printer) to make a model of something I just can't see from the flat pieces. This is particularly useful in hat making, where it can be hard to see how you get from the flat shape to the three dimensional product.
yes, the wrong side of the paper will show with the pattern piece. 

This is necessary fun for me because, all too often, the pattern is one I can never afford or find a copy of. Sometimes this little paper model is the closest I will get to it.

This is enough information to make one of these

As for trying different layouts, I'm a big believer in single layer cutting.
Nancy has other ideas.

http://www.nancyzieman.com/blog/sewing-2/absolutely-easiest-way-to-layout-sewing-patterns/
This is now a Zieman stan account. Deal.

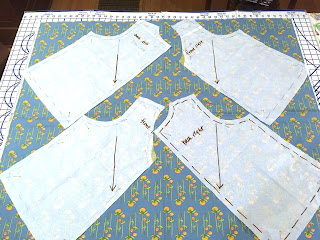
I have learned the hard way that it's easier to lay out a pattern on a single layer of fabric and not give yourself headlights, match designs, AND save fabric. Yes, tracing the 'cut two' pieces takes time and paper, but that's why we get the local newspaper.

I made one pattern piece for each piece. I also run the pattern edges off the sides at the corners, which would get cut off anyway. Facings are cut from different fabric - I need that fabric in the middle for the matching mask!
This was laid out on one yard. One precious special yard.
This is an actual shirt i just finished.  I am wearing it RIGHT NOW Yes, I am sewing. Just not telling.
Next to Philip Lynott, at work. The mask was in the wash.

You will want to trace your 'altered to fit you/final version' pattern.  You are committing to this version of this pattern for this fabric. You can cut it all up later on, but TRUST ME just do the deed now. If we're going to be thoughtful about fabric, we're going to trust the process. And you can see on that bias layout above that I run those pieces up to the edge and a little over. If I had to go back and add something, I'd be....really out of luck.

So, you take the one piece (let's call it Bob left back) and lay it out on the paper. And trace it. Pen, pencil, tracing wheel, whatever works.
And here's the kicker: when you're done, cut it out, flip it over so it's the reverse of the original AND MARK THAT SIDE accordingly: Bob, right back. The mirror of Bob, left back. Do it now before you forget. Also date your tracings and mark the seam allowances and pattern notches.

If this piece is one half of a piece cut on the fold, join it up right on the foldline. If you're splitting it into two pieces for a seamline, remember to add a seam allowance.

 I am the queen of forgetting the seam allowances.
I mark the grainline and the direction I want the pieces to go if this is meant to go on the bias*. I WILL FORGET. I will also add indicator marks at seams if I'm trying to match the print across the seam. Eventualluy I end up tracing a new copy because the old one has too many matching marks or lines on it.
It's quite a packed little video, and I hope they spend more time with all the ideas they raised.
-------------------
*reasons for this at https://erniekdesigns.blogspot.com/2019/08/bias-theory-with-flaming-skulls.html

Wednesday, October 30, 2019

Too Many Curtains: Folding Videos in October

https://www.threadsmagazine.com/2019/10/10/wrangle-your-fabric-stash-video
Seamwork's folding technique on YouTube  https://youtu.be/VF19yPgIUcQ

These both arrived in my (and your) inbox this week. Coincidence? 
 The Threads is solid gold. Using the storage box lid as a folding guide, or making a folding template (those flexible kitchen cutting boards to the rescue again) is super smart. Helps stack and sort (and retrieve) the stuff on the shelves. I use foam board, and old plastic corrugated campaign signs are FREE and plentiful.

The Seamwork one is ADORBS, but who sews with one yard? 

This stash sorting/refolding is pretty much what I did this morning, in anticipation of a trip to Ikea and the curtain department (where we get the linen Aina curtains to make pants for my sister and I).

My sister's stash lives at my house and she's got a lot of linen. A LOT.
This isn't all of it. It's what I measured and refolded this morning in two hours. Each is about three yards, or a couple of Aina curtains (57" by 98" each).

I cannot believe I haven't written about this before (and if I did, I didn't tag it with Ikea). 
I mean, curtains are a costumer's best friend.
Yardage for days.
Bob Mackie's genius costume for Carol Burnett GWTW parody.

Yes, it lives at the Smithsonian
And if you want a little more on the original dress by Walter Plunkett, https://www.npr.org/templates/story/story.php?storyId=129177801

I am all about those Ikea curtains.
The tab material is very easy to remove. These used to have same fabric tabs, but this is less lumpy.

https://www.ikea.com/us/en/p/aina-curtains-1-pair-blue-00328875/

The weight per yard of the curtains has gone up. The price has gone up as well, but 
each curtain is 2.72 yds,  or 5.44 yds for the pair. That's $11 a yard, but it's heavier linen now. 
Curtains come out to be 10.92oz per yard going by their package weight (divided by yardage).  Fabric is shown as 12oz because that's a meter (and I think that's the number they have from the manufacturer, vs the actual ship weight of a unit which will be more accurate). All this to say it's close enough and pretty hefty. They make great pants and jackets.
What they had on the by-the-yard fabric table was the lighter stuff (it comes out at 8oz per yard on my scale) from the previous season. Certainly just fine at $8.99. The 12oz would be a steal at that price.

But after all that folding and math, we didn't buy any more. Because my sister has all those colors already. Certainly enough to make all the pants she will need for the next five years, if not more.

BUT, Ms Smartypants, how do I fold my three and an half yard pieces?
It doesn't matter how you fold it, as long as you get 18" folds.
Another high quality illustration from ErnieKLabs

After I prewash and dry them, I fold them on the grain line (like they come off the bolt) and then fold them lengthwise into 18" folds. You can fold and refold any way it works for you as long as the end result is 18" wide. Fold that in half to fit 18" by (.25 of the width of 60" is 15"). They fit into that box, or on the shelf, and I can count how much yardage each has by counting the 18" folds and doubling that. 6 folds: 3 yards.
We are all about that math today.

Fold by 18s

And fold over, matching folds to selvage.

6 folds = 3 yards

Store in dry location with like-folded stash. Age to taste.
My shelves are 18" deep in this cabinet.
Okay, so not all the stash is as nicely folded, but I wanted to show how I break it up on boards and box lids to manage pulling stuff out without avalanches. The association groups change, but mostly by weight and use. And wool.

I do have to pull them out to check, but I like to handle the stash. This time I made a chart of the sister stash with those little swatches. Three different reds. Oy.


Sunday, July 28, 2019

Seamwork on YouTube

https://youtu.be/mkA4cX9vdx4

I am pretty sure this was the OH YASS, fist-pump moment.

I give Seamwork/Collette Patterns endless crap, but this is a great video. It's clear (they used two very different fabrics to illustrate) and concise. You do this in two passes, one for each armhole.

Bring your own popcorn.

And then I kept watching their channel.
We have a less than clear video on bias layouts
I can stop you right here and say: hey, go read this post next week:
(the one that isn't there yet but it will be)

https://erniekdesigns.blogspot.com/2019/07/bias-theory-would-look-better-with.html

However, let's say hello to the instigator of the next several blog posts


The problem starts here:
https://youtu.be/cjqqxM0H0iA?t=199

Each fabric has two biases.
She does not explain this.
But it's true. If you don't match the seams properly, the item will twist as it hangs out/gets worn
this is wrong

this is also wrong

It's important to get this right when you're laying out your pattern pieces.
And we are finally going to get to that next week.
I've been working on that post for about a year.

On the other hand, if you are up for a different approach to the subject, 
Paukshte Fashion Workshop is worth a look.
https://youtu.be/MuTCjRyDHpQ


I have to admit that I love this woman's slash pattern altering, as well as how she cuts out the pattern piece by folding the fabric. It's probably distorted, she didn't line up the selvage and the cut edge evenly,   she's using that fabric so inefficiently,  but DAMN she just gets to it. She eyeballs it and goes for it.

It's kind of the action film version of sewing. 
Gawd I'm looking forward to this movie

But the thing is: because it's on the bias, those little squiggles and snips will hang right out. It's an amazingly forgiving construction.
If it only stayed still.


And then I remembered I was going to watch the Charles Kleibacker videos.

But let's go to the tape with Charles Kleibacker


The next several blog posts continue this thinking. 
Stay tuned.