
This is an adorable video by Seamwork, and it beautifully illustrates working with scale model pattern pieces.
 |
| image from Seamwork video |
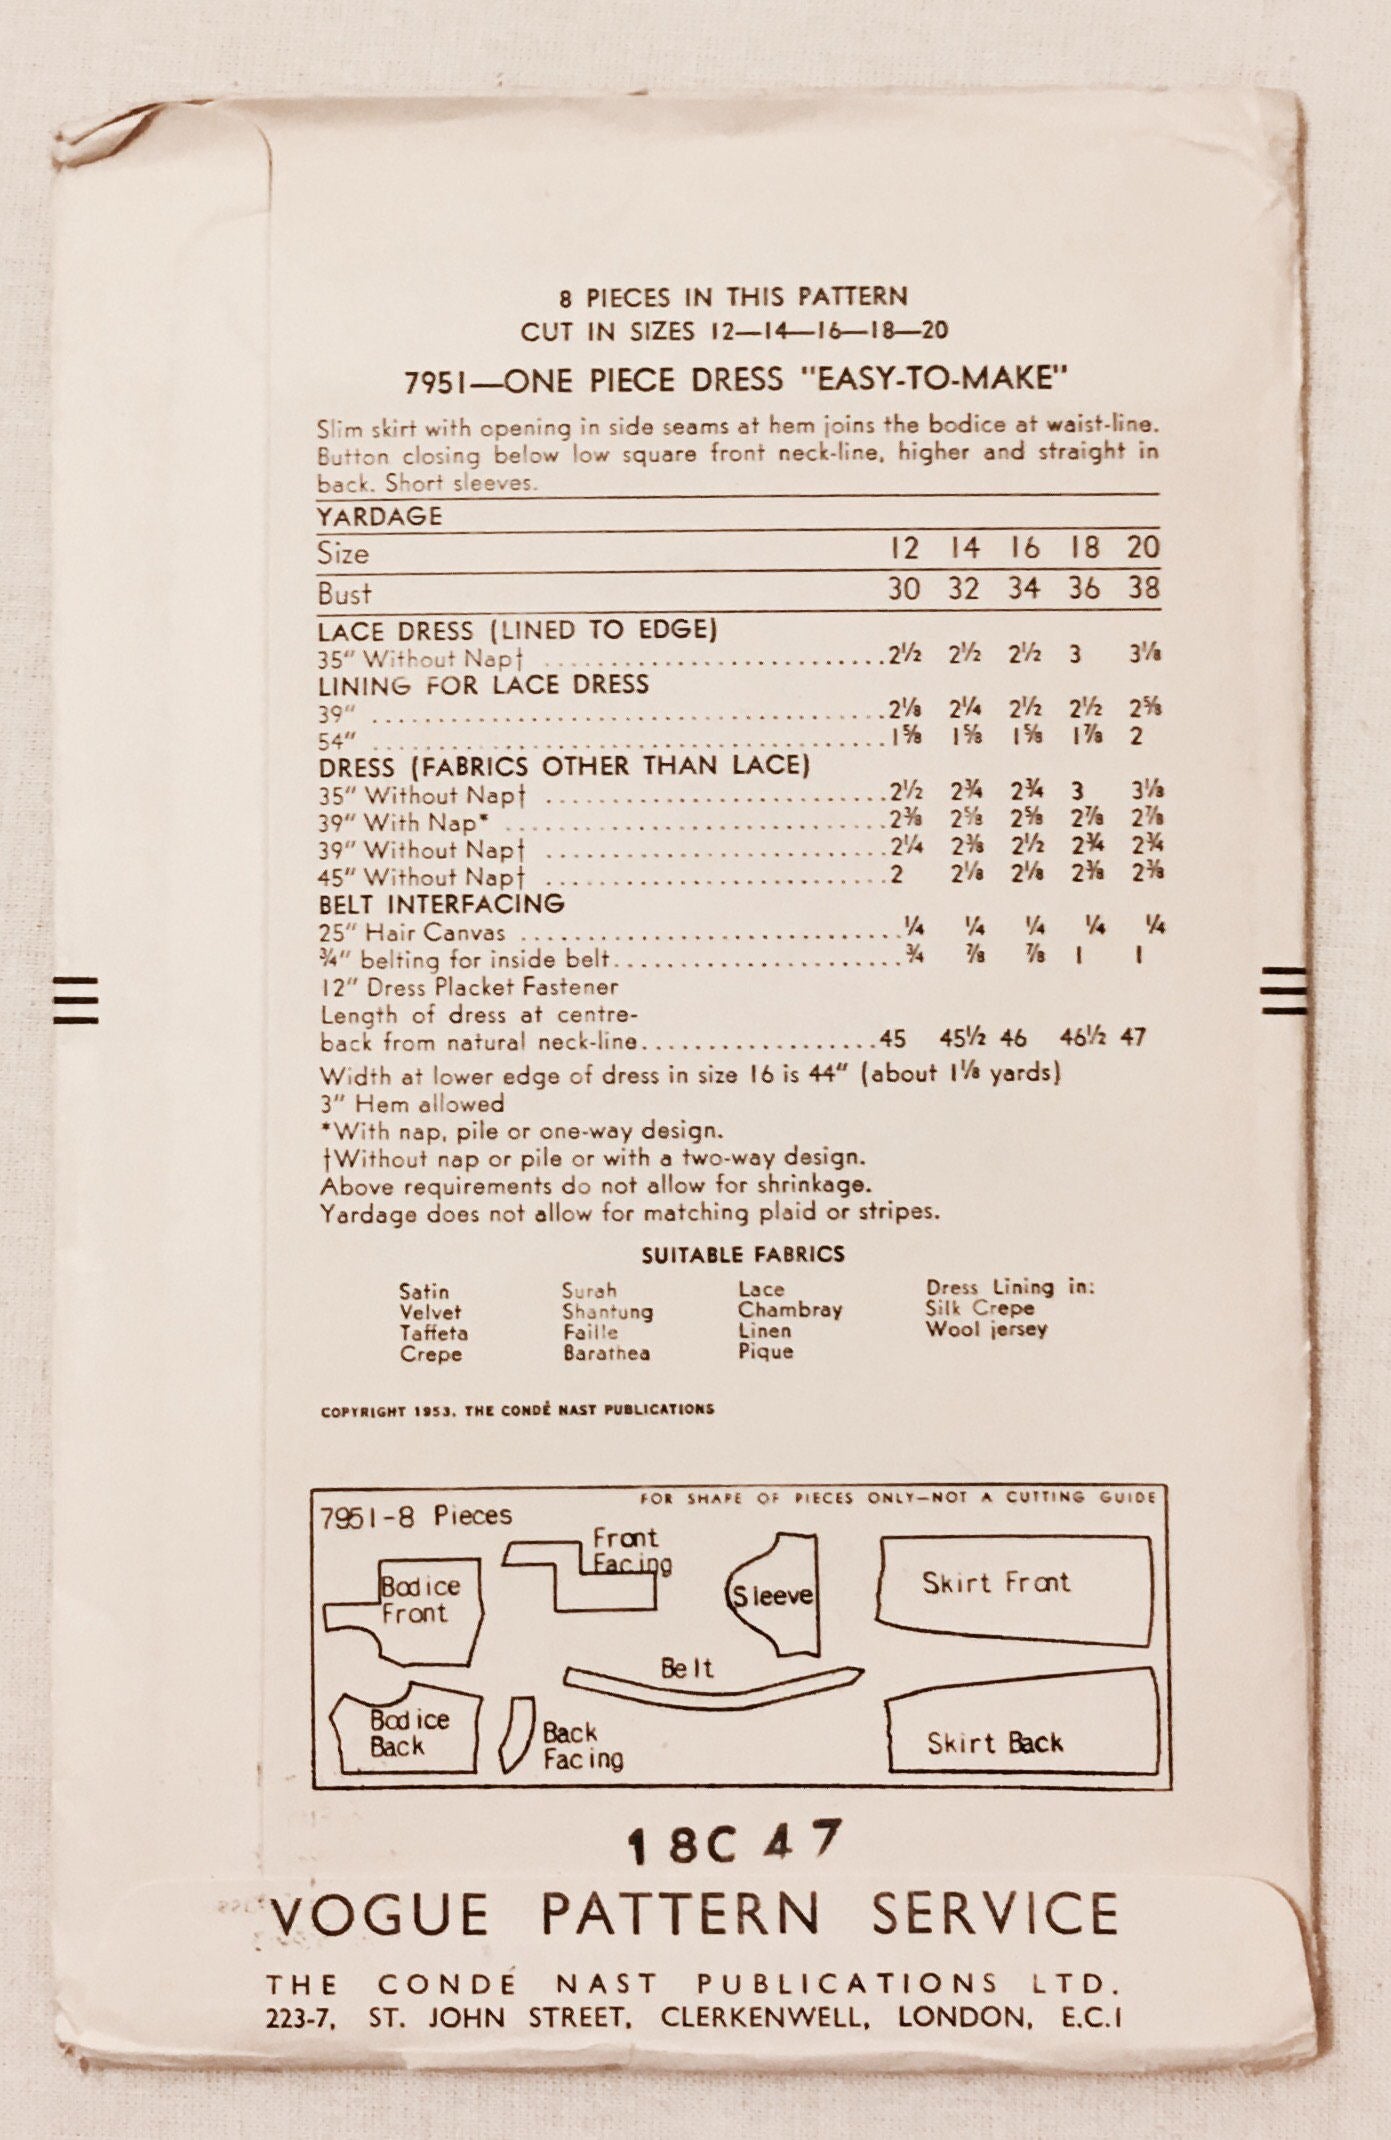
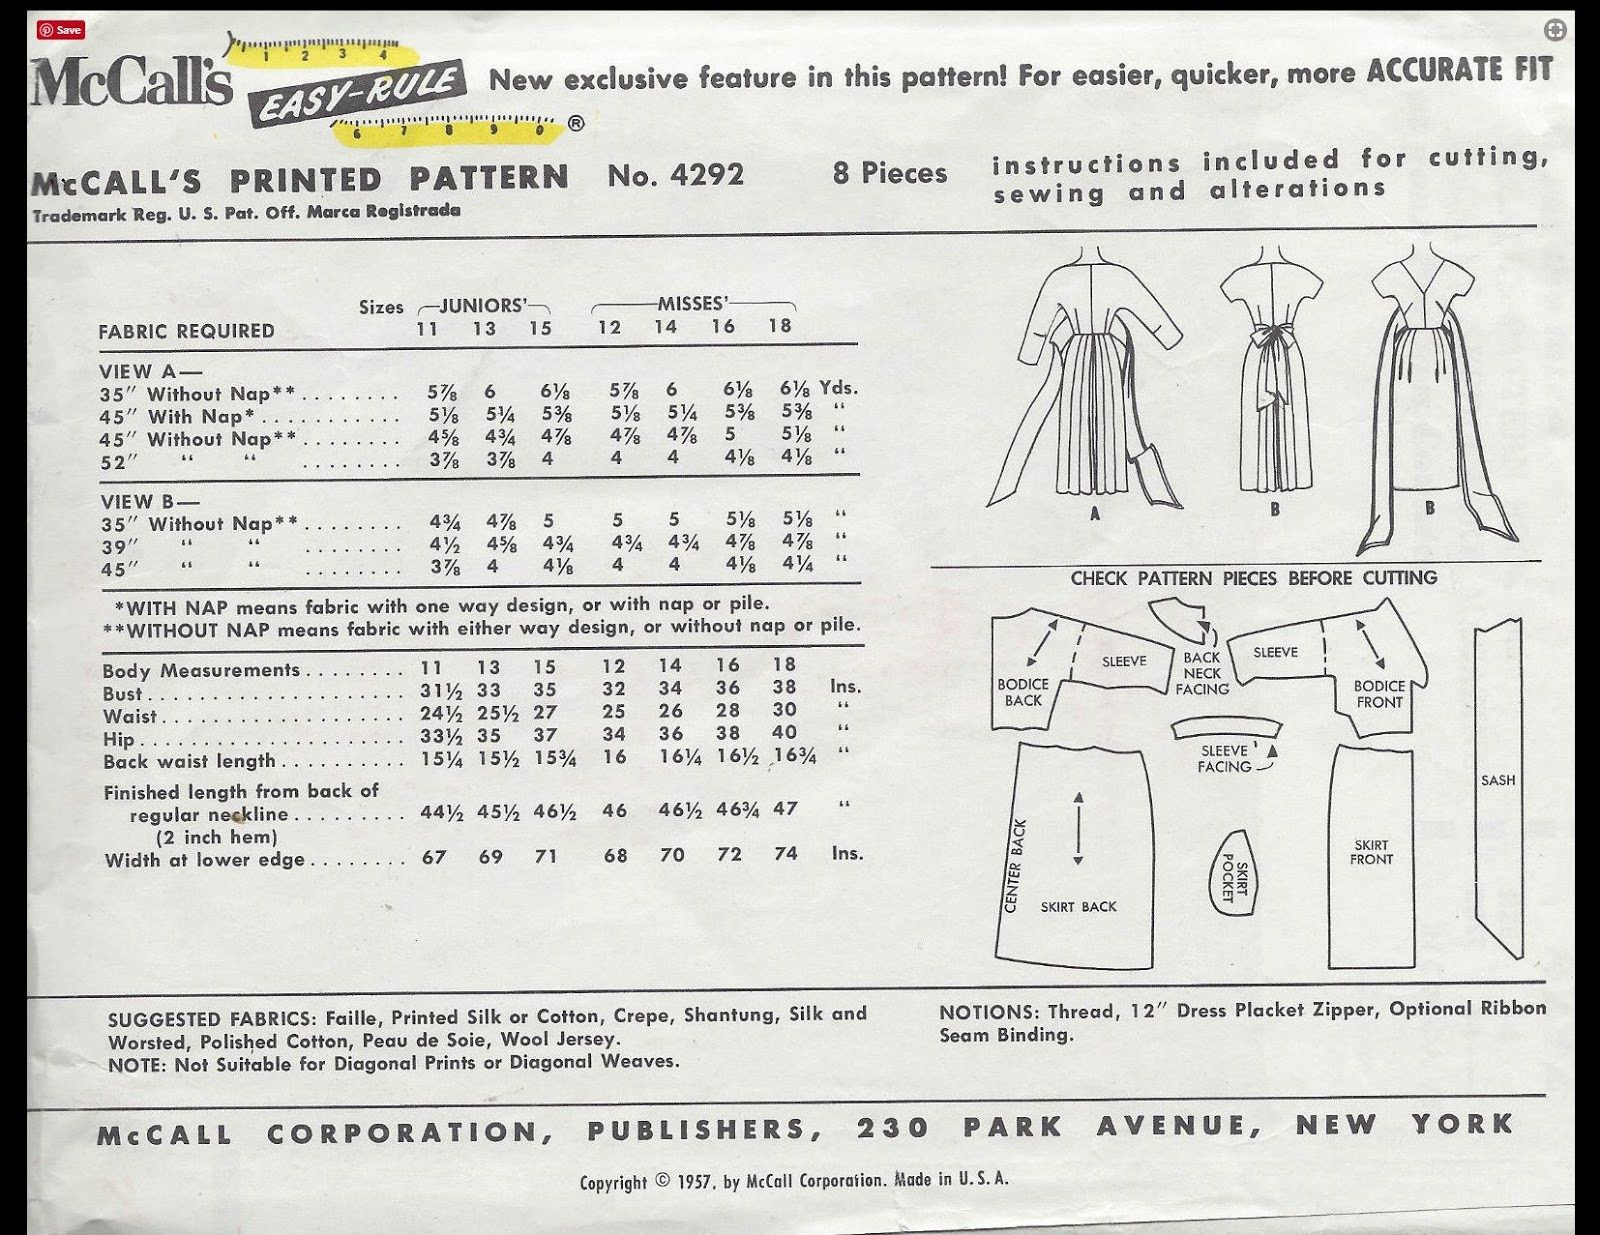
On the instruction sheets of most patterns, there's an image of pattern pieces laid out on the fabric, to show you potential pattern pieces laid out for cutting.
Why, there's an example in the video at the beginning.
I outlined in this image; you can scan and enlarge and print similar from any pattern instructions sheet. You can make them as big as you need to. They will not be exact, but they will be in proportion to each other, and that's what you need.
You can use those scale model pieces in other ways.
 |
| image from seamwork video |
You can use those scale model pieces in other ways.
 |
| BWAHAHAHAHAHA |
I love the back covers of vintage patterns for the preview drawing of the pattern pieces, for the very same reasons.
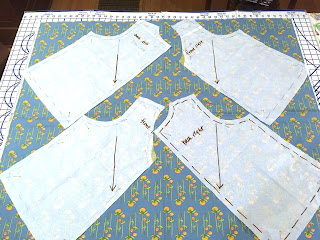
I can use the scale model pieces (sized up on the scanner/printer) to make a model of something I just can't see from the flat pieces. This is particularly useful in hat making, where it can be hard to see how you get from the flat shape to the three dimensional product.
 |
| yes, the wrong side of the paper will show with the pattern piece. |
This is necessary fun for me because, all too often, the pattern is one I can never afford or find a copy of. Sometimes this little paper model is the closest I will get to it.

As for trying different layouts, I'm a big believer in single layer cutting.
Nancy has other ideas.

 |
| This is enough information to make one of these |
As for trying different layouts, I'm a big believer in single layer cutting.
Nancy has other ideas.
 |
| http://www.nancyzieman.com/blog/sewing-2/absolutely-easiest-way-to-layout-sewing-patterns/ |
This is now a Zieman stan account. Deal.
I have learned the hard way that it's easier to lay out a pattern on a single layer of fabric and not give yourself headlights, match designs, AND save fabric. Yes, tracing the 'cut two' pieces takes time and paper, but that's why we get the local newspaper.
I have learned the hard way that it's easier to lay out a pattern on a single layer of fabric and not give yourself headlights, match designs, AND save fabric. Yes, tracing the 'cut two' pieces takes time and paper, but that's why we get the local newspaper.
 |
| I made one pattern piece for each piece. I also run the pattern edges off the sides at the corners, which would get cut off anyway. Facings are cut from different fabric - I need that fabric in the middle for the matching mask! |
This is an actual shirt i just finished. I am wearing it RIGHT NOW Yes, I am sewing. Just not telling.
 |
| Next to Philip Lynott, at work. The mask was in the wash. |
You will want to trace your 'altered to fit you/final version' pattern. You are committing to this version of this pattern for this fabric. You can cut it all up later on, but TRUST ME just do the deed now. If we're going to be thoughtful about fabric, we're going to trust the process. And you can see on that bias layout above that I run those pieces up to the edge and a little over. If I had to go back and add something, I'd be....really out of luck.
So, you take the one piece (let's call it Bob left back) and lay it out on the paper. And trace it. Pen, pencil, tracing wheel, whatever works.
And here's the kicker: when you're done, cut it out, flip it over so it's the reverse of the original AND MARK THAT SIDE accordingly: Bob, right back. The mirror of Bob, left back. Do it now before you forget. Also date your tracings and mark the seam allowances and pattern notches.
And here's the kicker: when you're done, cut it out, flip it over so it's the reverse of the original AND MARK THAT SIDE accordingly: Bob, right back. The mirror of Bob, left back. Do it now before you forget. Also date your tracings and mark the seam allowances and pattern notches.
If this piece is one half of a piece cut on the fold, join it up right on the foldline. If you're splitting it into two pieces for a seamline, remember to add a seam allowance.
I am the queen of forgetting the seam allowances.
 I mark the grainline and the direction I want the pieces to go if this is meant to go on the bias*. I WILL FORGET. I will also add indicator marks at seams if I'm trying to match the print across the seam. Eventualluy I end up tracing a new copy because the old one has too many matching marks or lines on it.

It's quite a packed little video, and I hope they spend more time with all the ideas they raised.
-------------------
*reasons for this at https://erniekdesigns.blogspot.com/2019/08/bias-theory-with-flaming-skulls.html
-------------------
*reasons for this at https://erniekdesigns.blogspot.com/2019/08/bias-theory-with-flaming-skulls.html
No comments:
Post a Comment
Thanks for reading! I love your comments, I love your ideas, I love your recipes, but if you post links to advertising, I will delete your comment.