Showing posts with label self drafted pattern. Show all posts

Sunday, June 2, 2024

All Stash Vest

I've been working on a vest that is not working out well, and I thought maybe I could remodel an old one.

this one. And it's just too small altogether now to be remodeled.
But I do still have the rest of this fabric.

A bit of a story here. 1992, my first trip to London, standing in Conrans and loving this two faced upholstery cotton with branding symbols on it. It Was A Lot Of Money.
I sat on it for awhile when I got home, until I bought a vest that needed new lining (the gold was too much for the tan front) (and the gold was too beautiful to get rid of). I would need to make a new vest to go with the lining. And this fabric was perfect.


Fabric and lining potentials (the middle dark grey went back to the drawer). This is all pretty deep stash - the black and white stripe is the newest at eight years in the 'collection'

I am going to alternate with them.


It's a lot easier to cut into this stuff now than it was in the mid90's.  And i still have a sizeable hunk for something else. I have noticed the smaller the remnant gets, the more I adore it.


Thursday, December 2, 2021

Put a Hood On It: Or maybe not.

I am not sewing for me right now. I have a lot of work, and much of it paid because I like living indoors and eating. So I am going through the blog posts I started and finishing them up. I have a couple of hundred of orphans, and my hair is going to change color in them. LIKE MAGIC.


I made this short robe for Son from an Ikea duvet cover (as one does)

So I took some measurements off the original and did some mathing

And then I gave it a hood.
Oooookay.
This was more a 'do ya think this could work?' exercise in sewing. I cut my hair shorter and shorter, and I don't turn the heat up very high in my house, so the back of my neck gets cold. Not the front.
So, hoodies. And it would be nice to have a hoody for work that isn't advertising something else than my organization. And we don't have a hoody.
Shame.
So I was looking at how the facing/collar works on this jacket and ...well, when you are into something (hoods), you want to put them on everything?

The continuous front/neck facing is twice the height of the body plus the width of the opening, sewn all the way around in one go. It's doubled in width, to fold over that edge.

 So, if I were to add the hood, I'd be extending those facings (and adding a piece at the back for the head width).

I think you're always better with a higher hood than what I'm mentioning here. You could measure your whole head height from shoulder to shoulder over your head. That is why the tape measure is flexible, right?

I try to make muslins I don't want to keep (I got too attached to makes that were almost good enough, and I wouldn't bother to take it further). I make parts of stuff; when I know what works, I just work on the part I'm unsure of. Get enough to get a good proof of concept before I commit to the fancy fabric.
This might not have been the best choice for this project, but it did work for the toile. I can't even remember what this sample fabric was for. I don't buy grey stuff much (even if it is delicious).

This kinda works. Hood should be deeper...
My ultimate fabric choice is a Kokka knit, semi deep stash, 40" wide.

Hug Snug as a seam finish (preventer of future stretching) at the shoulder/neck seam.


Oooh. Sewing.

Awkward selfie before the sleeves, with derp face.
Now, looking back, this is the point where I should have put sleeves on the muslin. 
The original does not have a hood, and it hangs fine.
The finished item has a hood, and it is less than pleasing, at least in this version, with these proportions and this fabric.

So I took off the hood.


Better.
Now if the black was actually black. Next to black, it's kind of green.


Thursday, April 8, 2021

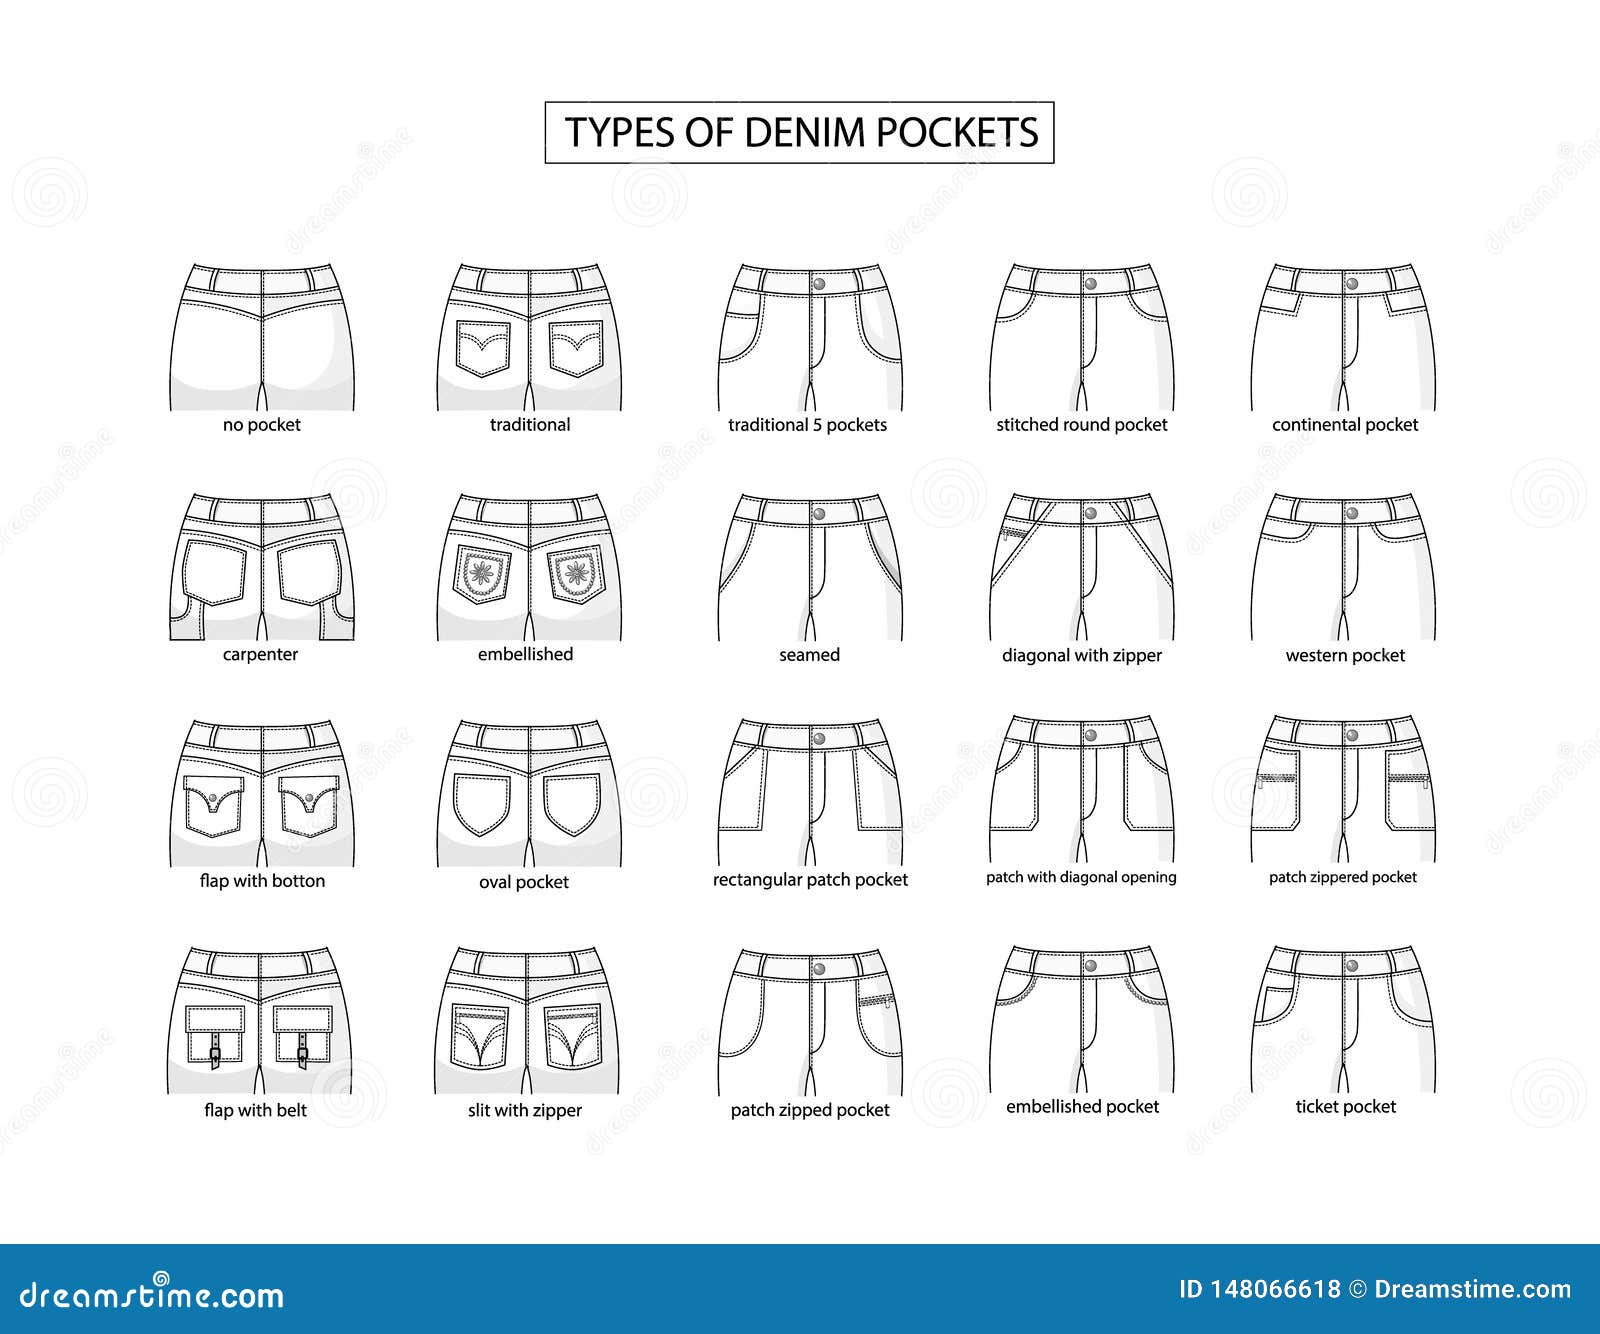
What is this thing called? Episode 12 of an ongoing series about pockets

I love pockets. You might have noticed.

I also love words.

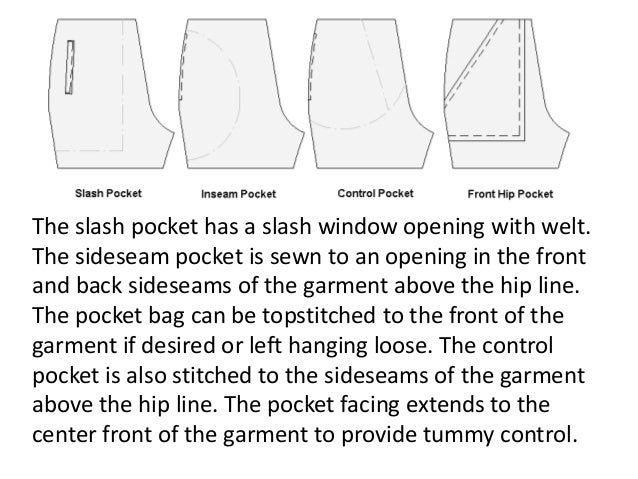
I slant in the openings for the side seam pockets (to let the hand find the pocket more easily) and make the pocket bags long so the weight of the pockets hangs from the horizontal seam in the waistband (the top of the pocket catches in that waistband seam).
(this also keeps the sides from floating up.)

For the kids pants (the ones they would burn through as toddlers) I made a single layer pocket and topstitch it from the outside to secure it (usually a couple of rows of stitching)


What is this called anyway?


Side seam pocket. With topstitching.
Solved that problem.


I desperately want to re-caption this image with random phrases for pocket types shifty shady flirty spooky death heavenly clicktrack. Who wouldn't want clicktrack pockets?


Fraudster should be Tail Lights

Sunday, July 22, 2018

Going to call it what it is: the cutie


I don't know what else to call this dress.
sewn in 2002 or 2003. Not my first quilting cotton dress, but reaaaaaaaal close
It's cute.
I've made it over and over again. I've worn a couple of them to shreds.

I'm 5'2" (158cm) and cute was the default mode for many years. 
shakes head. I'm 59.5 in years, so that's less interesting to me than it used to be. 
I blew through making this one, so no photos. It's cute.

There's not much to say about this dress. It's drafted from my bodice block, and it has a front button cut-on facing, a 60-64" circumference tube skirt gathered at a slightly higher waist, no darts, short sleeves that have a pretty high armscye, and patch pockets.
For coffee 'go' mugs.

The pieces all run the same direction this way. Particularly if you turn this upside down. Or stand on your head.
The skirt needs to be about 60" plus wide, so it needs to be in two pieces. One seam is the center front, the other is sorta buried in the gathers. The whole dress only takes 1.75 yds of 40-44" quilting cotton. 

 I have been buying for this in 2 yard lengths to be able to match the fronts. This is needed more or less depending on the pattern repeat size. 

The Sewing Woes has a 23" inch repeat, which is a beast and eats up yardage. Luckily it's mostly on grain, so I'm not digging myself a deep hole for later. 
I cut one front, iron the facing over, and then match it up on the yardage.

 I use the front piece and match the center front line with the piece flipped, make sure it's got enough fabric for it's facing, and then cut that.
I clip a notch at where that front facing folds over on the top facing.

When in doubt, I leave as much space around pieces for wiggle room. I can always trim back the excess.
Directions: I sew the collar facings to stabilize that open collar curve ASAP.


Then it's endless fiddling with making the front opening match up properly.

Unfortunately, the printing is not consistant across the Woes yardage, so I had to choose what I needed to be perfect and what I could live with.

My acceptable error rate is ......uh, I'm no Peter Lappin. 

http://malepatternboldness.blogspot.com/2018/07/how-do-you-like-my-octopus.html

 The rest just follows: shoulder seams, sleeves, side seams, attach skirt.
I add the pockets last.


I didn't try to match the bodice to the skirt. Too many gathers for that to make sense

i did get to use the nifty selvage on the facing on this one.

Sadly, the buttonholes have become the problem child of the sewing room.
This is the automatic buttonhole when I follow the directions.


Lots of picking and redoing. 
It took me many years to realized I would be much happier unpicking and redoing, rather than shrugging and moving forward with the errors. I do thank Peter Lappin's blog for that; it is worth the effort. Until it's not.

I did hit the button stash hard for these. 

These magenta kids don't all match each other. This is probably the only thing I will ever sew that they will go with, so I went with them. The yellow will audition again, I know.
I do love pawing through the buttons. 
I might have a lot of them. This is only one jar. (the 'cheezy plastic button' collection)

The Dickies is for scale, until I realize the square they are on is one inch, thus scaled. The three holes have been collecting in this one jar, from all the other bags and bags of buttons from every thrift store and estate sale I've ever been to. Okay, maybe I have too many buttons.
Maybe I have just enough.
Sewing Woes is done and ready for duty. 

Sunday, June 10, 2018

Summer Swing Top

Every summer, I make a bout...a gaumpty billion versions of the same top/dress. I get that summer's pattern down to where I want it, and then I just crank them out, with slight variations on a theme.
A couple of years ago, I made a shirt based on this pattern.
which turned into a series of woven pullover shirts, after I had refined the armscye fit.


You know the drill: there's the first, then changes, then the second, then more changes...
And I'm leaving out a couple.


This spring started the new one off.


with short sleeves and a new neckline.
Pretty much this shirt is the shoulders and sleeves of the previous shirt, with a new body. A trifle more width in the back between the shoulder.
And no buttonholes. 

I will go to great lengths to avoid buttonholes these days.

Originally, the * top had the semi v-neck. Which looked dumb.

So I picked it out and added seam tape for a little neckline definition.


I made the neck line into a circle that was a little tipped forward (the edge starts coming back to the center before the seam line)


and I traced off new pieces to make it's own set, rather than being the subset of the long sleeved version


 Just tracing over the old sleeve.

Taylor Mac watches over the process.

Still working on the selfie set up.

Hey, new pants. Same old pattern. We'll get to that presently. I do get MMMay points for finishing them (started them last summer).

Tasteful Incredibles2 scatter print sleeveless version.

I like to put my tag in the back on the facing. And yes, it's the Alexander Henry bathing beauties print.
  
And more in the next few weeks.
But right now, I have a present to make for a pal.