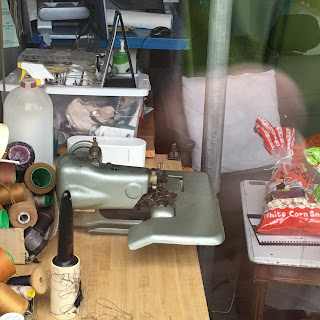
A pal wanted a weighted blanket.
They are supposed to help with restless sleeping, and anxiety.
I watched a fair number of videos
"Man Sewing" Rob Appell has a nice one
https://youtu.be/svqiyDlJmus
And I figured it out.
I decided to make one that would just cover the torso and the upper thighs, so we could see how it worked. If it needed to be bigger, I could make more panels and sew them together.
I used a thrifted sheet, backed with flannel, and sewed through all three layers, leaving the channels open at one end.
Others work out from the center.
Your results will vary.
The math for the number of sections is how big you want them to be.
I had an unfilled four inch border around the filled section.
I started at the bottom, I felt that the first set of square pockets (3" square) looked overstuffed when filled, and sad with a little slack in them. Also there was enough movement in the pellets to make noise, and Client didn't want noise.
So I unpicked and sewed the remaining tunnels to make them half as wide
(while making sure the tube I was going to use to fill them still fit)
 |
| Tube rehearsal reenactment. I didn't take enough photos. |
The math for the weight is:
the person's weight, divided by 10, plus 2.
He's 140, so 14 plus 2: 16.
You are supposed to divide the weight by the number of pockets 16 lbs = 256 oz.
256 oz divided by 80? 3.2 oz, I weighed them -
lets stop right here.
The blanket filled up at 8 pounds. I have a spare bag now.
This filling and sewing technique worked for me.
The bigger pockets are at the bottom, the skinnier longer ones towards the top.
So the tube goes in
You stand it up
Stick in your homemade paper funnel
This is the secret sauce. You figure out how much each section will need and you use a measuring cup. I cannot stress enough how boring cleaning up tiny plastic pellets is, or working them back and forth to make a clear area for stitching.
Be consistent and pay attention and it will go much much faster.
There they are in there. also helps that the tube wasn't longer than the sections I was filling. I cannot tell you enough to pay attention to how much goes in each section with enough slack to prevent things from exploding or stitches from popping.
I did handstitch some. I did that 'thread a couple needles on the spool' trick from this month's Threads letters column.
However, machine sewing goes faster
IF
when you come to the end of the row and set up to sew your set of filled baffles,
you have pinned a path to sew that is:
1) wide enough for the presser foot (I used the narrowest one. A zipper foot would work as well)
2) Has absolutely NO PELLETS IN IT
(so if you had to move some to the side for the next set, you pin that area closed)
You are creating an alley for the foot to travel down with no bumps to make the stitches loose and no pellets to break your needle.
This is the most time consuming part of the job.
Consistency will pay off big time here.
 |
| My finger is where the alley is.I'm running my finger down to keep checking for pellets. |
The other key thing is: you will want to set up on a table that will support the blanket. It needs to be entirely on the table, or it will slide off quickly.
You will need to be able to hold the work up and not make the feed dogs pull it while you're stitching.
Any lateral stress will break the needle.
And that is a pain.
It took the better part of two days, and it only would take 8 pounds of pellets.
It has worked really well. It's just big enough, the shorter baffles are cozy
The orange lateral lines are the stitching lines for closing the baffles, one set at a time. I went back and put in two sets with a gap in-between to allow the blanket to bend and be folded.
One side has flannel to keep the blanket from sliding off, the other side has fabric that is covers the other side, is wrapped around the edges, and is not quilted through except around the outside edges. It's there for structure, aesthetics and to protect the baffles from being torn.
He's pretty happy with it. We'll see if he needs it enlarged.


