Showing posts with label pockets. Show all posts

Thursday, April 8, 2021

What is this thing called? Episode 12 of an ongoing series about pockets

I love pockets. You might have noticed.

I also love words.

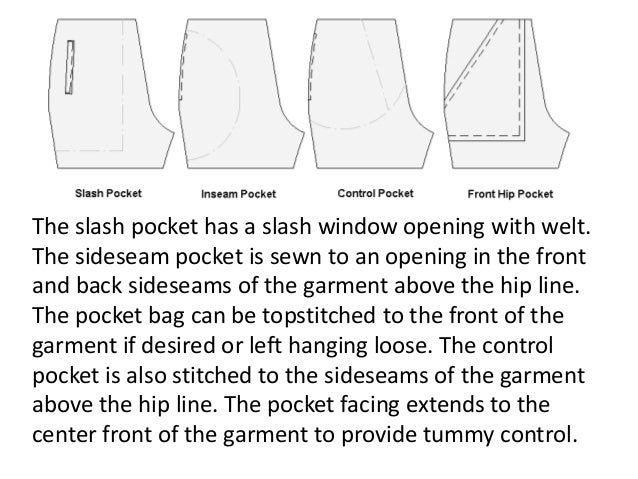
I slant in the openings for the side seam pockets (to let the hand find the pocket more easily) and make the pocket bags long so the weight of the pockets hangs from the horizontal seam in the waistband (the top of the pocket catches in that waistband seam).
(this also keeps the sides from floating up.)

For the kids pants (the ones they would burn through as toddlers) I made a single layer pocket and topstitch it from the outside to secure it (usually a couple of rows of stitching)


What is this called anyway?


Side seam pocket. With topstitching.
Solved that problem.


I desperately want to re-caption this image with random phrases for pocket types shifty shady flirty spooky death heavenly clicktrack. Who wouldn't want clicktrack pockets?


Fraudster should be Tail Lights

Sunday, June 21, 2020

Journey Jacket - it's all in the lining.

The original Journey jacket is how I learned about adding pockets to other clothes.
They have updated and enhanced it since then.

Journey Jacket 2

Saf-T-Pockets is all about adding pockets to clothes to keep your hands free.
https://saf-t-pockets.com/

If you read enough of this blog, my theories are clear: pockets are damn handy. If you have your keys in your pocket, you won't get locked out.
Many women have breasts.
If you have a loose fitting or oversized jacket or coat, 
 there's space you can use for storage 
under those breasts.
It's like a shady grove for things inside your clothes.
Oh, the star is the bust point. And since I grew a new tummy, I can't run the pockets all the way down. The opening of the pocket can be at the bust point, if the pocket contents can hang below it.

The lining is full of pockets and hangs from the shoulder seams to keep those pockets from bulking out the outside fabric. 
Kinda like one of those hanging shoe caddies for closets.
photo stolen from Wayfair because I have a cat in my lap and I'm not getting up to take a photo

I've done this on several jackets on this blog; traced off a lining pattern, cut it, added pockets, and then sewn that lining to the inside of a previously unpocketed jacket.
https://erniekdesigns.blogspot.com/2013/03/adding-pockets-to-existing-jackets.html
(I no longer have that jacket, but I have the photos to remember)
The key is keeping the weight hanging from the shoulder seams. so it doesn't unbalance the jacket.

For this jacket, I wanted a facing of the same fabric, not to just run the lining up to the edge (as I understand it, the facing is standard issue with the Journey 2 jacket).
I cut a fashion fabric facing for the front lining.

Facing and lining sewn together.

Auditioning pocket locations.
- I pinned the lining onto me and marked the top and bottom location with safety pins.

And those pockets are going to get zippers.

Sewing the zipper opening 'window' with interfacing around it

Flipped to the inside and pinned: I will topstitch it in place from the right side at this point,
because the pocket doesn't have a back side to it yet.

I pin the back to it and stitch around the edges.

Be careful over the zipper end.

The other pocket is a self welt pocket, where you sew one large piece of pocket fabric to the lining, 
turn that to the inside, and fold it over to make a welt and the body of the pocket.
Or if you like my super sharp Paint diagrams...
Still needs tweaking but it's getting there.

Sunday, June 14, 2020

Journey Jacket, same reasons, with doubts

I wasn't blogging when I made the first one of these, back in .....2002? 2003? I had bought the pattern at In The Beginning years before, and then just could not find the right fabric.
However, I did find the right reason.

The idea behind this pattern is hands free travel. A jacket with lots of useful pockets so you won't have to carry a bag for your wallet, passport (long before cell phones would have fit in anything smaller than a suitcase).

I was working an onsite ticketing job where I could be carrying a large quantity of money to and from work, in various locations, doing box office cashier work.

And I wanted to be able to look like I wasn't carrying anything, or at the very least, could give up on the cashbox because it didn't have any cash in it.  I sewed myself a multipocket expanding wallet that I could make change out of, for the situations where the cashbox was like wearing a billboard walking down a side street downtown. HEY I AM CARRYING LARGE QUANTITIES OF NONSEQENTIALLY NUMBERED BILLS LARGER THAN ONES.


The wallet itself. Still comes in handy now and then.

I was working for Judy Cites, who at one point in her career worked for Northwest Releasing, a music promoter, and in that capacity found herself carrying several thousand dollars in cash to pay Chuck Berry's fee at the stage door so he'd go onstage.

She carried that money in her go go boots.

The first Journey version was a victim of it's usefulness. It was poly crepe, easy to wear, very handsome, and smelled like all the cigarettes I smoked wearing it.
So it went.
I knew I would make another one eventually.

I bought this tropical weight wool fabric for this version in anticipation of a job interview that did not go the way I hoped.

But I got the second job, in a box office. And you can always use a 'grown up from the waist up' jacket in a box office.
Except now we are closed and will be for some time.
And even though we are in the Covid 19 shutdown, and there are no performances I need to dress adult for, no concerts I need a sweet jacket to go purseless for, I am making it, as an act of faith.
POCKETSSSSSSSSSSSSSSS

It needs work. Overexposed to show collar and seam problems. 
I may not have the job.
But I will have the jacket.

Sunday, June 2, 2019

Adding inside pockets to RTW

I can't entirely explain why I wanted a mustard yellow faux leather moto jacket*, but I did and I hunted one down on eBay (after mistakenly ordering a really misidentified one and finally getting a refund).

And it's just what I wanted, except where it is not.
The back label is super itchy and made out of razor blades (or that's what it feels like), so it needs to come off the back of the neck.

 And there's no inside pocket cause lady jacket pocket b%llsh%t

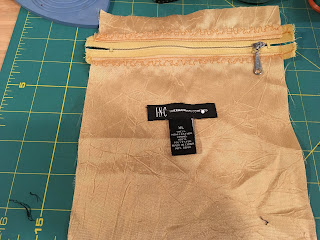
So I'm going to make a pocket and put the label on that.
Yes, I've been doing this forever.
(which gave me a chance to fix broken photos)

It's entirely possible that I will not need this jacket forever, and I'd like to leave the tag on for size and maker ID.
I am going to use that pocket pretty hard, and I learned the hard way to just overdo this at this point, rather than have to redo it later.

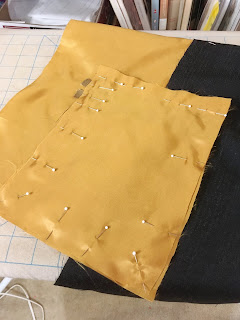
I don't make a patch pocket; I make an entire pocket, front and back. Stitch that around the edge with the insides out

flip it right side out

I ironed the points out

And sorta french seamed it around the edge.
This way the bag wears out on its own merits. If the original lining is too brittle, it will tear at the new seams, but this is more likely to fail in the center of the pocket bag.


I don't have any action photos, but this is the secret sauce.  I pin the pocket to the lining and double check to make sure that I have it pinned to the lining ONLY.  And then I fold over that lining at the pocket edge, match those edges up, pin them together and zig zag over them, sewing the pocket to the lining on the sides and the top. It's worth testing to make sure the zig zag stitch will open up to flatten out that seam  (a little ridge is okay, a big one will be uncomfortable). A wide, long, reduced tension zig zag will make the best seam (and last longer).

No, the fabric doesn't match, it's from the stash, as is the zipper (an old one from Seattle Fabrics big box of 50 cent zips)

And now my Jubilee jacket* has a proper inside pocket.
-------------------------

Saturday, December 29, 2018

Padded winter vest from the stash


Yes, this all came out of the stash.
I already had enough of the Seattle Fabrics quilted nylon puff.


I had traced a pattern from a vest I wear all the time, and made an allowance for the thickness.


And now I'm just auditioning fabrics.


I love this cowboy print


 I love this handpainted muslin more.
I had yards and yards for years; this is all I have left.

https://erniekdesigns.blogspot.com/2013/04/miyake-dress-1309.html


There was lots of trimming the fluff out of the seams, not the facing for it. Keeps it from pulling away from the seams as much as it will want to.


The collar is a elongated ellipse
And a super easy draft.
Cut out one piece on the bias (green is the grainline, red is the fold). One outside edge is the measure of the collar opening. plus overlaps for the snaps.
Fold it over on the red line.


You can draft that front curve from the curve of the neckline. Don't fuss over the back neck line, it will resolve itself.
It doesn't have to be precise (too long is better, you can trim it down to fit at the end).
And it flexes and snugs up to your neck; without a seam there, it doesn't chafe.

My neck is chafe free. It's my holiday wish for yours as well.

I add the pockets after the body, because I want the pocket to go where my hand wants to find it.
So I need to put the vest on to use my hand to determine that.

Here's where my pocket should be: where my hand hits the front expecting there to be a pocket.
Note that I marked where my lower wrist hits on the front with a safety pin.


And here's my diagram of how this pattern should work.
Those extra rectangles are the fat upper self-welt, that folds over to fill the gaping hole my hand goes into.
You can use the fashion fabric to cover that part, so it all matches, but I wanted the black slashy contrast, to work with the collar.


I have noticed I tend to forget what the pattern piece is supposed to do after I draft it. So I've taken to writing the instructions on the piece.
I can read it, that's good enough.


Tracing and correcting


Marking where the hole is going to be.


This piece of lining was scavenged from a miniskirt I thrifted for it's fabric. That fabric made into a hat, the zipper went in a purse, the hook into the stash, but the lining filtered down into the box.
And today, that skirt is all used up.


One pocket done before I thought to take photos.


Trust me, there's a pocket sewn on there. Not my best finish job, but my handsewing game needs work.


The red computer-drawn lines are where the stitching lines go. I don't stitch the ends of the rectangle shut,  I don't need to.


Top stitch the hole before I flip the pocket in and sew that.


I blew through this, no time for photos.
It's really chilly in this house, and I needed this vest pronto.
I blew through the snap insertion part, too.


The best punch is still the one on the left, from Closet Case Patterns' Kelly anorak snap set kit.
The one on the far right is from Tandy, and it doesn't like fabric. The shorty in the middle is from the Dritz set I used, and it doesn't like anything.

2019 will improve my hand sewing and my photography. 
There will be a bit more posted before we close this year out.

Unless I eat too much chocolate.
Or drink too many lattes.