Showing posts with label tutorial. Show all posts

Sunday, July 9, 2023

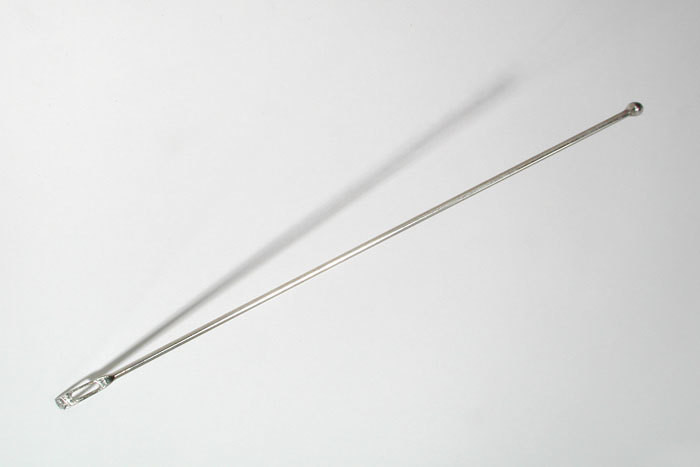
Make your own bodkin


I think we all know by now my deep fondness for plastic cutting boards. I use them for templates, quick rulers, a nonpinnable layer to put pins into things but not through all the layers. they are cuttable, NOT HEAT RESISTANT THOUGH, bendable and usually easily found at a dollar store or

https://www.ikea.com/us/en/p/finfoerdela-flexible-chopping-board-dark-gray-dark-turquoise-30335898/

Mix this up with a  rainbow double cap rivet - get the 


https://emmalinebags.com/collections/bag-hardware/products/double-cap-rivets-3-sizes-5-finishes-available-50-packs?variant=2349553385481

You would want the extra small rivets, with the shortest post at .19 inch You can find other small rivet sets on Etsy, this is just an example. I have become very fond of little rivets. Little rainbow ones are cute.


The victim


top to bottom: the paper one, the plastic one, the one that Clover doesn't seem to have in stock anywhere (there's a slider button that clamps on the thing you're pulling through and a plastic piece at the nose that I can feel for and grab. And inspired this homemade version)


BOB, this is the HOUSE OF BOB
(this typeface is called Plastic Purse, for Lily's Purple One, and the source of the perfect Mr Slinger mantra: today was difficult, tomorrow will be different)

I stapled it on to the elastic like the cardboard one

So the secret sauce is: you can feel that rivet through the fabric and grab that and pull the bodkin along.
Eventually the plastic will break at the fold. 
Eventually I will go blind and the world will boil. I won't be worrying about pants then.

Also more Bob, in wax print from House of MamiWata
https://houseofmamiwata.com/products/african-fabric-ankara-fuchsia-orange-blue-yellow-pink-kahina-design-yard-or-wholesale
These pants don't match ANYTHING

Thursday, December 24, 2020

Adjacent Ideas Collage Together: Serger Plus Vacuum Equals Profanity / Movie Theater Burns


Or, make a scrap wrapped wreath.

I have favorite tiny scraps of beloved fabrics that have no functional use.
I have a ton or two of preexisting decor in my sewing cave.
I could make a wreath, hang it in the cave, and move it up to the main rooms for the holidays. Which I may declare to last until I go back to my real job, if ever that happens.
And I was going to do this yesterday.

But this is what I really did for Christmas sewing


Sorry, there's no before photo. I never think to take photos of disasters. I was vacuuming the sewing room from the lint from one Christmas project, and put the nozzle near the serger base and caught the upper looper fuzzy nylon in the nozzle and yards and yards later undone and redone. Good lord what a mess.

Ebony Love, you saved Christmas.

https://lovebugstudios.com/serger-tips-using-your-overlock-machine/

Happy holidays. Photos of what got sewn next week.

Photo of today's real disaster:

The link below is quite possibly the most exhausting history on this theater, the north end of Seattle, movie theaters in Seattle, exhibition of movies in America, the Veterans of Foreign Wars, and much much more.

http://www.seattle.gov/Documents/Departments/Neighborhoods/HistoricPreservation/Landmarks/RelatedDocuments/DesRptSevenGables.pdf


Sunday, December 13, 2020

In praise of Sewing Workshop Videos; a better bodkin technique

I have had my issues with Sewing Workshop over the years, but damn if they aren't giving us goodness ago go on the interwebs

https://youtu.be/vGA6jZS7-Yw
This video is nominally about matching pattern motifs, and it is, but it's also just a really nice 'this is the process I used to get what I'm wearing' video.

But this is five minutes that could change my life
https://youtu.be/vGA6jZS7-Yw?t=987
(time marked to start)

https://sewingworkshop.com/shop/Ball-Point-Bodkin-p38176295

You sew the thing you're turning to the eye so it doesn't slip out along the way.


This video has a lot of good stuff in. Most of them do. You can put it on in the corner and stop and rewatch something when it strikes your fancy.  This one is just my jam, and does answer some pattern matching questions (mismatch on purpose, what point to match on the sleeve/body join, when to break the rules)
---------------------------------------------------------------
My term project is done. 
We'll be back with sewing next week.

Added:
at the start mark of this video, Linda Lee talks about her history with the Sewing Workshop, and their "first" pattern


Friday, December 4, 2020

Ear bud bag

The old ear buds had a tragic accident and sparked me when I used them, so they had a more tragic end.
Replacing them, I decided I should give them a safer form of transport than wadding them up in my coat pocket.
Of course I traced it. I'm making a pattern for it.
My goal is to keep the bundle from tying itself up. If I put a snap or a button in the middle of that wound-up cord, I should be in good shape to keep it from tangling.


Paper pattern made, pinned out

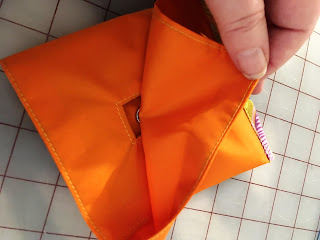
Making a square hole is easier to trim to the edge to turn it.
Sewed that square, cut it, turned it.

Turned it


This is the ugly half burrito. Yes, I had to turn it first, and then flip it back to stitch the sides and top seam. I know, I used a fabric without a visible right/wrong side, but this light nylon is what I had on hand to make this out of.

And after a quick light press (with a pressing cloth cause SINGE)

It worked.


I went back and snuck a piece of interfacing in the center section. Should have added piece of interfacing on center spot for other side of snap. Could have done this for the hole, but didn't need to as yet.
This is a test model, we'll see how this works out long term.

Snap one (centers in hole)
Snap Two, needs interfacing under it.

it gets some bias trim at the seam to cover and finish it.

Roll it up and stick it in.

Snap it shut


It's in there. As long as I put it in with the ear buds at the bottom of the pocket, I think it will be okay. It may not need to be a three fold, it might just as well be an open top pocket. Or maybe a zipper? 
I'm testing this out. I don't think I will need another one, and my fam are all wireless ear bud people.

Ya never know.

It's been working pretty well so far

Sunday, September 6, 2020

What I learned from Bragust and AlteritAugust: Link Party


I like theme month sewing challenges until I don't. I can follow and be impressed/inspired by the wide variety of responses, and then worn out by the repetition. 
These two do pique my interest, as two of my sewing failings are the bras in my life, and the stack of mending and altering that grows without any effort on my part. Both #braugust and #alteritaugust live on Instagram, but that does not mean you have to contain your interest to that platform.

I'm not sure how evident my alteration work is on this blog anymore. I still do a lot of it, it's just not as novel or photo-worthy (that Sjoden top being an exception), and it's done as soon as I think about taking a photo. And how interesting are photos of things in the machine in process? Not much to me. But alterations are most of my sewing, either for me or friends or money from friends.  My thinking on this has moved towards preservation rather than refashioning. The main point is I want to see sewing bring life back to stuff, while preserving the original intent if possible. At the end of the day, it's just stuff.


Sew North started #AlteritAugust a few years ago, to bring back to life things she'd made or worn and get them back into regular use. https://sewnorthco.com/alteritaugust-2020/  This is positivity talking. Any talk of alterations reminds me of this series on Ikat bag, which really gets to the nut of the issue: 

http://www.ikatbag.com/2011/12/alterations-making-choices.html


Altering an item involves respecting it's making and its purpose. Ikat has a series of posts on this topic, but this one discusses why you might not want to. The purpose of alterations is to create new value and use for the current owner. If you can, it's good to retain as much of the original in the seam allowances (see Mrs Mole https://fitforaqueen.wordpress.com if you want to see this in action). If that's not a concern, respect the process and do it right. Take your time. Measure twice, cut once and only after heavy consideration. And if you do bodge it, there are workarounds, or maybe you're just going to do what you can and put it in the donation pile. Or salvage the bits and use them later.


Sewcialists has #Braugust, and they are putting out some goodness 
https://thesewcialists.com/2020/07/28/all-chests-welcome-resources/ reminds me that Melissa Fehr has put a lot of time and attention into describing her techniques. The post https://blog.fehrtrade.com/inspiration/4723/elastic-edges-three-ways/ can be summed up with suggesting  "A walking foot for your sewing machine. I cannot stress enough how much of a difference this will make to your activewear sewing success!" 


 I cannot sew elastic to fabric without failure. I was hoping for some advice on sewing  elastic to lace somewhere in this month. Lacking that, I am falling back on Nancy Zieman

http://www.nancyzieman.com/blog/sewing-general/the-absolute-easiest-way-to-sew-elastic-to-a-waistline/


There are a lot of sewing advice gurus, but if I'm sorting through a pile of results from a search on a sewing issue, and a Nancy link comes up, I go to that one first. She wrote so much, recorded so many programs in so many places, and she wasn't afraid to try something new. Even if I disagree, I learn something.

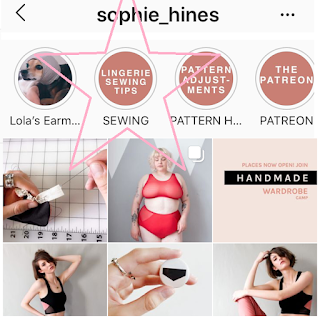
Sophie Hines, from IG Stories, Lingerie Sewing Tips

https://www.instagram.com/sophie_hines/
https://www.instagram.com/stories/highlights/17947844347182034/

Sophie Hines has a tutorial set in her stories on Instagram: Lingerie Sewing Tips. I'm sorry that's the only location I can find for it, but they are there. She uses a jillion pins. And she sews over them! Ahhh! In this tutorial, she has some of the best action shots of construction and sewing I have seen. She makes very simple advice make sense.


A happy discovery has been the Ginger and George LBB bra, specifically the YouTube tutorial showing how to construct one. 
because.....
There's No Sewing Elastic To Knit Fabric.
Is Miracle!
(youtube link)


This lime green is from Em's scrap pile (the ultimate in repurposing: giving someone else your scrap bag of leftovers), I only made one layer to check the fit. It's remarkably close right out of the box, using a couple of hints from the tutorial. I highly recommend watching the YT tute. It's a simple, clever pattern with few moving pieces that is easily hacked and altered. There are a trillion cup sizes on the PDF, which is layered to reduce vision strain, and has a guide as to which pages you'd need to print. 
There's a free code in the video for this pattern, but I liked this so much I GAVE THEM MONEY FOR IT. 

As it turns out, from reading all of these: what I need to do is this: 1) reduce the pressure on the pressure foot, 2)put the most stable layer on top while sewing, 3)match elastic to the edge of the fabric and the seam allowance and trim excess fabric AFTER stitching. I need that extra bit in there to make a stable seam. Last but first: I'm going to need to make samples to test different stitch lengths and needle types (and sometimes thread) to determine which works best for what I'm doing, so samples will be necessary from the scrap from cutting out my project.


And sorting out that tension
http://dragonpoodle.blogspot.com/2020/05/necchi-bu-nova-and-tensioner.html
We all make the same mistakes with where we think the tension has gone wrong. Dragon Poodle is here (second half of their post) to set you (and me) straight.
And you know I'm leaving this here so I won't lose it
Honestly, if the only thing I did all day was point you to their website, I'd consider it a good day's work.

Thank you benevolent scrap bag.

Thursday, January 9, 2020

New Winter Hats

I have lost my hat that looks like this:

Mine was red. It's missing.

I mean, look at it, its a tube with a top and sewn tuck ribs down the side. the crown often has same color embroidery on it, in a four point oval 'star' or similar.
The ones with gathered midsections are sweet.
photo from various

And in velvet (although this is just a photoshopped image from elsewhere, so not really but ain't it pretty?)


Meanwhile, my head is getting cold. I have grey wool coat fabric.
Made band and crown. Lined it with stuff. Sewed stuff on it.
Hat!

This goes really fast, and I only got to photos at the last step (covering up seams on the side with wide fancy ribbon, purchases long ago at Treasures of the Gypsy at SewExpo (long retired)


The ends need covering. I have a lot of this ruler trim from the last days of Pacific Fabrics.
I sewed the edges with the raw edge pinked and out,

But I don't like the raw edge flange top.
I love the derpy expression on my face, but the profile of the hat, no.  If it's going to flange at the edge, the body of the hat below it shouldn't be bulgy. I need a different shape for the body.

So, get out the ripper!

I'm going to get a handle with flames on it.

Pinned.

Bias trim inside to cover edges and provide a little structure (the hat equivalent of a sleeve head)


And okay. Still not what I'm looking for, but it's fun and warm and cost nothing but time and remnants from the stash.