Showing posts with label frida. Show all posts

Friday, January 29, 2021

My First Frida

 I wanted one of these, but I missed out.

https://barbie.mattel.com/shop/en-us/ba/inspiring-women-series/barbie-inspiring-women-series-frida-kahlo-doll-fjh65

So I made my own.


Doll remodeling is an entire world unto itself. Some of the videos are ASMR in their 'crafting as soothing activity' qualities. I was very soothed.

I have an entire separate blog post just with links and photos that helped me/enabled me through this process, which I will post next week. Promise. Probably sooner.

If I were going to buy one from Mattel, it would be Ella

Mattel website, credit on photo


The very photo from Ebay of our subject

Like Frida, she has her own back problems.


The original doll is from the Monster High dolls, Cleo de Nile, purchased on ebay.
She needed her hair combed out. Conditioner helps
And I cut out the teal hair streaks.
Gooped her up with coconut oil to keep the paint from sticking and wiped her paint off with nail polish remover.

I did file down her upper lip a little, and flattened out the bottom lip and the tip of her nose. It was a little too Barbie for me.


Her hair needed to be tamed to her head shape, so she got the deep conditioning, head first into the hot water spa. I wrapped her up to make her easier to handle.


At this point, I had to make a style choice: am I going for the sort of precision paint work that Frida would have done, or the looser line driven drawing I tend to prefer?
I went with looser. These aren't real eyes

I did take down the moustache a trifle. I have one, she had one, but I didn't want it to be the focal point of her face.


This is my favorite picture of the set. Me and Frida, hanging out on Saturday night, doing her hair. There's a little Sarah Silverman in this, and I'm good with that.


I had to glue her bangs back and cover that line with the wreath. Also glued. And sewn.
Now she needs some clothes.
What would Frida wear? Well, I have the book

https://www.amazon.com/Self-Portrait-Velvet-Dress-Fashion/dp/0811863441
which documents this exhibit which went on tour
and now lives at
https://www.museofridakahlo.org.mx/en/exhibitions/

It's hard not to pose her reacting to the camera, frankly. 

With her skirt and huipil
And a shawl.
She will get other outfits, I promise.
adding this link to a FIT YouTube presentation on the recent exhibition of Kahlo's wardrobe, 
https://youtu.be/k_9XMG8Oo9k
as curated by and spoken about by Circe Henestrosa (the head of the School of Fashion at LASALLE College of the Arts in Singapore).

Monday, February 24, 2014

Jeans Jeans Jeans Frida Edition


This is a rough survey of the high and low points of my jeans journey. It's not a detailed map; plenty of other blogs have done a better job. Where I've messed up and where I've succeeded.

A basic anatomy lesson. 

These are the Frida jeans. And this is the front pocket facing with a welt pocket already set in place of the traditional patch watch pocket. I've put mine on the right front, because I like it there.

Same treatment as the pockets in the Plaidness vest. Made the self welt on the face, sewed the back seam, need to sew up the sides and it's done.


Pinned the facing to the pockets. I had just enough of the quilting weight Frida's to face/pocket the jeans.

In fact, I had enough to have a little fun with image placement.

The fly facing; yes, the message will get folded over.

I made a template for the stitching at the top of the pocket

Stitched it (will notch and clip curves)

Ironing. Dark print to the right will fold over the part to the left and get sewn up at the bottom for the pocket.

I saw this curvy shape on the front pockets of a pair of my DH's Ted Baker jeans

Pocket facing is folded over and sewn. And now Frida is peeking out at the world

I'm still working on the zipper thing. 
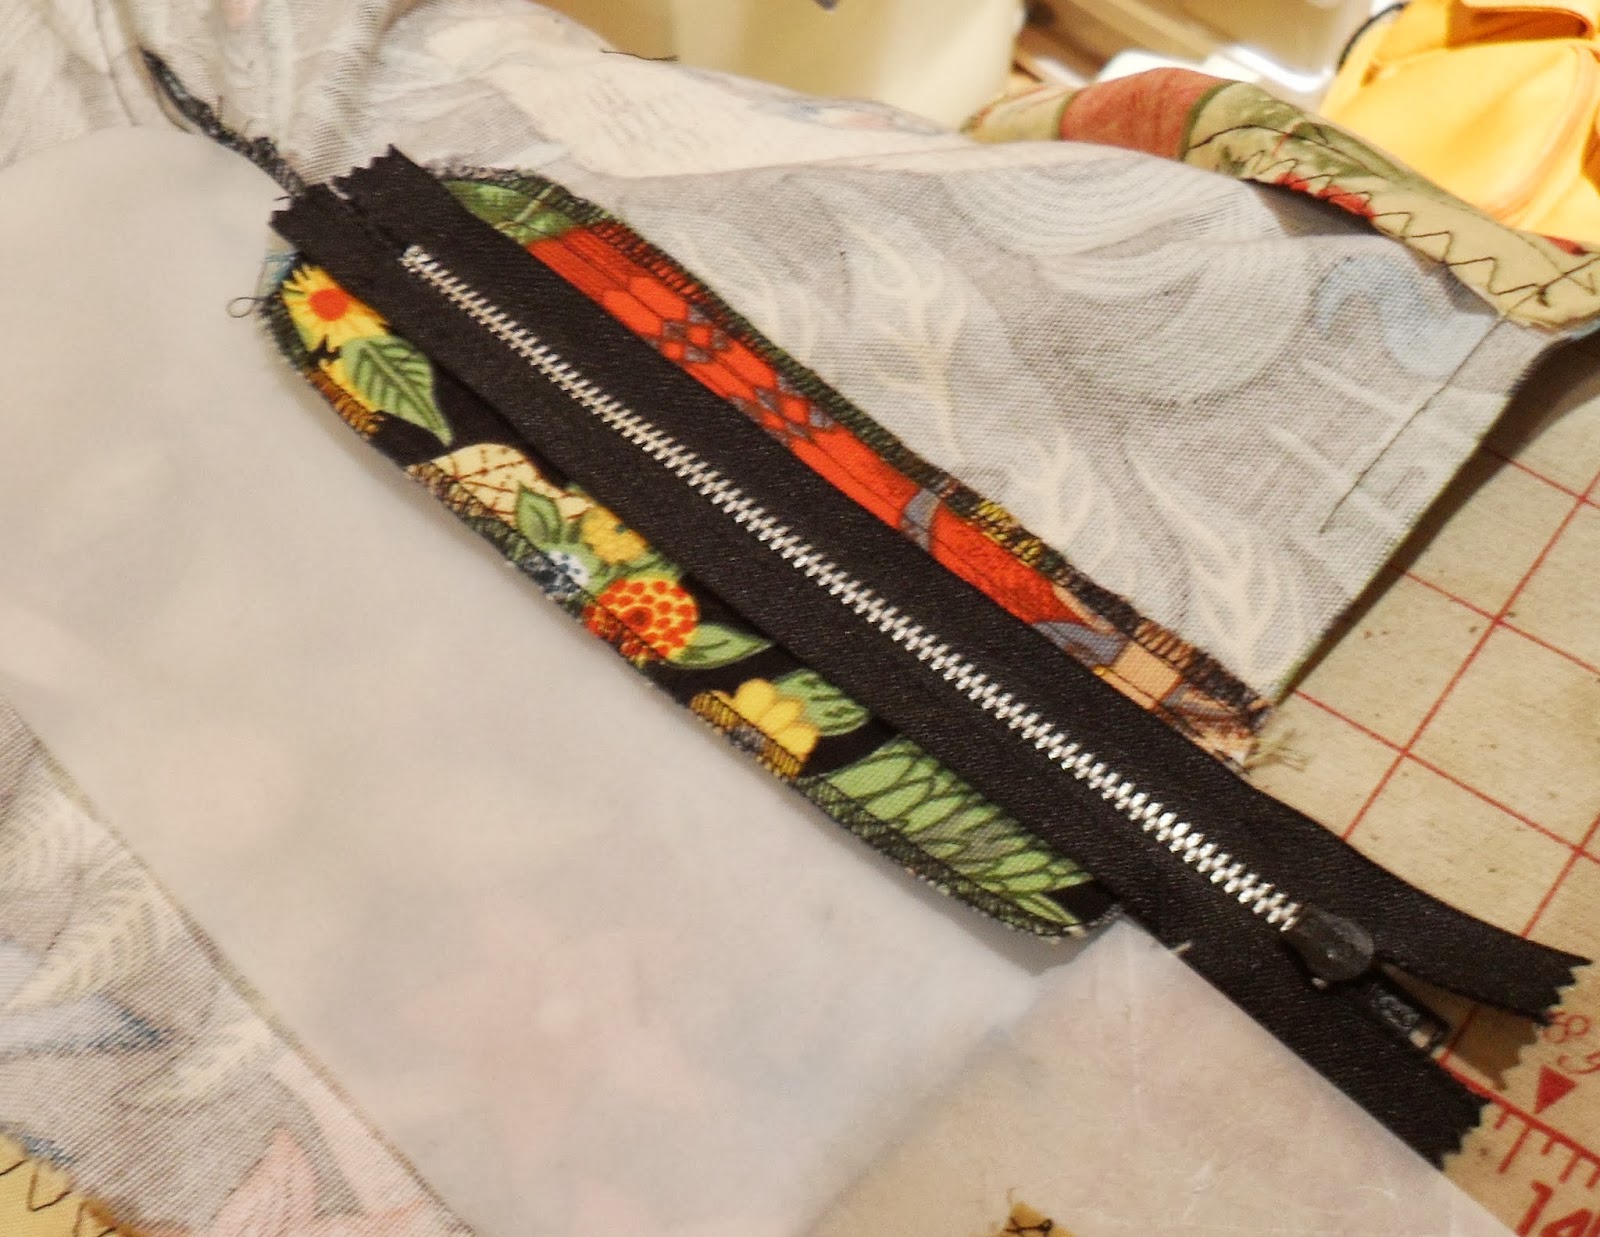
Skipping ahead, I have the zipper in. To attach the fly facing, I slide a piece of plastic under the facing to pin.

And there it is, pinned on. Sew it up!

I have about a quarter inch overlap on the front. Personal taste.

Worth saying a few times: I can choose to have a curved waistband, a welted watch pocket, the zipper overlapped by the center seam, a contrast facing.

I don't have to have exactly what the pattern says. I made a pattern from my pants. I can make them the way I like them.

I'm back matching facings for waistbands. The nice thing about tracing paper is that I can see the fabric pattern underneath and position the piece where I want it.


Okay, it's taken me decades to learn this. When you are ironing, and you need to release some steam, tilt the iron AWAY from you. Like a lid on a pot on the stove. Don't just lift it up. Aim the steam away from body parts.

Zipper work. I've cut off the metal teeth that are going into the waistband seam, I need a new zipper stop. This is a bead clasp. Poked a hole, stuck the prong through the hole, folded it up (will cut off a little more) and glue it before I crimp the clasp shut.

When we talk about 'stitch in the ditch', it's the seam line on the non-seamed side. Like here. I'm aiming to put the seam on the yellow arrow. I am going to watch the front of the presser foot (green arrow, center line) NOT NOT NOT the needle (red arrow BAD). The needle moves and my eye does too.


Ah, bad bad buttonholer! My set up for automated button hole (on scrap of same fabric) looked great. The actual one looked awful.

Picking out buttonholes is really tedious. Can I speed this up?

Hm.  A toy!

It may not have done a lot, and the lint shaver weakens fabric, but it broke up the anger and the tedium.

My forward and reverse button hole stitching lines crossed, the material is as black as the thread, so this time I'm going to look at the seam allowance ruler (green arrow) on the plate to ensure the fabric is going forward and backwards without moving from side to side like before.


Too long on one side, but parallel. I have this problem all the time; I set up the automatic buttonhole on scrap of the same weight with interfacing, but I lose traction on the actual item. I can fix the length on the machine. 

This does mark the end of my Frida fabric collection.  Ten years of fun!