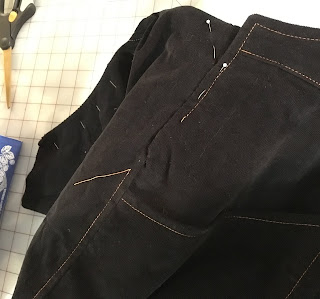
Warning: black corduroy overexposed for details. |
| They are too big. But yes, I can get my arms in there, with room to spare. |
Yes, I have been dragging my feet on it.
 |
| Supplies gathered and ready to go. |
You know, when you're working on something, and it's really fun and you have a plan and it's going great. Really great.
I changed up the side pockets, I added a zip to the bib pocket, I lined the bib and the straps.
And that topstitching? Ow, I hurt myself, it was sooo good.
And then one damn thing after another happens?
I changed up the side pockets, I added a zip to the bib pocket, I lined the bib and the straps.
 |
| Did I mention the straps were lined? I would not want to forget to mention that. |
 |
| Inspiration overalls that no longer fit me. Leaving with Blondini, who is that thin. |
And It. Just. Grinds. To. A Halt.
 |
| overexposed because black corduroy |
It's a couple of things. Not the instructions or the style lines. I'm loving those.
It's the buttons and the straps and the overall width.
Yeah, that's what we got here.
There's nothing wrong with the pattern...
 |
| I saved up the hardware and top stitching thread in a project bag. These bags have plastic hooks on the top. This has been hanging on the wall in the cave for months and months. |
The problems started with the fasteners.
I was pretty sure I had used these jeans buttons before, without errors.
And they just kept failing. The shank of the nail would not go into the hole in the button with moderate hammering. The shank would bend and fail first before it would go in - it preferred folding to going into the hole.The next step was wailing on them with a bigger hammer.
That trick never works.
That trick never works.
I had to crank on them with a wrench to finally close them.
Which after awhile means I get irritated and sloppy and I don't take as much care to not make marks on the face of the button.
I had lost my wrench with the leather facing on the teeth (prevents tooth marks on metals).
I needed to make another.
 |
| I did make another. You glue/sew on leather over the teeth on the faces. This is how long I've been stalling on finishing this post and these overalls. |
They are holes with a lot of stuff around them. I can pick them all out, but there's still that hole. A not insignificant hole.
I removed the jean buttons.
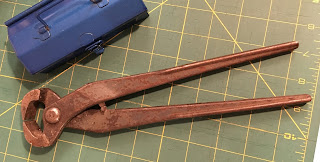
They will not go quietly - I have a pair of end cutting pliers
They are just able to cut the nail off , just below the head. There's enough space in there to do it.
And I did. I replaced them with sew-on shank buttons and redid the buttonholes as per the directions.
The buttons are huge and when I put the overalls on, the buttons feel like they are on the wrong face. And this is following the directions.
The buttons are huge and when I put the overalls on, the buttons feel like they are on the wrong face. And this is following the directions.
 |
| Wonky side opening mismatch before it mysteriously resolved itself |
I did not come up with that solution.
I like the look of the straps and buckle, but between the button and snaps at the side opening, and that buckle, there's too much stuff going on the sides that I won't be able to manipulate properly. I won't be able to rethread the buckle closed.
I just don't bend that way very well.
 |
| partial tab or full tab? No, this is not up for a vote |
They are very comfortable, but they are very very big. I cut them in the size per the envelope, and I've got a couple of cats worth of space leftover in there (I'd say I have five more inches of ease that I need, and I like em baggy). And that's with half the side panels gathered and pinned in place.
I trimmed the leg seams in about an inch or so before cutting the pattern. I CARVED down the legs on the inside seam after I tried them on. They are still very baggy, but proportionate to the piece. I am thinking I want to cuff them to make them come in a little more at the ankle.
I am going to take out several inches in the hip by cutting out that side seam. I don't know that I will get that topstitching down the side again. I will probably retain a vestigial amount of side tab. Just for grins, maybe with a snap. Probably not.
Meanwhile, I have been wearing them around the house. I have other work to occupy my brain, and doing other things sometimes shakes loose a good solution.
I trimmed the leg seams in about an inch or so before cutting the pattern. I CARVED down the legs on the inside seam after I tried them on. They are still very baggy, but proportionate to the piece. I am thinking I want to cuff them to make them come in a little more at the ankle.
 |
| I changed the pocket significantly. I will make another pair of these and illustrate what I did. Or just make another post showing that with drawings. But not today. |
I am going to take out several inches in the hip by cutting out that side seam. I don't know that I will get that topstitching down the side again. I will probably retain a vestigial amount of side tab. Just for grins, maybe with a snap. Probably not.
Meanwhile, I have been wearing them around the house. I have other work to occupy my brain, and doing other things sometimes shakes loose a good solution.
Or a good enough solution.


