Tuesday, April 30, 2013

Altering pants pattern to fit

I could go on about how to make pants fit you, but Shelley J over at New Vintage Lady has it pretty much figured out.

http://newvintagelady.blogspot.com/2011/05/stout-alteration-tricks-pants-rise-to.html

As for my adventures in pants, 


Textile Studio 1001 basic pants don't fit me out of the box. I have a bit more junk in my trunk than they assume, so I needed to add more fabric down there. So, added a waistband in the back,  giving me almost three inches more depth to the back seam. 

I altered the pattern, and then went at the pants. Luckily, the elastic casing width in the pattern gave me something to work with. 


The back seam moved up.


Waist seam trimmed for band addition (lurking at right)

Sewn and ironed


Matched to front edge and ironed

Edge serged, top and bottom of elastic casing sewn, and finished with a rickrack loop at the back.
And next time, these pants are ready to go out of the envelope...except for the part where I'm moving the side seams forward and changing the pocket and.....

Monday, April 22, 2013

Hats and polka dots


Working on a set of prints at Spoonflower, partly for a pal, partly to replace the polka dot dress I love.


As part of the Pattern Review Pattern Stash contest, I've been doinking around with Vogue 7464, hat B. AKA, Satan's Little Hat. The instructions stink. 


That's where you want to go if you want to make this one. She figured it out, but I have to say the results are still marvelously underwhelming. I used crap felt and a scrap of loved cotton to work it out for myself.


And then I had to try it in cotton with a contrast just for grins.  It's four smallish pieces and about an hour or two once you've got proper instruction (see link above). And even though I never finished the buckram for the cap, it was a fun afternoon.


Noooo, I'm not wearing it. Or the other one. But I learned something, I have an idea for the hat I'm cooking up, and more experiments are coming.

Because this summer, I've got Ring tickets.
And raven fabric.
Pics later.
Pants to sew.

Monday, April 15, 2013

Votre Mode

I am running out of interest in stash busting or pattern following. I've got a Vionnet bug in my bonnet (always do this time of year)

The bodice is going up next. To hell with competitive sewing. I'm itchy for drapy.

At the beppa studio sale this weekend, some buttons, and a 1950's newsprint french fashion mag, Votre Mode. Ooooh! (lala to your taste)  What a treat!

I scanned only the center gatefold plus another page, but this is what summer sewing is going to look like for me.


Shirts shirts shirts! Well, dresses dresses dresses, but with shirt tops. Back sketches in blue next to their color illustrations.


Particularly this one. I'd skip the flappy pockets (tastelessly referred to in my family in the 70's as tit flaps) but I love the double L inset/piping. And a stand collar? Oooh!

Saturday, April 13, 2013

Tony Stark At Home

Taking a brief break from spring break parenting and manic competitive sewing for Pattern Review, I would like to share this photo, from EW this week. Credits on bottom of photo: I do not own it, I'm just borrowing it.


This down home workshop is only missing a couple of PBR's (or a Thermos brand in red plaid) and a less expensive blanket (that Pendleton retails for over $350, I saw it at SewExpo for 80 a yard). 
But the other details are spot on: the stuff hanging on the walls, the light well of the basement shop, the tool chests, the Atlas gloves...and are those baby food jars lower right on the bench?

I see this as the Suit complaining about life at home while Tony keeps working and mumbling "Uh huh, got that right, man"

Ok, back to work.

Wednesday, April 10, 2013

Cleaning up and preparing for the next project

I am not the tidiest person...oh, who am I kidding? Peg Bracken ain't my patron saint for nothin' kids.

I hate housework.

I also hate not being able to find stuff when I'm working, so I do have a tidy ritual with the sewing space.


First, after the project is done, I sew up bias strips. Okay, I cut them out when I was cutting the blouse, but I sew them together at the end. I chain them and then cut them apart


I make the joins all lean the same way (less annoying when in use)
Iron it out
Roll it up on a card or whatever's handy.

Now, in case you think I'm crazy, I use this stuff. I don't waste my time making it into ironed up folded strips, because I'd just be unironing it later. And I use a lot of it for nice accents and a sweet interior detail on a lot of clothes. Sometimes it's a nice way to remember a great project. Sometimes it's what was left when the project was an enormous failure.
The cherries on yellow was  a CLOWN suit, much nicer as bias trim.
The pink with stripes was a nightmare shirt that  was ALL cut for bias
This is a sweet dress for summer and I love having more of it to wear in other things.

I pull the thread FROM THE NEEDLE END (some repair guy gave me great grief about pulling it "backwards") and thread a needle with it. And save it for later.
I clean out the parts I can get at with a huge brush. It really pulls out the fluff and dirt, so I don't worry as much about vacuuming it out.
The usual. Wipe off the throat plate, you know the drill. 

Then I oil it. Take out the needle and run it. Wipe the devil out of it, and let it sit with a piece of something absorbent under the presser foot. And come back tomorrow.

Maybe go read a book....

Sunday, April 7, 2013

Miyake Dress 1309

I love Issey Miyake's Vogue patterns, mostly the ones from the 80's, I think I've made them all. 


1309 seemed a classic, so I bought it and pondered. Going into the Pattern Stash contest, I knew I wouldn't be able to crank it out like I normally can (damn left thumb) but it was a good excuse to make things I've been thinking about.


I knew that I wouldn't fit the tunic as is, so I wanted to make a muslin to check fit points and potential alterations. I also knew I wanted to get rid of the exposed back zipper, and previous Miyake patterns have convinced me that there is always a chance you can lose the zipper.

Above all, it is a legendarily tricky construction, being just three pieces turned this way and that, so a failed tablecloth (loves me that Ikea curtain material!) stepped in for the trial run.

 And yes, it wasn't wide enough, and the armholes are too long. So more muslin piecing, adding about 4" to a size 14 gave me enough to get around the backside of 41".


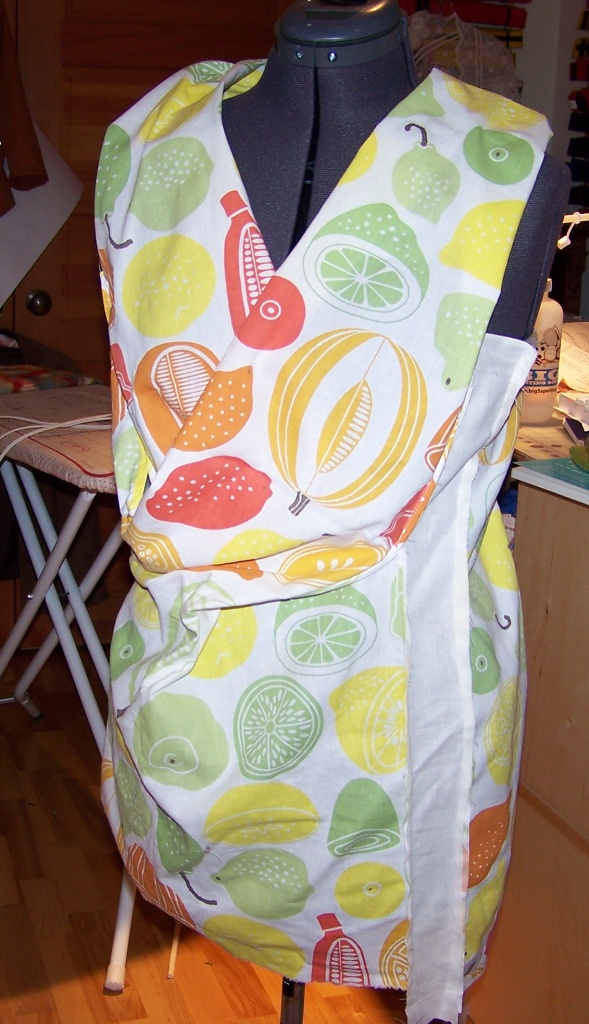
 It's one big piece, sliced up the middle and crossed, with a short right side panel and a long left side panel.


So, armed with knowledge and a sense of "oh, what the hell", I dug out three yards of this cotton hand-painted stuff that just hasn't suited anything up until now. I had to wash it again, because it was so dusty from being moved several times from house to house. I've probably had it longer than I've been married. Which clocks it at 30 years old.
Oi.

I inherited a serger from family, so for this version, I cut out the big pieces and serged the edges. 
Three pieces, serged and ready for marking
I decided to widen the big piece (2" each side) to add the necessary width. I felt the proportions would be better. 

The red line is the alteration in the pattern to shorten it.

I kept the center line pinned to make putting the tape markers on  an easier task
I used masking tape (should have used the blue stuff, easier to remove) to mark the join marks. This way I could really see which were circles or squares, and clearly identify them by their letter codes.

I don't have photos of the part where I cut the center slash and then serged it. Examining the muslin, I didn't think I needed to go the whole bias tape route. I did have to move the tags off the center line, and then there's the part where I forgot to raise the serger bar and ....had to rethread the serger from zero. The actual sewing time for this was under 30 minutes. The total amount of time was probably several hours (there are a lot of marks to transfer to the pieces) (I am really bad at threading the serger. Now I'm very good at it.)

I zigzagged the edges together and pressed them out for the shoulder join


Now the armhole is a good height.
 Only problem is: in widening the big piece, the shoulder pieces are waaaay too wide. They got rolled in and sewn.
The only place you can see the serged center (where I didn't do the bias edging) is on the back of the right side armhole

It even looks better on me! A Miracle!

Taking in excess shoulder width by folding it in and overcasting on the serged  edge

Tacking down center so I don't flash anyone. Also a good cheat as to which side is the front...

Because I will forget which is the right and which is the left...
This works out great, as it is a perfect summer weight dress for overheated me. Camouflaged enough to disguise a lack of undergarments when it turns hot. 

To celebrate, I bought another "new to me" Miyake this week on Ebay!

Wednesday, April 3, 2013

Watching people make things is almost as good as making them...no it's not

Now and then I like to cruise You Tube for sewing and designing links. I am most partial to the TR Platforms videos; pretty much swoopy shots of still photos of amazing stuff on dress forms. Some action vids as well.

I could watch the woman make the  the rolled hem on the Hermes' scarf one over and over again (and I have, often in tears).
And speaking of action shots: did you ever wonder how those rosette forms are made?


Free style draping video (about fifteen minutes)

There is action, suspense, a few heartstopping moments, and a nice resolution. My spouse had to leave the room while I was watching, as I was talking back to the screen ("Oh no! Really? WHAT? Oooooh!"). I had to take a break for coffee in the middle. Where is the popcorn?

I'm not so interested in the completed item; I have an allergy to big shoulders (mine are big enough) and things that make you look a little like an extra from Star Trek. That said, the process is fun to watch.