Showing posts with label pattern. Show all posts

Tuesday, January 24, 2017

Working out the bugs on the gloves

I have been poking at this pattern for years. 

I pick it up about this time of year to poke at it some more.

Bike gloves. This is version four.


I made the three pattern pieces up in three colors to keep the action clear. Further explorations have changed the order of assembly, the sizing of the pieces, and a few bloopers along the way.


And see those little thread bits? Yes, I put the thumb on wrong the first time. And picked it off.


This doesn't work. I need to make the seams for the back first.


And we need more gather on one side for the other fingers.


Ungainly but moving forward.

And it will get a cuff. Cuffs are easy. I can grab a mostly dead sock and cuff this in a heartbeat.

Fit issues. Big hands. Hard to pin fit a glove on the dominant hand with the other one. But we're moving the right direction here.


Scuba fabric?

Tuesday, December 1, 2015

Dignified Pullover Garment: Japanese Nested Patterns

No, I still don't remember where I heard about this book


I am glad that I did order it.


This is the stuff I need


This is the shirt I am going to make.
If you have ever traced off a pattern from a nested page, you know how frustrating it can be. It had better be interesting enough to make the work worthwhile.


The diagram of nested pieces is on pattern page 3, and their relative locations on that page (relative to each other that is). 


The piece shapes are good to know, as it makes it a lot easier to figure out if you traced all of it. Or too much of it.


I do not know what the numbers on the tech drawing refer to. They do not refer to the instructions, which are very very brief.

I don't want to draw on the pattern page, as I will reuse this page and may eventually sell or trade this book. So I want to find a way to indicate where the lines are before I start tracing, so I can see the whole piece beforehand.

After some pondering of household items, my gaze fell on a penny.
I do have a lot of them. They are small, flat, and they stay put.


The pieces are indicated by their pattern letter (L in this case) and a little line to the line you're looking for.


See the rectangle, nested in with the other pieces? I fingertraced and left pennies until I got all the way around.

The letter codes go all the way around the page. So I went around the page clockwise, tracing them one by one. Even the ones I was pretty sure I wasn't going to use.


That's a rectangle, with a rule on one edge ready to go


Some were a little less specific which line. I had to go back to this one to find the piece I was missing at the end.


That's a sleeve


That's a tailor's mark. It's very easy to miss those with that much going on, but I got the ones I needed.


When I was tracing, I used a rule as often as possible, and rolled the paper over the pennies, flicking them out of the way through the paper once I had found the line.


At this point, I would urge anyone who is interested in nested sewing patterns to do a dry fit of the pieces you have traced. They may look like the pieces in the diagram, but this is where I always get 'bit'. The large square piece ended up being two inches too wide to fit. And the whole thing would be a dress in length on me, so I left off cutting out the bands at the bottom.

Most importantly, the sizes do run notoriously small. I cut a large (from previous hard won experience) and my 38" chest just fits comfortably.  I read no japanese to speak of, so the measurement table made no sense to me (largest number was first, then middle, then smallest last. I guessed the largest would probably be the hip. It may have been.)

This is really a lot of work for a pattern. If it's just another shift or a tshirt, I wouldn't bother tracing it out, I'd steal the style features and adapt them to an existing pattern I already have worked up.

The actual sew is very quick, maybe an hour. It's just big pieces that don't have to be lined up precisely, and the interior finishes can all be serged.


left off the bands and the cuffs. I'm short

Next post is the construction and breakdown.


Monday, November 16, 2015

Connect the dots to coat


It is not giving too much away to say that I've been pattern testing. And that involves PDF patterns.


Sometimes there are a lot of size lines all right next to each other, and it's hard for old eyeballs like mine to see which one I'm cutting on.


So I mark them and cut


And then they get too close together


So I spend a little extra time with a colored pencil to make a mark along the line I'm looking for, each time I can identify that line.


and then I just....


And then I will cut out the piece with my paper scissors NOT my fabric scissors.
Cause kids, I am using the used fax paper from work for these things.

I trust you all now know the name of the coat. Oh, did I say coat?


Tuesday, January 13, 2015

Pants Pattern ComParison

I wander around Pinterest now and then, and stumble onto much goodness. I seem to be a visual search person. 

This is much much goodness about pants patterns, written by Dixie DIY in 2012 on her blog. I could repeat it, but she wrote it and researched it. I'm here all week, working on pattern testing; see ya later.


Dixie DIY wrote a great post about this:
http://dixiediy.com/2012/02/decoding-the-derriere-or-have-you-read-the-word-crotch-enough-today.html


Wednesday, November 5, 2014

Cutting A Fashionable Fit Online - a little history lesson

Let's be honest: once a history major, always a history major. 

I'm at my happiest in the stacks at the library, or in this case, with the electronic access materials online.

Cutting A Fashionable Fit

is a 1979 article written for the Smithsonian (where apparently she worked at the time) by Claudia Kidwell. I stumbled on this through my library system, and include the link so you can read it online as well.  

Towards the beginning,  Ms Kidwell clearly states "This paper is not an exhaustive treatise on 
dressmakers' drafting systems." 
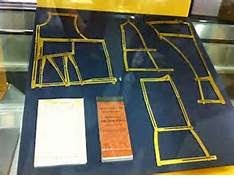
illustration from Cutting A Fashionable Fit

Check out this chart: it couldn't be. It seems that at one point or another, every other sewist in America had their own, patented system for measuring and cutting clothes.

Ms Kidwell is an engaging writer on this topic. She is an archivist and (I suspect) a sewist. What she does in 100 pages (the other 50 or so are her source records, it's that thorough) is give you a cogent history of American dressmaking and the people and the issues at play. 

 Initial reviews of "A History of the Paper Pattern Industry" by Joy Emery have been mixed. I like it, but it is pretty dry going.  Consistent with it's purpose, "Paper Pattern" is built like a dissertation, with summaries at the end of each chapter. Her time span covers the beginnings of the commerically printed paper pattern for the home sewist with Ebenezer Butterick in 1863 and through the 20th century. It should be titled the American Paper Pattern Industry, but it has a lot of ground to cover and a lot of color illustrations to boot. It's not everything I could want, but you read the Kidwell in turn, and you've found your place in the historical turn things have taken with PDF patterns and pattern drafting software.

I requested this from the Seattle Public Library, and just couldn't wait any longer for it. This is my copy.

Worth reading about. And Now I want my own McDowell Pattern Drafting Machine.


Both are a quick read, "Paper Pattern" is probably just a library away

"Fashionable Fit" is just a click at that link at the top.

(waited til the end of the Ebay auction to put this up)
(no, I don't want any more competition than I have already)


Monday, September 22, 2014

Pants Pants Pants Sloper In Progress

I need to post a tutorial about making pants. And it will be free, because knowledge is power. Today I'm thinking about a pants sloper

Add a little ease, a little styling, pockets = pants!

I would take a pair of pants that fit well enough, put one leg inside the other and trace the crotch from them as accurately as possible (marking at waistband front and back).  Cut out that crotch shape  onto a big piece of fabric (old bedsheet, whatever you got to use/lose) as shown below. Mark the front and the back.

The resulting tube should be something you can sit down in without the elastic pulling down in the back and poofing up in the front. You may have to raise the waist to get to this. By the way, this is the hardest part of fitting pants. There will be darts in the front and back sections at the waist. 

You will need to make another leg to match this one, and sew up the crotch and repeat the process. It's not the most fun you've ever had, it helps to have help on this. 

It does beat the ptooey out of starting from scratch. 

I can't help but think that the fit starts at the crotch and works out to the outseam.  I can stand pants that are a little wonky at the sides but they have to fit in the seat and in the stomach or I just can't stand them.

Like so much in life, a work in progress. And now I need to put up or shut up...

Wednesday, September 17, 2014

Grading up vintage patterns: proportion and preservation

It's beautiful! It's everything I want in a dress! It's a vintage 16 and I am...

bigger.


Tanya on Curvy Sewing Collective just covered the basics in a very clear tutorial

photo from Curvy Collective, Tanya http://tanyamaile.com/

But what about smaller pieces with darts and seams and connections to other pieces?

Let's say, a bodice with an angled collar. Like Mail Order 9213


I am going to trace the original pattern piece and cut that piece up, preserving the first one. I can trace and shift, but I get lost and forget where I've traced and shifted, and slicing the pieces gives me a chance to play around with proportions. And I've covered myself in the very likely event I make a hash of it.

The green lines are the ones I can mess with and no real design change will occur. The Red is super caution and the yellow needs thinking about.

The blue lines are sort of a standard bodice slice. Through the bust point vertically and horizontally, at the front edge and through the armsceye. I never want to add all the width at one point. Ever. It will look awful.

I measured myself vs the pattern's size measurements. I am assuming the pattern takes wearing ease into account, and won't get into the precise nitty gritty of fitting ME and MY SPECIAL ISSUES until later.

I need two inches all the way around, checking by my waist and upper bust #s. So, one inch in the whole front bodice; I want to add a half inch to each side of the front.

What I want is to keep the high angle of the collar. I don't want it floating as a little collar in a sea of bodice (which will happen if I just add width through the shoulder seam), and I don't want it suuuuper wide on either sloping angle. So I want to add a little here and a little there.

It is easier to manage adding the width first. Adding the same width to each cut keeps it even. So if I'm adding half an inch to this piece, each cut is 1/4 inch wide to keep things about the same. I tack this down with a little tape (usually there are strips of tracing paper flying around the table for backing purposes) .

Don't draw lines yet.


This is where you can play a little. I don't need adjusting in the armsceye, but I do need a little in the bodice below the bust point (usually I need to shorten this part).  I am NOT doing a bust adjustment in this manuever. I would lengthen by 1/4", but if you know you are a long torso from previous experience, measure yourself and do that deed NOW below the bust point.

If I think the collar has just gotten too small, I can grab it and move it. If I want it smaller, I can cut that section up and move the pieces around WITHIN the boundaries of how big the bodice needs to be.
(this is why I make the copy. I like to play with my toys!)

Redraw lines. The shoulder seam got a little longer, the collar a little longer and deeper.

 Time for one more think over on the v neck collar. I'm going to cheat it down a little in the center. I am a modest gal, but I like the sharp angle at center.

You will, eventually, retrace this on new paper. Move the marks (seam marks, bust point, original darts) to where they should be on the new piece. You should mark the bust point by trying this piece on you. That's when the bust adjustment happens (that is, I don't have one)

Keep in mind that if you add height to any seam, the other piece of that seam (a sleeve, a back bodice) will need to be adjusted similarly. This is where it works to do these pieces at the same time.

On a big table

I did the slide method for the skirt until I realized the waist yoke pieces were getting lost in my wiiiiiiiide new front piece. So there're a whole set of frankenpattern photos that follow this one. I'll just keep that to myself.

It is easier to make mistakes on paper than fabric. You will make a few truly huge boneheaded errors, from which you will become brilliant.