Showing posts with label vintage patterns. Show all posts

Wednesday, May 5, 2021

Girl stuff i don't know how to do: Sleevy Shawl

Things I cannot do:

 High heels

Makeup

Scarves

 I'm looking at this pattern and thinking the reason why it doesn't work for me is that I'm not a shawl or scarf wearer. If I were accomplished or even familiar with wearing a shawl, the one sleeved shawl would make sense and I could make it work. I could put it on and make it stay.

How do you people do that?


https://www.decadesofstyle.com/collections/1950s-sewing-patterns/products/5006-1950s-stole
I have every sewing ambition there is or can be.
More aspirational than accomplished I think; the title slapdash sewist was already taken.
I spend a lot of time making little models and thinking about shapes.
And after seeing Julie's Jet Set Sewing version, 
https://jetsetsewing.com/2018/03/25/oscars-report-get-a-snack-its-a-long-post-and-daniel-day-lewis-sewing-blog/

I wanted to play with this.


This is an issue. It is important, and appreciated.


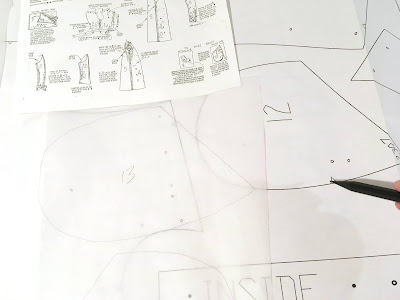
I am not giving anything away by showing you this picture. As with most vintage patterns, the pieces mean nothing. Look at the photos: it's a sleeve with wrapping parts and a secret pocket.
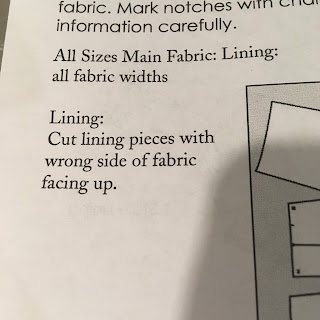
The instructions are the gold.


And we are going to remind you, in a different typeface: don't make the mistakes your forebears did on Pattern Review. 

There was a tissue fit with the full size piece. It was....I'm short. 
The sleeve was the height of my torso.
It's a midriff baring wrap for her. 
It's an entire torso and change for me.
I'm really short apparently, because what's left is HALF the size.

There are no finished photos. It turned into something entirely different, because it was huge and I just can't throw that one end over my shoulder to the back and THEN bring that other end to the front.
There might have been a bit of ripping.
Maybe.
(there was a lot)

Sunday, September 20, 2020

Scale Model Fun / Single Layer Layout / In Praise of Tracing

This is an adorable video by Seamwork, and it beautifully illustrates working with scale model pattern pieces. 
image from Seamwork video
https://youtu.be/Tb_AyBwGTKs

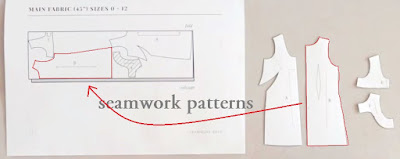
On the instruction sheets of most patterns, there's an image of pattern pieces laid out on the fabric, to show you potential pattern pieces laid out for cutting.
Why, there's an example in the video at the beginning.
image from seamwork video
I outlined in this image; you can scan and enlarge and print similar from any pattern instructions sheet. You can make them as big as you need to. They will not be exact, but they will be in proportion to each other, and that's what you need.

You can use those scale model pieces in other ways.

BWAHAHAHAHAHA
hemlock vintage clothing


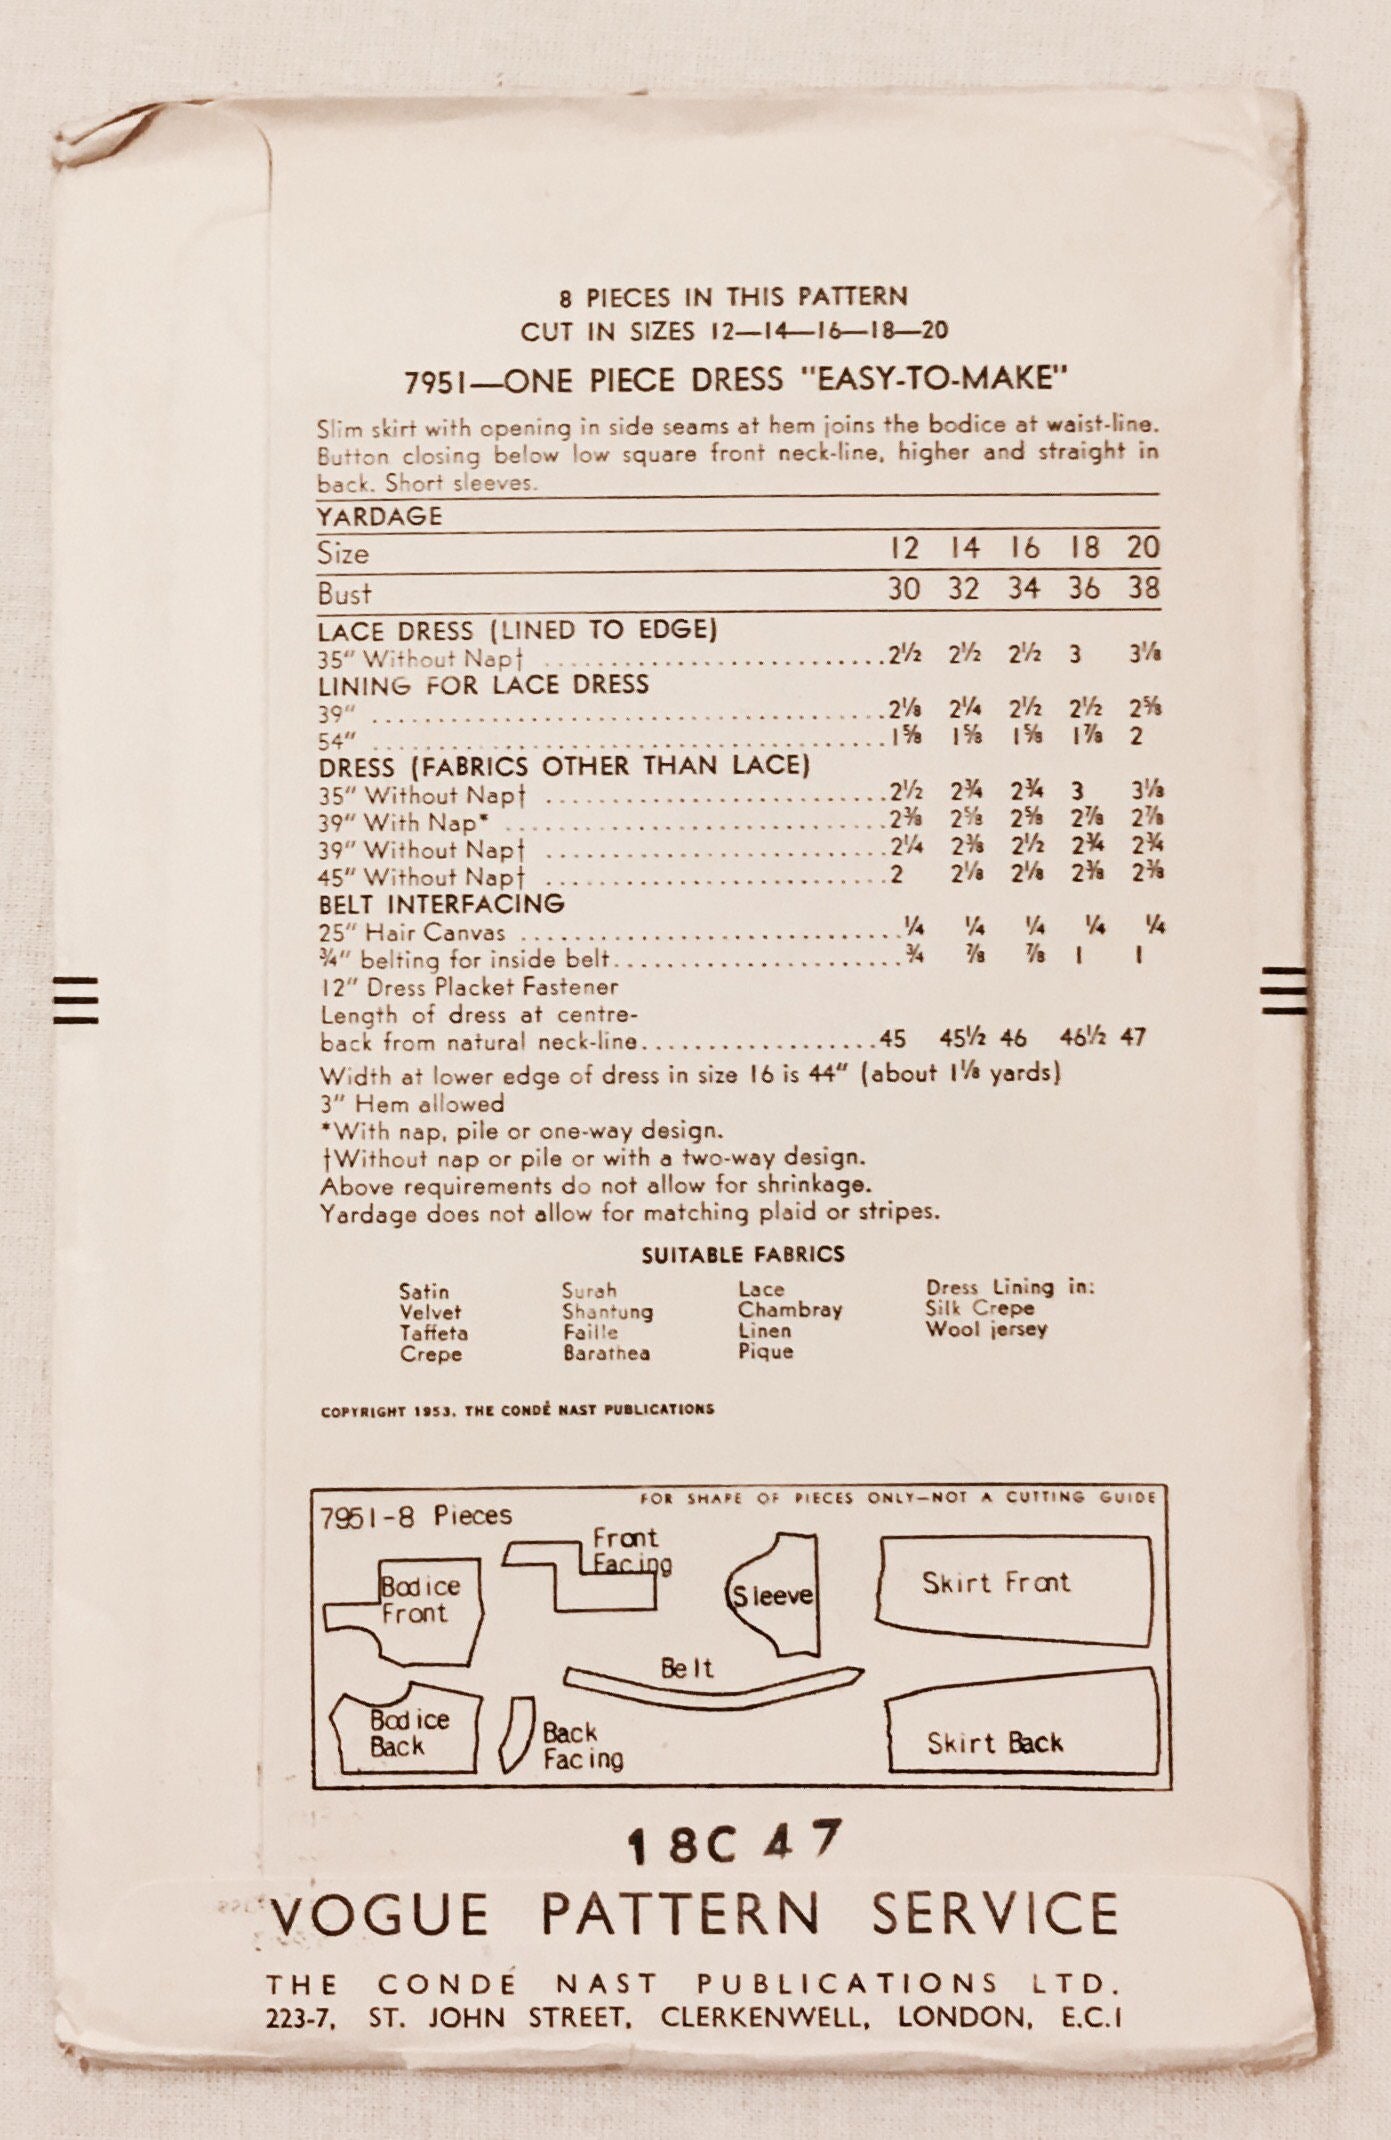
I love the back covers of vintage patterns for the preview drawing of the pattern pieces, for the very same reasons.

I can use the scale model pieces (sized up on the scanner/printer) to make a model of something I just can't see from the flat pieces. This is particularly useful in hat making, where it can be hard to see how you get from the flat shape to the three dimensional product.
yes, the wrong side of the paper will show with the pattern piece. 

This is necessary fun for me because, all too often, the pattern is one I can never afford or find a copy of. Sometimes this little paper model is the closest I will get to it.

This is enough information to make one of these

As for trying different layouts, I'm a big believer in single layer cutting.
Nancy has other ideas.

http://www.nancyzieman.com/blog/sewing-2/absolutely-easiest-way-to-layout-sewing-patterns/
This is now a Zieman stan account. Deal.

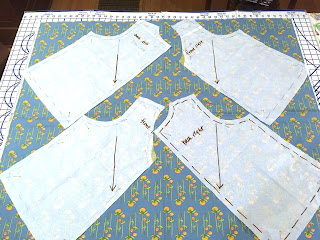
I have learned the hard way that it's easier to lay out a pattern on a single layer of fabric and not give yourself headlights, match designs, AND save fabric. Yes, tracing the 'cut two' pieces takes time and paper, but that's why we get the local newspaper.

I made one pattern piece for each piece. I also run the pattern edges off the sides at the corners, which would get cut off anyway. Facings are cut from different fabric - I need that fabric in the middle for the matching mask!
This was laid out on one yard. One precious special yard.
This is an actual shirt i just finished.  I am wearing it RIGHT NOW Yes, I am sewing. Just not telling.
Next to Philip Lynott, at work. The mask was in the wash.

You will want to trace your 'altered to fit you/final version' pattern.  You are committing to this version of this pattern for this fabric. You can cut it all up later on, but TRUST ME just do the deed now. If we're going to be thoughtful about fabric, we're going to trust the process. And you can see on that bias layout above that I run those pieces up to the edge and a little over. If I had to go back and add something, I'd be....really out of luck.

So, you take the one piece (let's call it Bob left back) and lay it out on the paper. And trace it. Pen, pencil, tracing wheel, whatever works.
And here's the kicker: when you're done, cut it out, flip it over so it's the reverse of the original AND MARK THAT SIDE accordingly: Bob, right back. The mirror of Bob, left back. Do it now before you forget. Also date your tracings and mark the seam allowances and pattern notches.

If this piece is one half of a piece cut on the fold, join it up right on the foldline. If you're splitting it into two pieces for a seamline, remember to add a seam allowance.

 I am the queen of forgetting the seam allowances.
I mark the grainline and the direction I want the pieces to go if this is meant to go on the bias*. I WILL FORGET. I will also add indicator marks at seams if I'm trying to match the print across the seam. Eventualluy I end up tracing a new copy because the old one has too many matching marks or lines on it.
It's quite a packed little video, and I hope they spend more time with all the ideas they raised.
-------------------
*reasons for this at https://erniekdesigns.blogspot.com/2019/08/bias-theory-with-flaming-skulls.html

Saturday, March 9, 2019

More round hats and SewExpo 2019

I genuinely hate driving in traffic, and any excuse for public transit I will seize upon.
So I took the bus to the train to the bus to SewExpo.

You have to click on this to see the action 


I stalked Bernina presser feet.


I visited the booth where I bought my hat's fabric


I took two classes.

Peggy Sayers of Silhouette Patterns didn't have a booth this year, she was just here to give a couple of presentations. Her presentation on sleeves hewed to the "if you have a blouse that fits you, that's the sleeve/armhole you want to use". Her key measurement is the arm circumference of your favorite blouse/top. 
 Let's give Peggy the chance to tell you herself. This is essentially the lecture she gave. It's a great idea, and saves you a lot of redrafting and messing around.
These machine knit blankets are about ten feet high.

The loveliest bias hem on a Kalle blouse

with a very charming sew in tag.

I bought these from Drygoods. I've never been in their Seattle shop. Silly me.

I got this stunning pendant from Rusty Crow. The needle and the button are separate items.

Pattern coming soon!

It was not one of Ms Ruddy's better days.
 That said, she answered all the questions the audience had. There was time/room location/topic confusion and she had about a minute to change her presentation. No harm done.

A magnetic pincatcher /cup on a plastic snap bracelet. I will show you how to make one of these later this month, from stuff you already own, sometime in the March edition of Tips and Tools. I just need to buy another chocolate milk bottle that has the cap that works best for this.

I found the motherlode of vintage stuff.
More halo prim button covers and some crazy snap strap buttons


The hat pattern that Peter Lappin made famous and a demented Simplicity uplighting pattern with a cowl pattern you know I'm going to take a swing at.
And the pattern on the left is going to be my spring regrade project. The right, we'll get to that later. 
There is no trip to Puyallup without a scone. Skipped the jam this time. Mmmmmm.

I didnt' wait for the train to go home, so took the express bus back. HOV lanes are my friend.
Yes, they put the Sound Transit map in woven upholstery on the seats.
WANT.

Saturday, September 15, 2018

Reproducing Past Patterns Butterick #2307


 http://www.pastpatterns.com/2307.html

Does this look at all familiar?
No. Slight resemblance on the style lines, but... no.

I've had the Butterick for years. And pulled it out thinking it was older and wouldn't it be nice to wear a repro of a Great War dress for a lecture on said subject , regarding the 100th anniversary?
Well, no. It's 20s.
The 1916/1919 dates on the pattern are for the trademarks and patents for the company.
https://www.vintagestitching.com/pages/dating-vintage-patterns 
if you want to read a little on the madness of this subject.

Past patterns says this is from 1923.24, and while I think it's older than that, I have no proof and defer to Ms Altman's knowledge base and collection.
Mostly, I want to know what sorts of fabrics this would have been made from , and get some comparative images to work from. The drawings are lovely, but I want mooooore.


I traced some of it, I cut a lot of it.


Quite rightly, I let this sit for a week. And then I cut out a toile from fabric I don't give a damn about
The center piece is the lapel and the curved flange (that would cover the welted pocket opening in the dress body. A dress with pockets is a win!).


SEAMS!!! 
As with the patterns of the time, the instructions are pretty light on the ground. Handlettered to boot. This is one company where there's definitely a house style and one draftsperson's hand present.

Considering how 'vaguely precise' some of the instructions are, I feel that I am giving nothing away by reproducing them here. While we learn a lot about the sleeves and making tailor's tacks, there's still so much missing in how to address that long long open seam allowance around the neck and center. Not to mention any lining for that vest front that would finish the outside seam that runs around the cut-on collar (it's got to flex as the undercollar, and be visible at the flange). Still some mysteries.


I love that you "arrange dress on lining". It's just a bodice lining, which has a smaller profile than the dress. By attaching the sack vest outside to the fitted bodice, you could bring in and anchor the larger pieces by their seam allowances without apparent seaming. Which would be covered up by that narrow added belt (that belt is hot stuff in 1918, believe me)
And aren't the handdrawn numbers lovely?

From the excellent ""Witness2fashion.wordpress" webpage: fashions for July 1918.
Second Battle of the Marne that summer. People say the war is practically won with the arrival of the Americans, but it's not over yet.
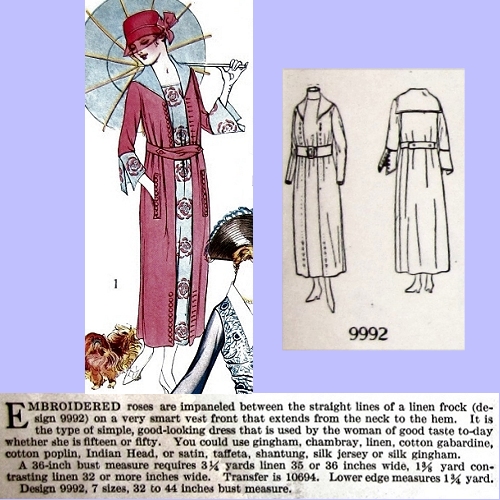
https://witness2fashion.wordpress.com/2016/08/10/summer-dresses-from-butterick-july-1918-part-1/
This vest front Butterick 9992 strikes me as similar enough to give me a good idea as to materials.
And how do I close that front up?
http://www.extantgowns.com/2011/12/edwardian-jumper-dress.html
I know it's not the same style, but it's roughly the same era, so techniques would be similar. 
See that dark grey line up the back facing? It's all small hooks to close it up
I added two inches to the armscye and the sleeve. I have two extra inches of sleeve in that armscye. I could not take photos of me in it as it's just too tight in the shoulders to move. It is super fitted, after adding inches and inches and inches. And I already have a moulage that fits like a glove (The term literally means “molding” or “casting”)

But I am going to cut this short: I had a major fitting fail and a lack of love has set in.
The armscye was too small, now it's just not in the right spot because the back was too narrow and the neckline too high. A 1918 38" chest is not a 2018 38" chest.
Which makes me grateful I made this out of stuff I do not give a damn about; I won't try to cobble it into something wearable. 

Basically, I am better off if I transfer style ideas and details to an existing similar sloper that fits me. A tube that already fits me. I can chase this armscye  location around for a week, or I can draft this vest front onto an existing pattern. Or I can take a break from this and work on something successful to break this downer I'm on.
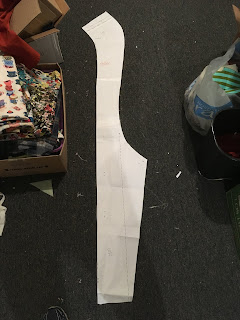


The vest front that makes the dress.

I trimmed the super wide part a bit, and shortened it by an inch between the collar and the lower flange

So I am going to mark the pieces as to what needs to happen, add the toile as it is to the package, and set it aside in the UFO pile for later.

I learned the word 'enbiggening' from G Willow Wilson's Ms Marvel.
You learn stuff from comics.

Because I need a win here. The lecture isn't until October.

And Hammer Pants are calling from 1991.
Which would be cooler if they were 1988, but....