McCall's 7910 on the left is the pattern we went with for the bridal jumpsuit, and the right photos are the inspiration pics that drove the fabric decisions.
There was pattern alteration and tissue tracing fun
Remember the phrase "the wrinkles point the way"? We're going to come back to that.
I am made the toile in a pink ponte that I didn't want anyone to fall in love with. I wanted to make mistakes and take chances with this.
Trying it on with the seams on the outside really helps.
Wedding jumpsuit
First try on was way too long in the waist and neckline needed rethink. She is alllll legs.
I sewed other things to break things up: I made another Closet Core Kalle because I can make that placket in my sleep, I need to be reminded I know something about sewing here and here's a burrito yoke photo
 |
| Spoonyflower coffee cup fabric in cotton sateen. Mmmmmm |
Back to the knit
Second fitting for this jumpsuit. The first one was a 'so do ya think this is going to work' (also had to see if we needed a side zip and yes we do) and 'is this what you wanted and what else do you want?'
She wants it fitted through the thighs, swooshy at the legs. She's the boss.
There are terrible photos but they let me see what I could not see when my beloved goddaughter was standing in front of me. Looking at the photos here, it's obvious where we need to go. Space and time to think.
hoiked way up in the front
hoiked up back view
Now, I know the back is fine without being adjusted, pulling them up looks terrible; it's the front that has the trouble. there's too much in the crotch point, even after shaving some off. The next set of changes include adding a stable lining for the bodice to support the pants at a stable waistline.
When I get stuck, I have a couple places I go to on the internet: this one is for pants
https://5outof4.com/pants-fitting-guide/
This is a pretty comprehensive 'photo shows problem, diagram solves problem' run down of what can go wrong and how to fix it.
This not related photo that illustrates the point that the wrinkles point to the problem: there's not enough fabric in the armscye for the fella to raise his arm. this is an exaggeration of the problem, but it illustrated the problem to the tailors that it's bad enough and he needs a remake of the sport jacket, because this is just too tight. He's not lifting boxes, but this jacket will not fit over a thin sweater, not even a shirt with sleeves.
For videos, Style Sew Me does a nice job
https://youtu.be/1gsHHK5TlEw
has a nice set of action shots (you have to smooth and reshape that seam as you sew) and some nice advice.
I would undo the seam , baste it, check it and then stitch it, because my problem is not equally distributed front and back (and probably no one's is)
Baste and check before you cut.
And don't be afraid to put fabric back on if you're making a toile.
Spent a lot of time second guessing Recut, resewn, recut in final fabric.
Better (also has elastic in waist)
It took me an entire afternoon to get this result, and a lot of mis-makes. Making the loops on the ribbon gave me my best results, but a whole lotta other folks would say differently.
This was a mistake. Pressing and putting the steam board over it was smart. leaving it on the ironing board overnight was a big error. The side seam pooched out to a bigger curve than it needed to be, so the side hip has a little bag to it. Bride is going to steam it back flatter, which should work. Still, a rookie mistake!
Clipped out excess in hem seam, used random pressing aide to hold steam in to set the crease.
So much to sew through at the side and so hard to get it all to line up. Ponte knit is heavy and wants to fall on the floor and pull out of my hands.
I was very concerned with making sure the side seam for the zipper lined up at the waist seam and the top edge, and there was a lot of basting and swearing and the usual poor vocabulary exercising. It's like a white on white on white sandwich.
Basted the zip seam closed to add the zipper,
I did this about fortybillion times.
Made a sash of the lace and poly organza.
Sewed all ten feet of it, turned it, pressed it
Handstitched motifs to secure to the back at about one in the morning because I forgot I hadn't finished it.
Bodice to pants, and this time I pull out the pins before I sew over them.
that's fancy sewing here.
this is as long as I can get the stitches to go.
Plushy elastic on waist gets little ribbon ends
Missing: photo of entirely hand inserted zipper. Gaaaaaah.
SUPER fancy sewing
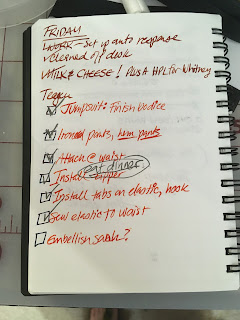
I make checklists for any day or process that has more than two steps, so I won't forget something.
I did not embellish the sash: I was too damn tired.
And Whitney doesn't read this blog so she won't know I snagged a lil Lovecraft for her.
Finished photo of jumpsuit? No. Too tired to think of it.


No comments:
Post a Comment
Thanks for reading! I love your comments, I love your ideas, I love your recipes, but if you post links to advertising, I will delete your comment.