Monday, May 29, 2017

Shark Quilt

 This is a project I've pondered forever, but it wasn't until a trip to Joanns awhile ago that it bore fruit.
Cause we all know how much I love novelty prints.

Fleece 

Quilting cottons (pretty rough quality)


Of course, when I went back all they had was the fleece, so I had to go online and search for them. It amuses me that I can buy something on their website from the very same store I was just in, something that wasn't on the floor and the staff swore they had never seen.
Okay, I know, working at Joanns can suck the fun out of you. But really? You had all this.
Anyway, online works. Ebay helped. I got a few other pieces, for five prints altogether.

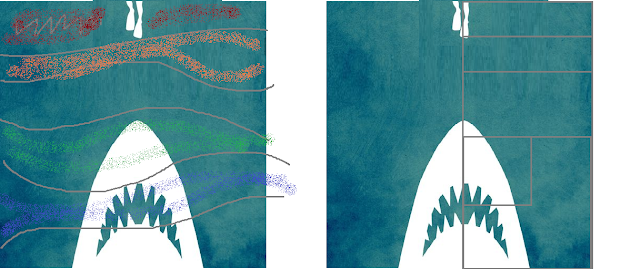
And to break down the whole thing into a simple motif, I went looking for the original poster and instead found this:


Not available on their website anymore, but all visible on their Pinterest


sketched it up a little, redid proportions


reduced it to black and white, put a grid on it in Paint (then did a screenshot to capture grid)

From there, it's just enlarging using the grid system, just like I learned in high school.

Mostly I just sketched it while staring at the grid.  
made a big template

traced it

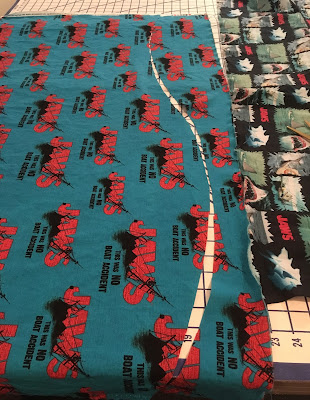
assembled the base 'waves'

Oh good god it's crooked. Well, it's crooked for good.


You can see where this is going.

I am going to edge and back it with the fleece and my niece will finally get that Jaws lap quilt I threatened promised her. Should be done this week.

I am working on a longer post about one piece pants, but it needs more photos and more thinking. 

And things are going to slow down sewing wise because I have a big cat to feed at work.

Where every day is Caturday

Sunday, May 21, 2017

Raincoat Is Mostly Done (mug shot edition)

It's not going to rain for awhile.
I just look sooooo excited, don't I? Flattering angle, great lighting, happy face...

Which is good, because I need to put this aside for awhile. It needs more than I can give it right now. It's sucked the fun out of me.

I do think this raincoat has a lot of promise. 

It fits. It fits over my enormous sweatshirt and the big sleeved Miyake shirts. It covers my backside. The sleeves are long enough and I can raise my arm. I put in useful pockets at just the right points.
It will take a very rainy day. It has reflective bits and a visible print. The hood will stay up but the jacket isn't hanging from my head.

It just took so long to get here. Every step has taken a day of thinking and rethinking; I'm running out of time before I'm working full time and have 'pace around and change my mind' time.

And I need that 'pace around' time for the big projects.

I did not cut these pieces out. I redrafted them. Twice. But I did start with that McCall's jacket (ended up raising the sleeve angle so it was more straight across)

See, the shoulder seam has less of a slope to it now

When I got it on the table, it was offgrain, but what isn't these days?

Fabric Fusion won the seam sealing contest

The nylon can be ironed.  And if it had a weight on it overnight, it would stay pressed. Mostly.

Mostly.

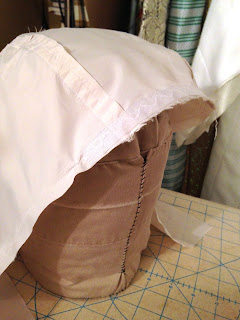
I put a little horsehair braid in the seam at the front of the hood. That hood needs more overhang at the forehead.

Things did not line up perfectly, but I didn't expect them to. Four foot rule.


Numerous zippers: side hem seam. Put that curved line down at the bottom and the side rather than the top center of the coat. At least I don't have to look at it all the time.

Outside welt pocket. Got most of the puckers out.

Inside pockets with zippers pointing the right way for easy access. This is one point where I learned from the mistakes on other coats. Also learned from the black coat: I put mesh in the sleeves and shoulders; it's a nice slippery one that won't get hung up on shirts, and isn't sticky or clammy on bare shoulders and arms.


I wrote out directions, I made construction notes. I  worked stuff out ahead of time. There were a lot of layers to think about.
I even added a thin mesh layer in the body, to give it a little more substance. Which will make it more wearable in the long run.

I drafted a pattern from patterns, I made the pieces fit, I tested it numerous times, I'm pleased with the IDEA of the coat, and I will wear it. 

I wear that black raincoat, for example. It has its charms.

I do have to add the front zipper and the placket flap, and the hood is going to need a visor. I can pull it over to cover my forehead, but it won't stay.  So kids, that Oregon hood needs an extension on the front center.

But the seams are puckery. I undid a lot of them and redid them, but there's still a incompatible materials tension/stretch issue there. The Bernina badly needs a tune up, which does not help the matter.

The curved hem on the upper sleeve piece needs a facing for it. And I just got...tired and used bias tape. I can go back and redo that properly....but not today.
Once you see the rippled hem, you will never unsee the rippled hem

There are about eleventy billion things I can identify on this that don't work very well. The fabric is charming but it's not raincoat material; it would make a helluva set of tote bags. 

But it is one thing I like: it's not anything for a funeral.

Although the expression on my face implies that I am going somewhere unpleasant, I am not

I will finish it and wear it and refine the pattern further.

Because I did cut a winter lining for one. Because I am really tired of that damn purple coat. Wearing a school color in a university town is tiring. And I graduated from there. So did the spouse. And the boss. And all the friends. Because UW Daily RAWKS. 
But I live a mile from it.
When I am old, I won't wear purple.

I do not look upset with this

And I quilted it.

So this will continue. I just need a break for now.
I have novelty print pants to sew. 
Lucky for you, I can't find the photos right now.

Monday, May 15, 2017

Glue - Because You Should Test On The Material You Are Using Before You Ruin It


To be honest, I dated in the horn section

I use a lot of glues for different things and I think a lot of them are made of the same thing,  just rebranded to sell to different audiences.

While I can state the properties that I think these glues have, and the uses I put them to, I cannot list the specific ingredients in these products. 

Ingredients in glues and paints and a whole lotta stuff you don't put in your mouth are listed as trade secrets and don't have to be identified on the product's label.


I can go on and on about safety and contents*, but my immediate concern is this damn raincoat, and sealing seams/gluing seams down.
Clamping down seams with the items at hand. Tums love Too Much Coffee Woman

Nylon fabric doesn't like the same glues that other, more porous fabrics have liked.


Without pressure, Tear Mender dried nice and flat and Stop Fraying made the seam curl on the 

rubbery Yaya Han 4-Way Jumbo Stretch Matte Fabric. Different results on coated nylon later 


Anyway, I have seams to seal and seams to stick down.
Here are your contestants!
Fabric Fuse by ThermoWeb, Loctite Vinyl, Foamies Glue by Darice, Aleene's Fabric Fusion, Quick Dry Fabric Fusion, Stop Fraying, Flexible Stretchable, Beacon's Fabri-Tac, Tear Mender. Not shown: Tiger Bond.

We will divide them into two groups:
Stinky and NonStinky
Stinky:
Loctite Vinyl, FabricTac, QuickDry Fabric Fusion

Nonstinky
 (that is, no obvious flammable or brain shrinking solvents)
 Foamies, 
Aleene's Fabric Fusion, Flexible Stretchable and Stop Fraying
 Fabric Fuse
Tear Mender
Tiger Bond

I do use permanent tapes (Peel n Stick by ThermoWeb  and
Glue DotsTM) but I need to be able to topstitch and seal, and tape won't do that job this time. Both will hold slick fabrics well enough but really cannot be washed with confidence. PeelnStick has migrated from time to time, so I use it for bags. Glue Dots will hold stuff with a tooth to it, they will hold fabric to paper if you use enough pressure to grind it in. 

Foamies works for foam. It takes forever to dry, and you need to make sure it's mixed well. Shake or cry: it will run otherwise and not set up. I have my doubts about the strong and permanent claim, but it does not melt craft foam and when that's what you need, that's what you use.  Pals use it on felt. It did not work for me.

Fabric Fuse is made by the ThermoWeb family, and I can find no contents or safety sheet listings. Yet. Same deal: shake it or cry. It's easily spread, you do want to put pressure on it to get good contact.

Fabric Fusion is a Water-Based Polyurethane Adhesive, and a member of the Aleene glue family. Dries clear, won't run. The safety sheet is exciting reading
The Flexible Version is, I think, exactly the same product. It works just like it.
The Quick Dry Fabric Fusion version is NOT the same product. It is very stinky, flammable and stringy. "Extinguish all flames and pilot lights, and turn off stoves, heaters, electric motors, and other sources of ignition during use and until all vapors are gone." 
Oh yeah. That stinky.

Fun note: Blick Art Supplies links to their MSDS (material safety data sheet) on their product pages. Dharma Trading has one big page.
Mail order companies will usually have data sheets, as some things can't be shipped and state laws on contents vary.

Tear Mender is sold at outdoor stores with the intent that you can use it to mend outdoor gear. Based on natural latex, as long as you keep treat it like rubber cement (coat both sides lightly and join), it works pretty well.It takes a few days to dry entirely (it sets up but still is rubbery-tacky on the surface. Like Tiger Bond, it will separate in the tube so always shake it.  And like rubber cement: once dry, cleaning it up by rubbing it off often pulls it out from where it's holding stuff together. It likes to stick to itself better than anything else.

Tiger Bond is the favorite of many pals, go read the reviews online. I can't get this sucker to mix for me in the tube, and it separates and runs and makes a mess and doesn't work. But Emily SWEARS this is the bomb, and it is not stinky, so I'm keeping it in here. Best practice is shake the tube like crazy before you open it, test the mix on a scrap of paper, then lightly coat one side, then the other,  and then stick together. And wait.
People use this for rhinestones. That must be some serious glue action.

Fabri Tac is recommended for glueing rhinestones. It melted the backs of the plastic 'gems' on a prop a year back. Didn't just remove the shiny paint, it liquified them and took over a month to solidify. And stank up the joint in the meantime; it had to go live on the back porch. The faking of that prop was sad and pathetic. Sorry Kayla. I ruined your jar.

Loctite is a clear Isocyanate terminated polyurethane in Methyl ethyl ketone. Which roughly means: It's not good for you. Polyurethane is a great marine grade coating, in this case in a solvent that destroys brain cells fast. Get immediate medical attention, rinse with water...no. It works, it strings and spreads, but you don't need that level of adhesion to seal seams in a raincoat. Because of the solvent, it does dry fast, but I would really not ever use this to mend a tent you slept in any time soon.
-------------------------------------
This is the test: the orange is two strips of coated nylon rainwear. The white is a poly cotton lining. The card is spare heavyweight scrap drawing board. I wrote in pen over the samples after they were dry enough.


All of these did the job I asked: they held the coated nylon pieces together 

Loctite: stinky, stringy, leveled well. Stayed stinky after dry.

QuickDry Fabric Fusion was stinky and made annoying web glue strings like airplane cement. It made a proper mess of itself and runs faster than Fabric Fusion.

Stop Fray had a nice sheen and smooth finish, Spread a little better than I would have liked right out of the bottle. Stuck on paper, fabric and nylon. Works well with a brush.

Fabric Fusion glued better to the nylon than the paper, made a nice bead on the seam when I used the tiny applicator tip I had on hand. 

Tear Mender, Foamies and FabriTac did not hold nylon to nylon when pulled on (and Tear Mender and Foamies still aren't dry after three days....guessing they need more air than they are getting in a coated nylon sandwich)


I have a lot of Stop Fray, in various bottles and sizes, and it's always been my "I guess it will work" craft glue. It won't form a bead (it's thin and self leveling) so it needs a brush and quick brushwork. It does fill holes nicely, dries clear and flexible in a thin sheet. The spreading part works for seam sealing better than glueing. It cleans up well.

Stop Fray wins for the seam sealing. Fusion for gluing the seams.

Now back to that blue fabric test: it proves why you should always test on the material you're using: 
Tear Mender worked better on that knit backed 4way rubbery stretch than Stop Fray. The SF curled up the seam and got crunchy and stiff. It may have had more to do with how wet the SF went on and it might have soaked in to that stretchy knit backing, vs the Tear Mender just riding on the surface. 

And how would I suggest application?
Seattle Art is long long gone. I keep my tools clean, thank you.
One thing I dislike about Aleene's glue is the tip on the spout of their bottles. You can't trim it down small enough to get a good bead of glue coming out unless you open a teeny hole with a hot tool. I have had some luck by transferring glue into a big plastic dental irrigation syringe, or a small bottle with a 'gutta' tip (gutta being a resist you apply to fabric you are dyeing).  The syringe has the benefit of being easier to clean (just suck up soapy water and squirt it out a couple times)
That baby will get you the tiny flow you need. Unpaid link as ever. They also sell the bottles.
It's easier work with the right tools
Action shot

Sometimes its easier to squeeze a bottle than a syringe. 
As long as you clean it out with a pin or a toothpick and soapy water right away when you're done, you're good. Or toss the parts in a jar with soapy water and give them a shake. That should hold them. Aleenes will not set under water.

Even with the seams I still have to do, this coat will still get a workout, even this late in the season


----------------------------------------------------------------------------
*Safety Soapbox

*Bless California and their stricter safety regs for making that information less opaque to you and I, at least for known carcinogens

I worked in several workshops over the years, and am really really vocal about shop safety and proper use and disposal. When you don't know what is in something you use every day, you grow understandably paranoid.

(The mystery 55 gallon drums didn't help. The OSHA guys suited up into their HAZMAT suits before they walked into my work area at that shop space. I wore a lab coat over a vintage party dress, like the rest of my coworkers.)

I have probably inhaled so much toluene from 'just a quick shot of spray paint' that my IQ  is surely lower and I am clearly stupider.
I have inhaled enough dust (chalk, clay, wood, plastic) that I have the rough equivalent of stress related asthma. 
I have a metal contact allergy now. The earrings and watch are gone, and my wedding ring is lined with rhodium (which somehow I don't react with). I was wearing an 'O' ring

So when you're filing down that little thing with a nail file, do yourself a solid and clean up the dust with a vacumn, and wear a dust mask or a bandana. Don't put your fingers on a substance and touch your skin without cleaning them off first. Don't lick the brush and then stick in the paint. If it smells bad, don't breathe it.
You can thank me in twenty years.

Sunday, May 7, 2017

Big a** prints - dealing with large print repeats

Big pattern repeats can hurt you.

My best practice is to trace another pattern piece, open out the fabric on the largest surface possible (that's not the floor, too old for that shit)
and start playing.

Good to have a marker to start at (see that red marker? That's where the pieces line up, on a lateral red line on the bust point level);
may I recommend the bust point, to keep any headlight effects away?
And it's friend, the butt point?
(sorry, no successful photos but you get the idea)
Tracing paper is great for auditioning this problem.

Some examples from the archives:

Getting the tassle to line up on that panel on this Miyake shirt required running the print crossways, and ate up yardage. Lucking I could use the spaces inbetween for the collar and the facings, things that don't need a motif or you can't see.


upper right corner is the back piece on the fold
I was running really short on Preciousssss yardage, so my biggest concern was cramming it all onto the fabric. But the big palm would work well on the back.
Upper back piece with motif centered mostly.
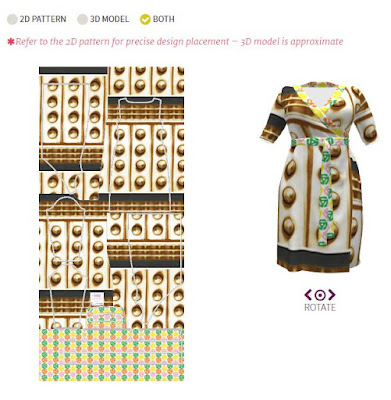
For the Dalek 5th  Avenue in 2016, I  sized the design on Spoonflower to fit my skirt pattern piece. I believe is this one of the great uses for Spoonflower printing; once I get the design honed, I can resize to fit my needs.

BTW, this process has gotten better since I did this

The world of upholstery has this one figured out

from http://carrscorner.com/repeatadjustment.php


This is kind of a blunt instrument. Upholstery doesn't use the bits inbetween to fill in pieces (those useful facings) and they don't piece stuff to fudge it, so there is definitely room for improvement in this chart. But you get the general idea. I'm geek enough to want to spend more time figuring out an estimator for yardage more complex than "Buy too damn much".

But so far on this coat, twice the amount is just going to squeak through. It's an 8 inch grid. 
And it's not on grain. The grid's not even entirely square.
(wails a heartbroken and pathetic wail)
And did I mention it was translucent?


I used that red line to try to match up the pieces that would need lining up. A big grid pattern is going to scream YOU SCREWED UP if I don't try to line them up. So I laid out all the fabric (the big piece on the floor is folded lengthwise as it has the larger pieces on it) and walked back and forth and back and forth, adjusting and measuring. The piece on the table is laid out single layer, and this isn't the final layout. I traced more pieces, because it became apparent that I was going to need almost every inch of this yardage (I had about a square foot leftover). And paper is still cheaper than fabric, and easier to mend with tape.

But I did cut.
aiiiiiiieeeeeeeee

and there's been sewing too. For terrifying real time updates, I'm instagram'ing. See that link tab up there?
Next week: glue sealing seams.
(which are drying as I type this)