Oh, the stripey bias goodness of this!
 |
| Look at version 1! It's bias, it's green, it's stripey! And check out those groovy pockets! I don't care what they say about you, Advance 4906! I love you! |
I hunted it down on Ebay, and the sketch above gives an idea of my cracking it apart, trying to figure out where I can alter a size 14 to meet my size...18? self without destroying what makes it special to me.
This is a problem. You know where it says in those pattern instructions: No Provision For Above/Below Waist Alterations? And immediately I have to start messing around with that? You can destroy the design points by altering without caution, and I have chopped many a pattern in that act. Now I remember to trace the pattern before I go to town on it, but I am clearly a work in progress still.
As my dad used to sing "Should have read that detour sign"...
My normal alteration route is to widen and shorten the bodice for my blocky torso. If I do that here, I will lose that nifty 45 degree angle on the bodice/sleeve junction, or make the bodice too tall. I need to go into the side seam; if the sleeve/bodice junction were to run into the armpit, it would just make a bigger sleeve opening, and that's cool with me. And if I need to add a dart, it would....well, I like to call it the NBA, or No Bust Adjustment, as I have no bust.
I spent a couple weeks pondering this while I worked on the choir dress hems. I will try out the side seam alteration on the bodice and see how it works out in a half-muslin.
 |
| left to right: plastic quilting 24" ruler, pattern, big fat mechanical pencil, tracing flimsy/architectural paper, heavy metal yardstick |
And so, armed with the tools of the trade, I begin
 |
| Wait a minute! |
 |
| No printing! Just holes! Lots of holes! |
This is my first nonprinted pattern. I've taken apart a lot of vintage, sewn a lot with repro patterns and Folkwear, named After A Fashion my ur-text of alterations (which is bread and butter here in ErnieK Labs), but this is the first time I've met one of these in the flesh.
I defer to Gertie to give you the low down on the matter.
This is the legend for the pattern. Each of the matching points is marked with a number. I will transfer those numbers to my traced pattern (and then ignore them like I always do). It would be swell if those numbers indicated the order of construction, but so far that idea is only mine.
I may not follow instructions until I've screwed up, but I need to understand what I'm seeing. Notches in the sides we know. Three big holes indicate the grainline. Two big holes indicate layout on a fold (later, I will miss that detail and have to fake it). Smaller dots are tailoring marks. The rest of the instructions are just like those of today.
One thing that stood out; a zipper is called a slide fastener. This reminds me to mention that later on, when I speak of a hook and loop closure, I am not referring to V3lcr0 but a hook and a loop made of metal that are sewn in individually. When did the zipper become a generic term? After 1948 apparently.
The pattern pieces were carefully unfolded, and ironed with a dry iron and laid out very carefully. As you know, folded cut patterns will tear on the notches, and these were no different.
Flat. Laid out for tracing.
"D" is the foldover tab on the front bodice.
 |
| Yes, it looks like cheese. Lunch break! |
 |
| More pieces; front sleeve and bodice front. Previous tracings are in the rolled part to the right. |
 |
| Using a ruler to make better straight lines. |
 |
| Adding a dart from punchmarks |
 |
| Begging the question: should this seam at the shoulder seam be straight or curved? I left it curved. I was right. |
There was some distortion of the pieces. They were a little mildewed, and had not been folded very nicely when they were last put away. They weren't missing any parts, but a few were curved when I knew they should be straight (the belt, for one), so when in doubt, I assumed the pieces were correct and I would find out more when I was assembling the muslin.
 |
| Adding grainline |
 |
| oops, backwards piece |
And now we put the original pattern away and begin to alter on the traced version.
 |
| how wide should waist section be, how long the skirt? |
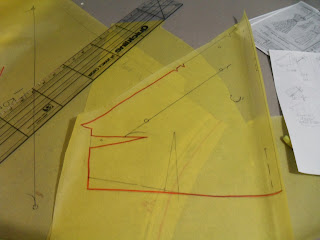
Instead of cutting down the skirt pattern, I drop the waist until I get the width I need. I am short, I won't need all that length, and I can just measure down from the top, mark a few times, and then draw a new waist line.
 |
| 28" baby |
You can just barely see the skirt piece underneath the bodice back above photo. I will get the two to match; that's why I start in pencil and use the red pen for the 'finished' lines.
 |
| This side dart on the front triangle piece will leave during construction |
Measure the pieces and measure me, and make alterations on the pattern, making sure the altered pieces fit together. Which means matching up the seams on pieces.
There are many ways of doing this that are probably better, but I just overlay the pieces and line them up to each other. If one piece curves one way and the other goes the other, I can measure them with a tape but I like to double check (because I know my failure points soooo well)
 |
| Walking the seam to match length. Literally. |
 |
| Match seam, plant thumbnail at last match point, swivel pattern to line up with next section, |
 |
| And continue moving it up the seam, adding seam marks when we get to them on the bottom pattern piece |
 |
| The red line is an adjustment |
The waist seam on the skirt is too wide, so I raise the seam allowance up to keep the skirt shape. I will forget this when I am cutting out the pattern on the fabric. An hour of seam ripping is the result of Not Paying Attention!
 |
| Expanding back neck facing. I will redo this later to drop it by about an inch. |
 |
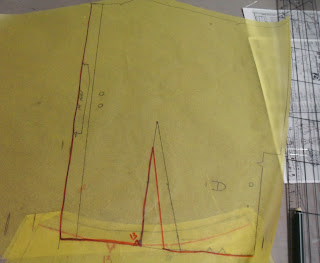
| The dart is about to go (added more on sides, will remove that and dart after fitting half bodice |
It is always a procedure and a half to do this. Amend one piece, then the next, around number five a logistical error occurs and the process gets walked back the other way. I only used pencil and a red pen on this set; other alterations have more colors on them. I haven't gone the rainbow yet, but usually by that point I've retraced some pieces so they make sense.
And yes, it really is better to work out the kinks on paper rather than with fabric, even at the muslin stage. I have and know and can operate an eraser.
I will test the bodice fit with a half-bodice muslin. And redraw. I will miss a few key problems, but I will prevail!


This is really great! My mom gave me an Advance pattern ages ago - I just took it out tonight to see if I want to tackle upsizing a vintage 14 to a modern 20.
ReplyDeleteThanks! Strangely, this is as far as this dress got. And confession time: I probably spend more time altering and tracing paper than fabric!
ReplyDelete